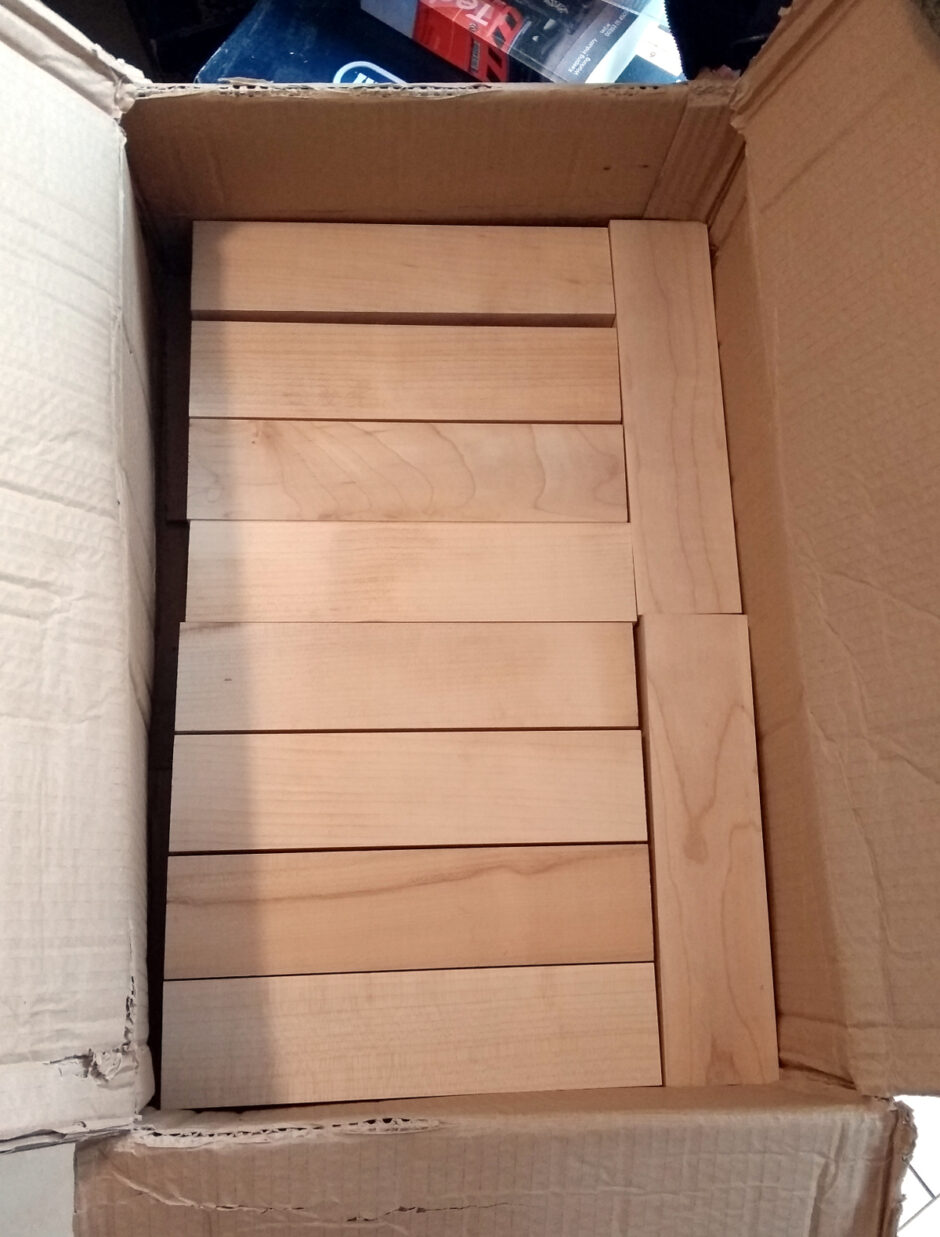
So along with the Gnomes, I wanted to do a batch job of something for solstice gifts from the lathe, and while I initially thought trees or baubles, it came down to snowmen in the end. So, first off, ordered a few sycamore spindle blanks from the Carpentry Store.
At that time, and at the moment, they’re one of the most economical (ie. I was being cheap) sources, but only for spindles. I mention this because we’re now two days from Brexit kicking in across the water in the UK, and already the costs of importing blanks from my normal source at HomeOfWood.co.uk has jumped (though not as much as it has for his continental customers). It’s a very small complaint compared to what’s coming, but the woodworking hobbists here in Ireland may be facing into having to find either local suppliers or continental ones, so costs may be rising right as we face into the damage done by the covid pandemic to our economies. So, y’know, yay. Kinda glad I stocked up over the last few months.
First order of business was to rough out the blanks.
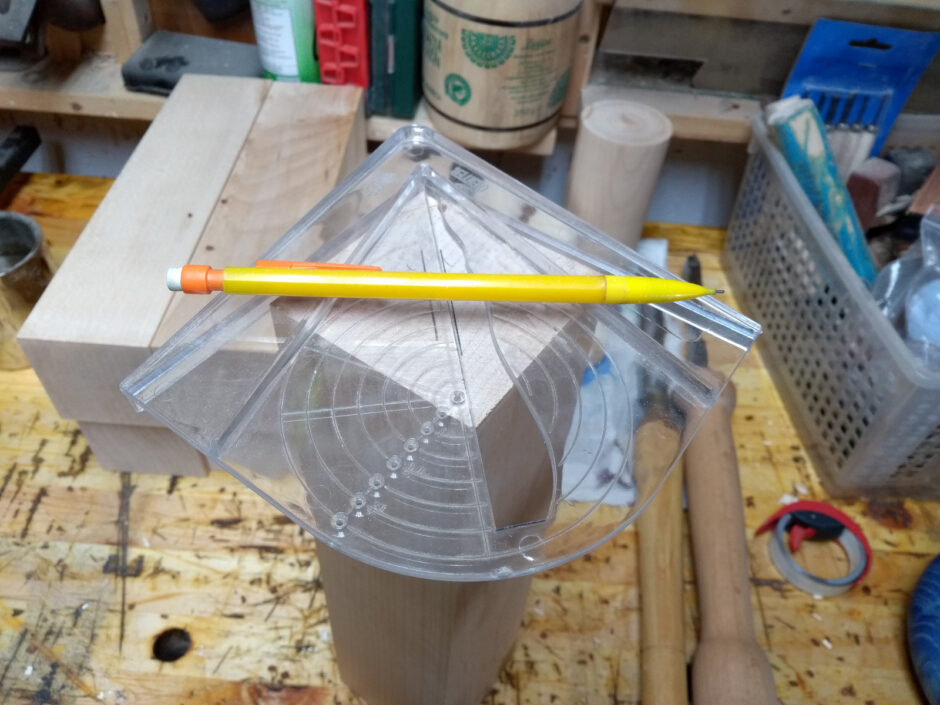
The normally really fast anglefinder off aliexpress wasn’t quite long enough to get to the center reliably on the 70x70mm blanks, so back to more traditional methods.
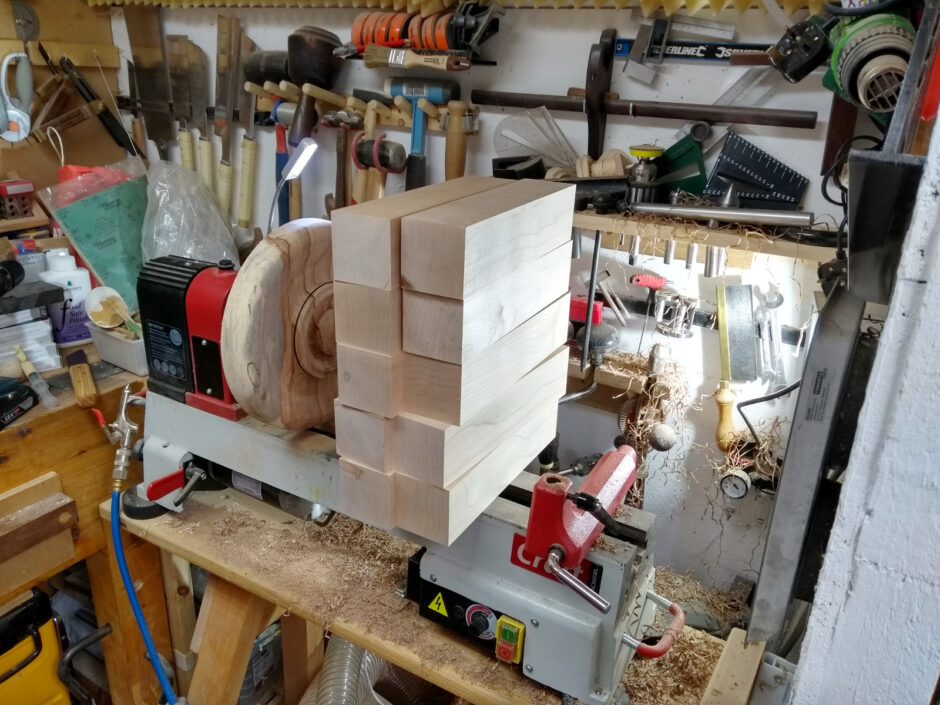
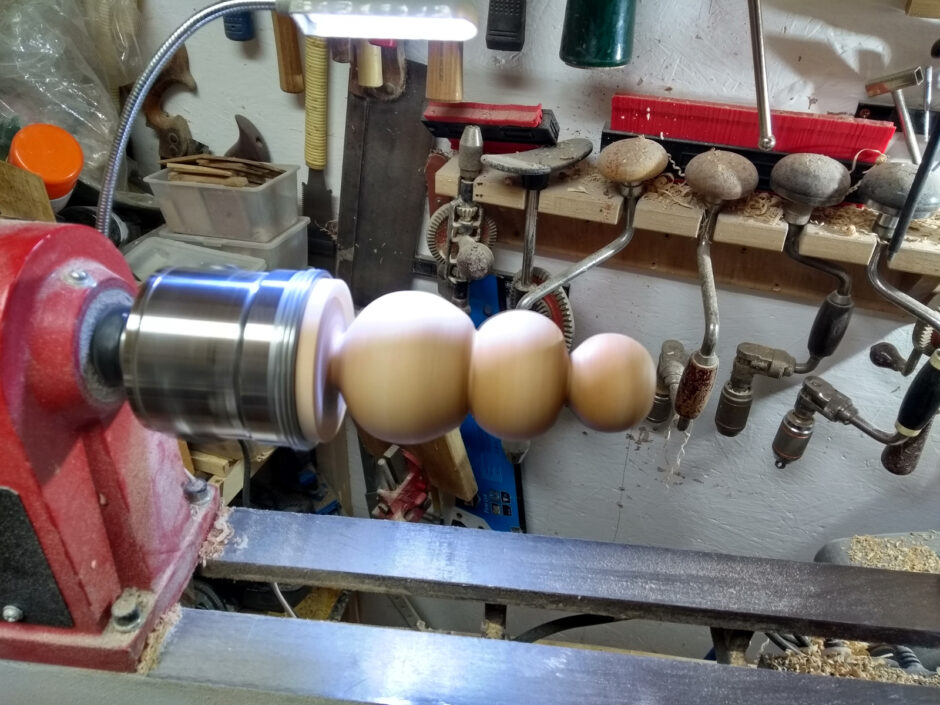
Then into the lathe and rough out to round. No neat tricks or features here, just the routine operation. Round with the roughing gouge, turn a tenon on both ends, measure to find the half-way point between shoulders and part it in half there.
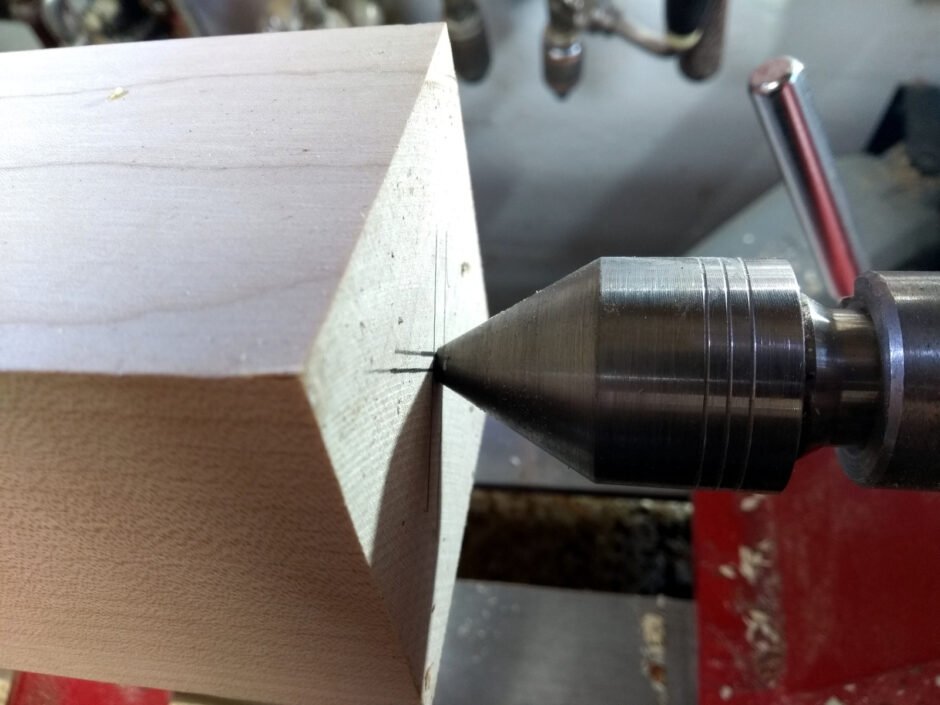
I really need to get a ring center, this cone live center is fine and all but it wedges something awful into endgrain like this. I did buy a ring drive center, but I don’t think you can use those in the tailstock without a fair amount of grease and smoke. F.Pain talks about using them in The Practical Woodturner but he’s also talking about lathes made from wood and a few other things that don’t really get done much today because (a) we have better alternatives and (b) the skills are mostly lost.
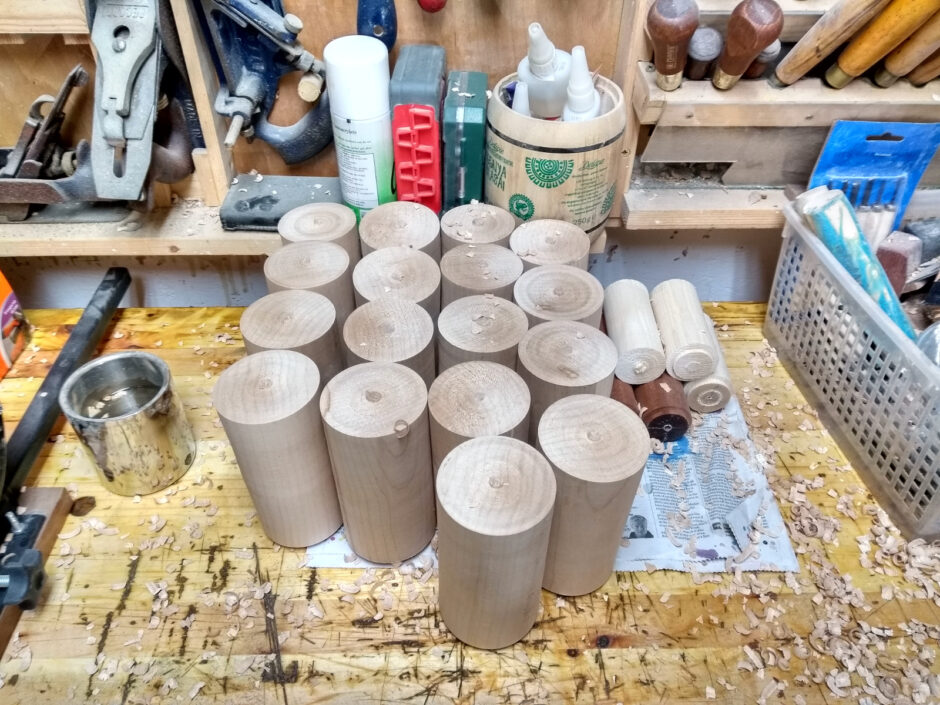
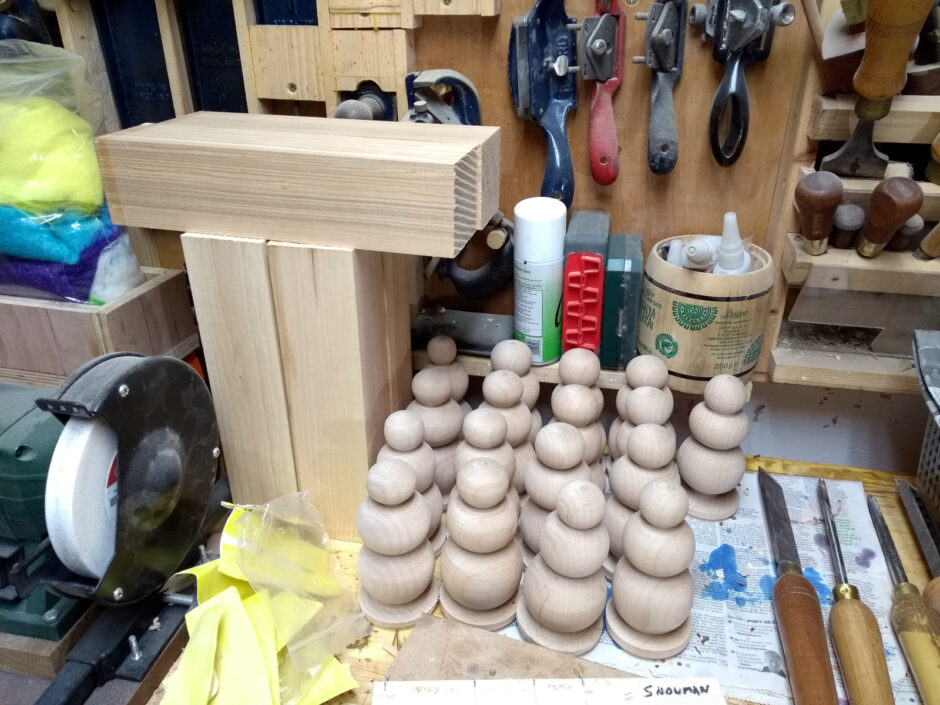
And that’s them all done (along with the blanks that became test gnomes and test trees and so on). Every spindle blank gave two snowmen blanks (and you’ll note there are some missing, they got turned into a test snowman and a wood witch for a friend who’s recovering from the nasty bug of the year).
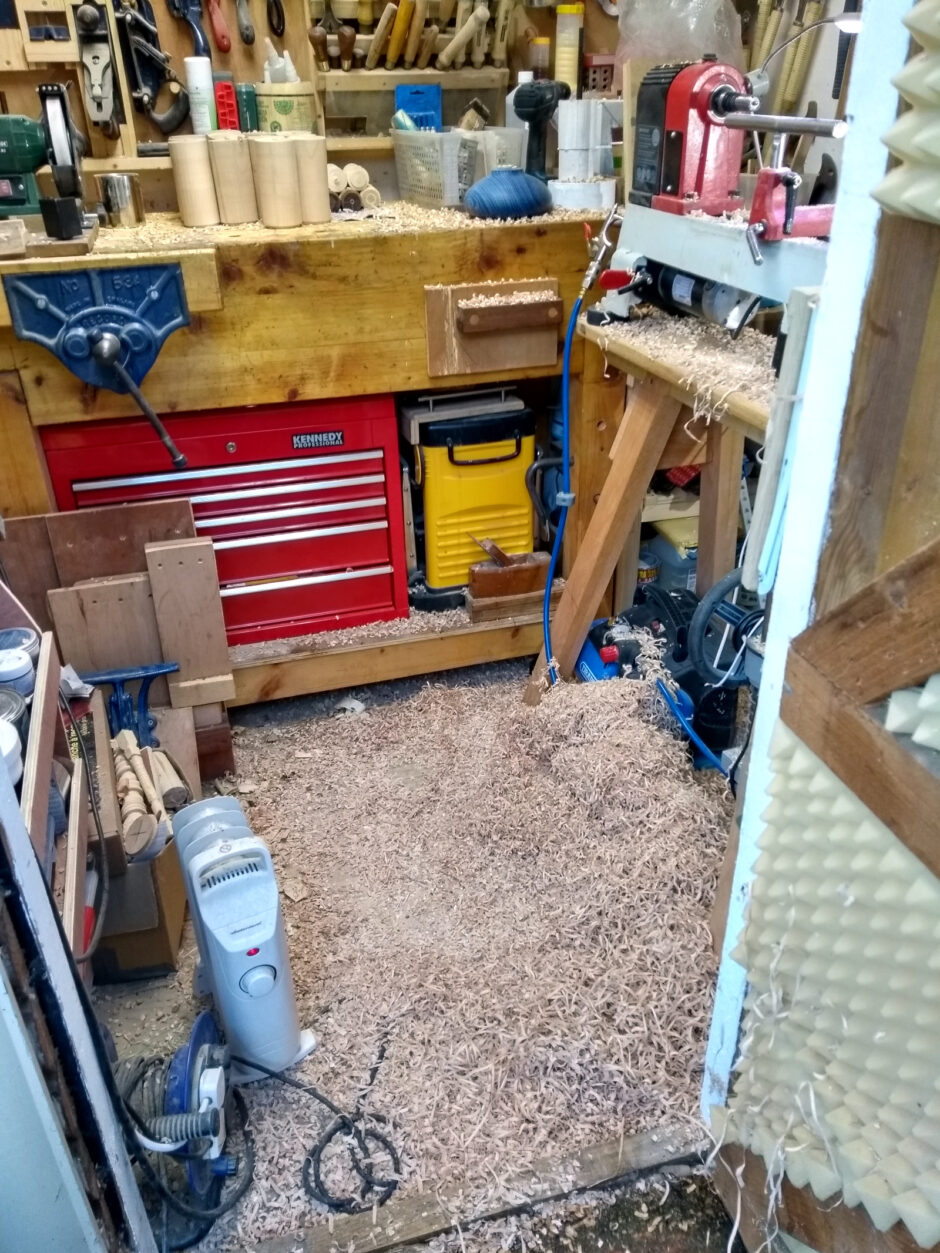
First thing to buy after you buy a lathe, is a large dustpan and brush.
Also, I think this is what killed my air compressor. It has since given up the ghost with a loud pop, a hiss as it dumped the full tank of air, and a strong stench of burning oil and rubber. Le sigh.
Next up, story stick. Because I don’t want to make that many snowmen and have them all horribly different and disfigured, that’s a Calvin and Hobbes routine.
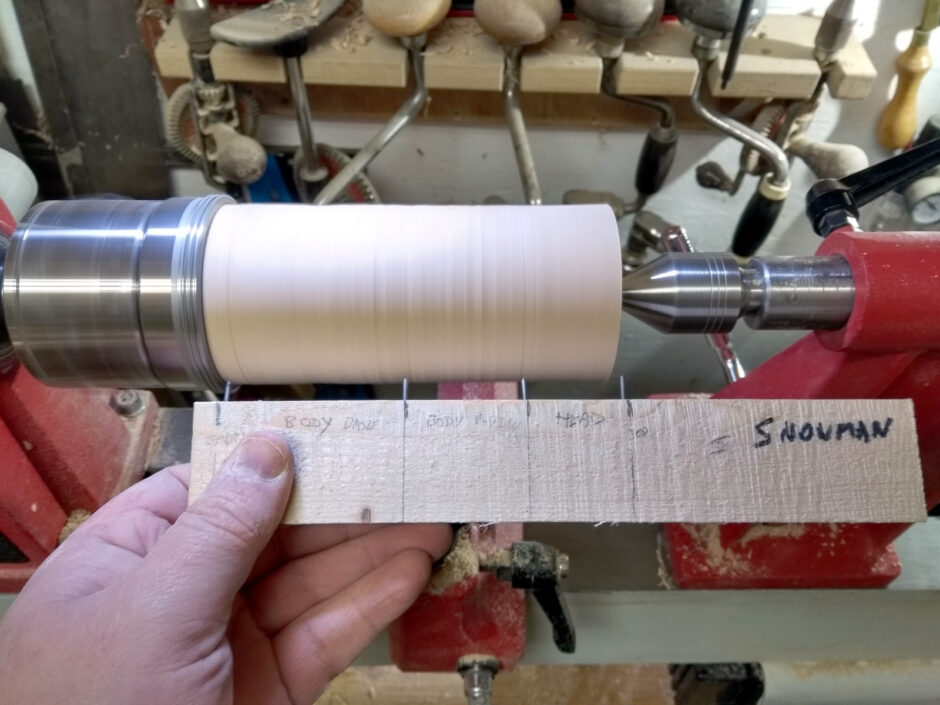
I used nails here, driven in at the lines and then filed the heads off with the grinder. That’s a standard approach and I think I’m going to completely ditch the entire thing as a bad idea from now on. Yes, you can mark lines with the nails readily enough, but the lathe does want to grab the whole thing out of your hands if you’re clumsy and storing this would be a PITA. I plan to copy this onto a piece of thick-ish plasticard with lines drawn on it and that’ll store in an envelope more readily. Much much easier for the small shed. And marking off every line with a pencil is just easier than with nails, and that’s what I did with the gnomes.
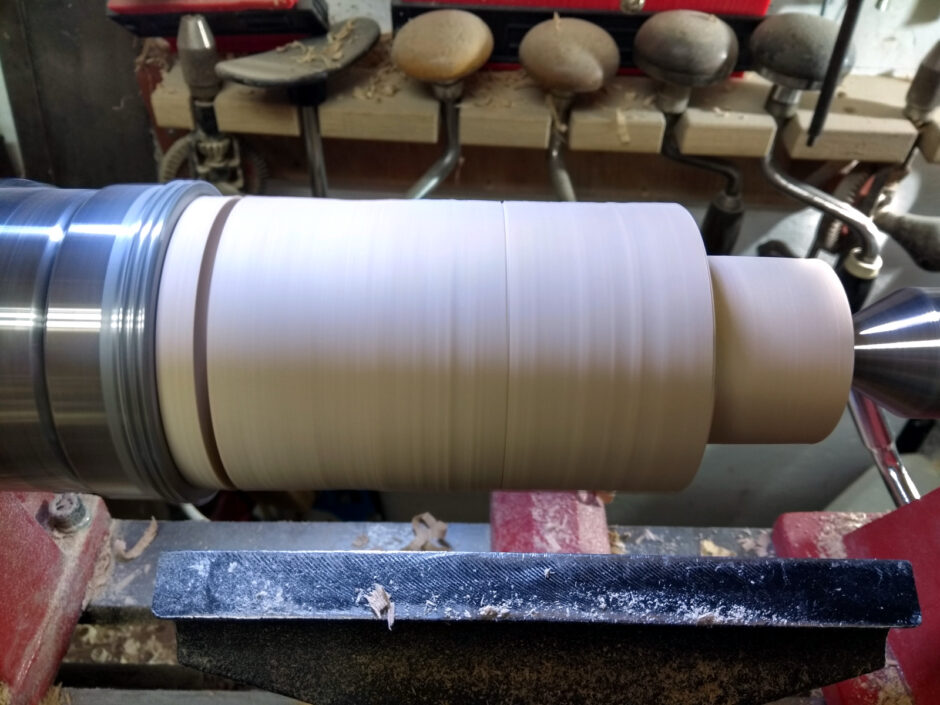
Okay, so that’s the cutoff at the base marked out with a skew cut, and the head has been taken to thickness with my shed-made parting/beading tool thing.
And that’s the middle snowball thicknessed (the thorax? Absnowmen? What body part categories does a snowman have?). And pencil lines marked in at midpoints by eye. And now came the humility lesson.
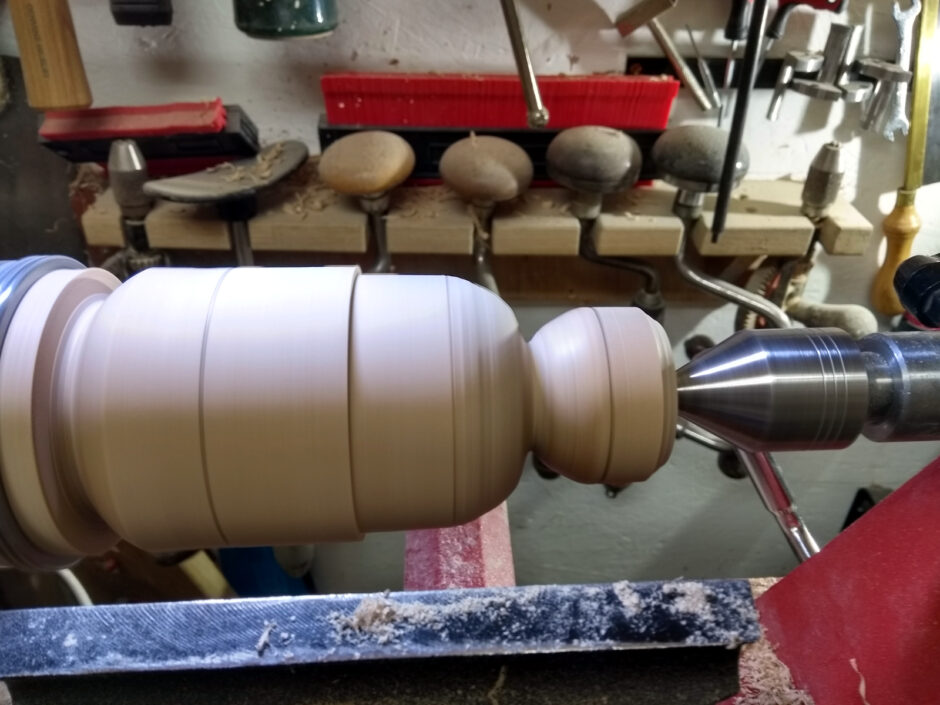
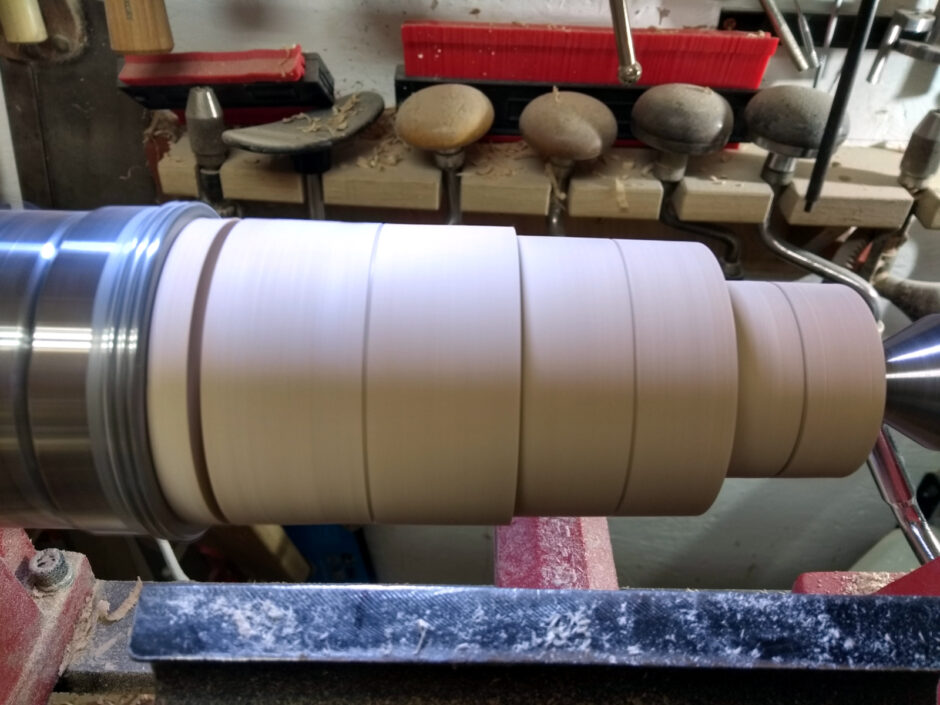
I tries this with the skew. Yeah. Nope. At this point (and I’m pretty sure, now too), my skew skills were not up to the task. I mean, this was a month of work ago, and we all know that time dilation is in full effect here in 2020 so this was many years ago now, but still. I eventually had to give up on the skew and do the rest of the blanks with the spindle gouge.
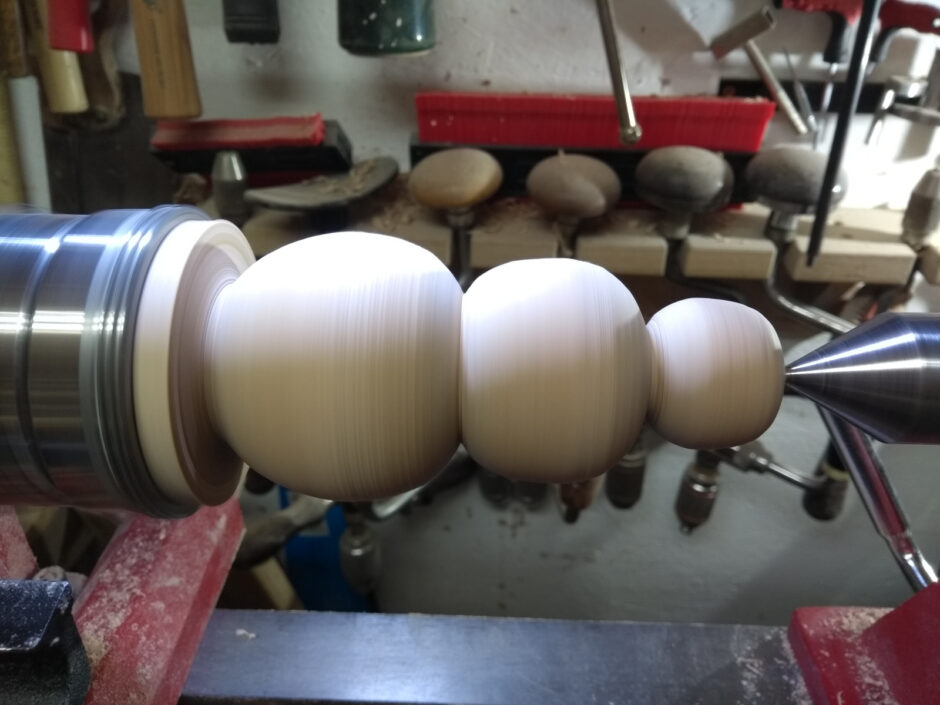
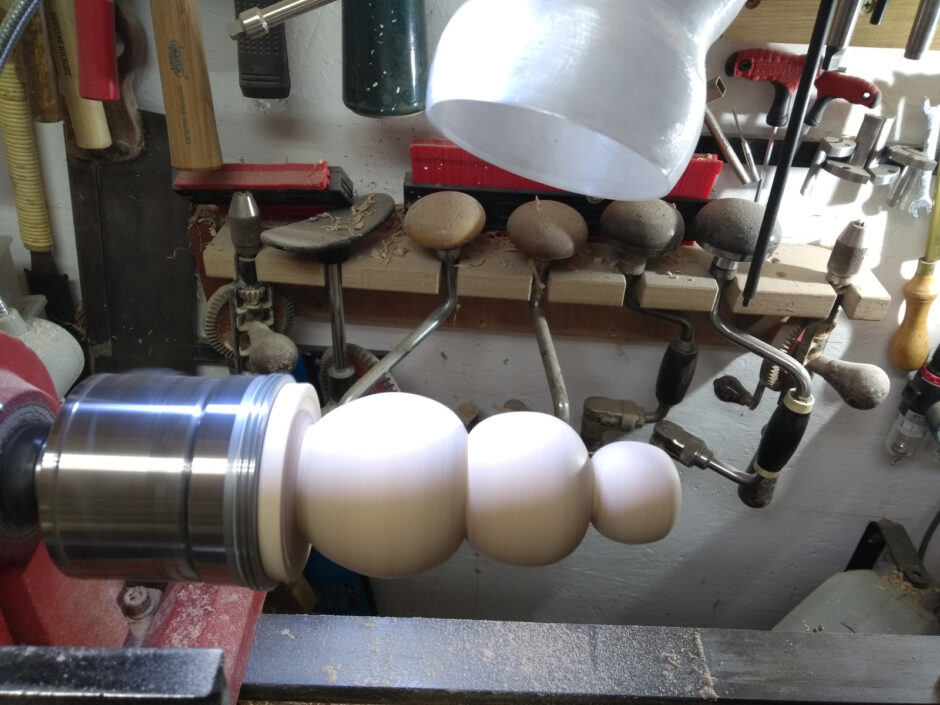
Also, I’m going with BB Turning’s advice here about not getting perfect spheres in a snowman. Yup. That’s exactly what I did. Totally deliberately.
And then on to my woodturning secret, buying 80 grit sandpaper in bulk.
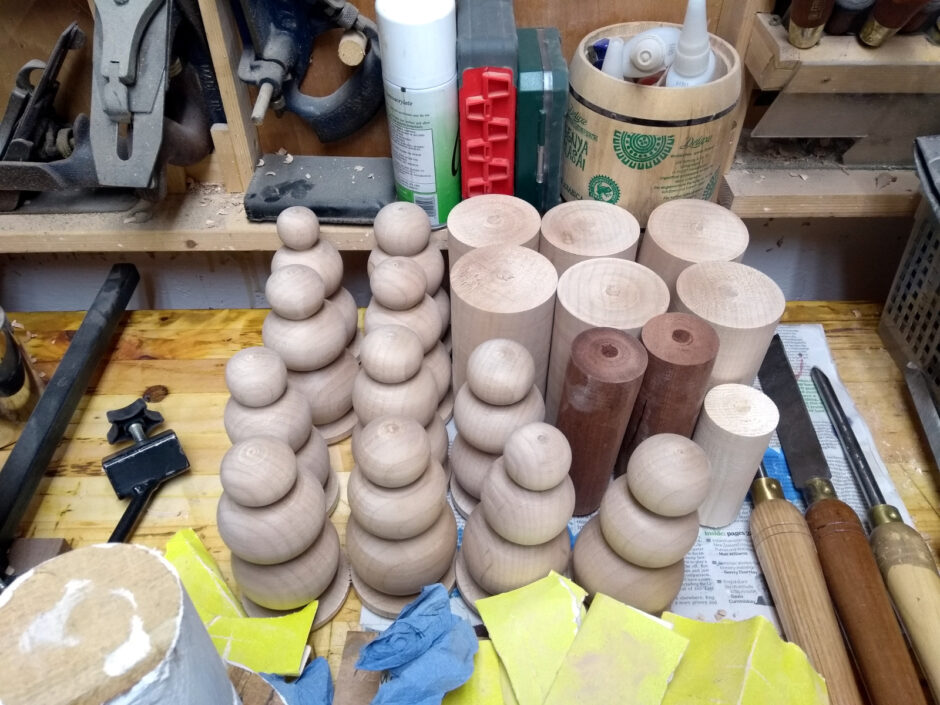
And from 80 grit up to 220 grit and then everything was set aside for finishing (the idea being to batch things, so you do each step and repeat, not follow through on every piece like normal).
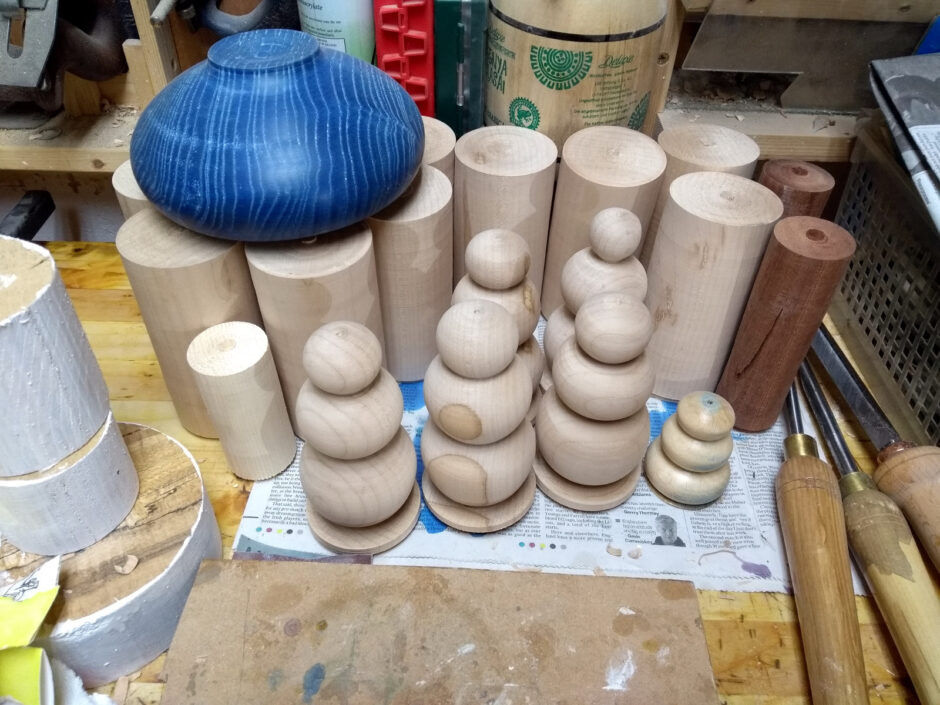
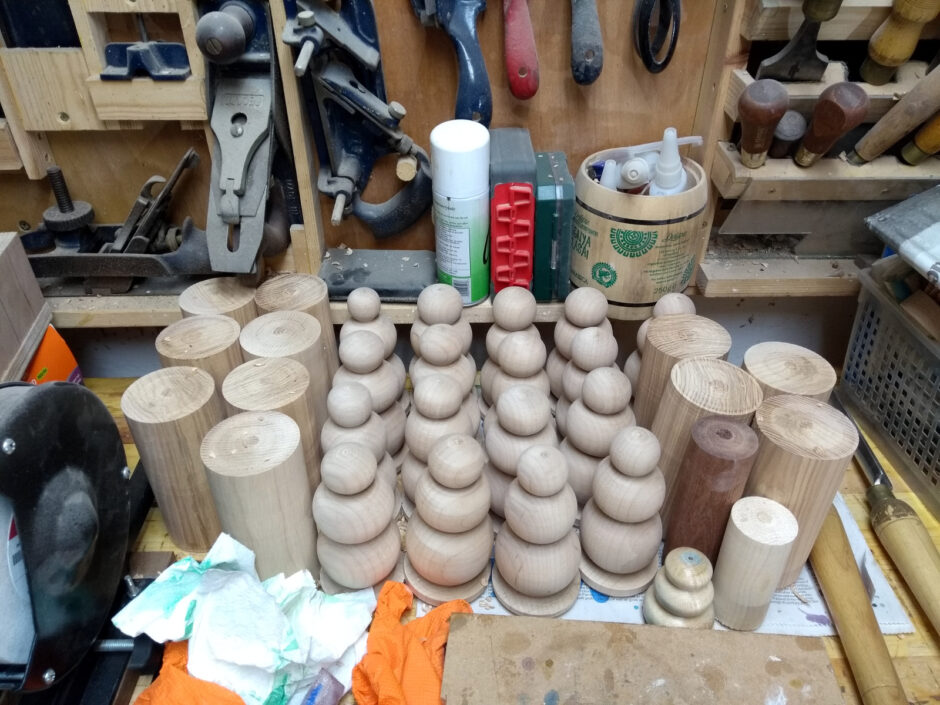
That’s as close to a montage as I’m getting (also those other new blanks in the last one there were for trees and there are still a few out in the shed today, mocking my working speed).
At this point, various large work projects as well as the gnomes ate all the shed time and it took a while to get to the next stage. But eventually, the snowmen got back on the lathe for sanding sealer, sanding to 360 and then yorkshire grit and hampshire sheen wax (because it’s toy safe).
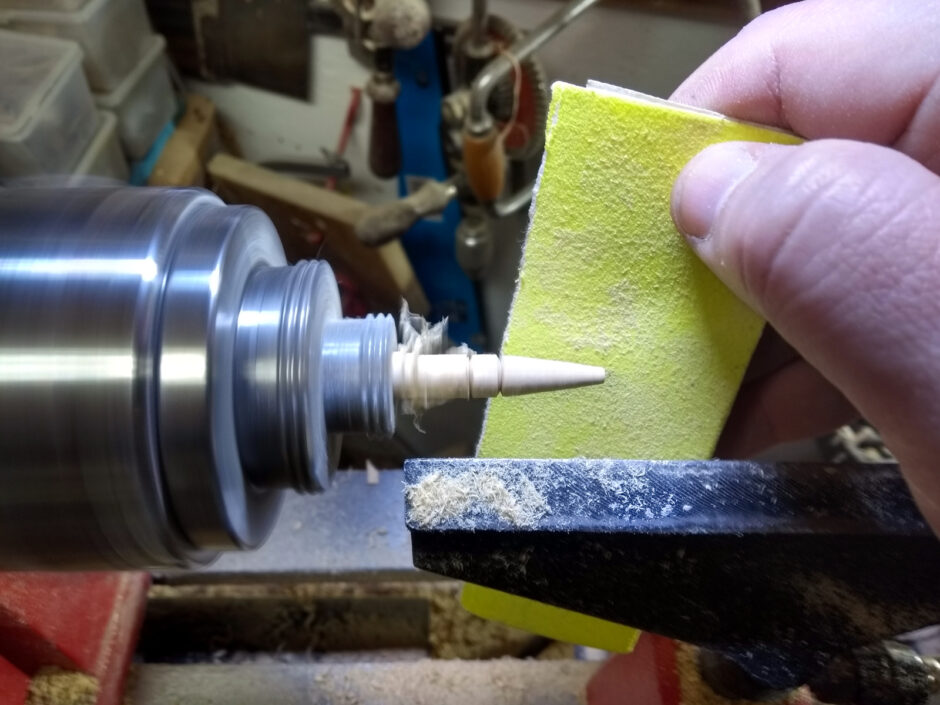
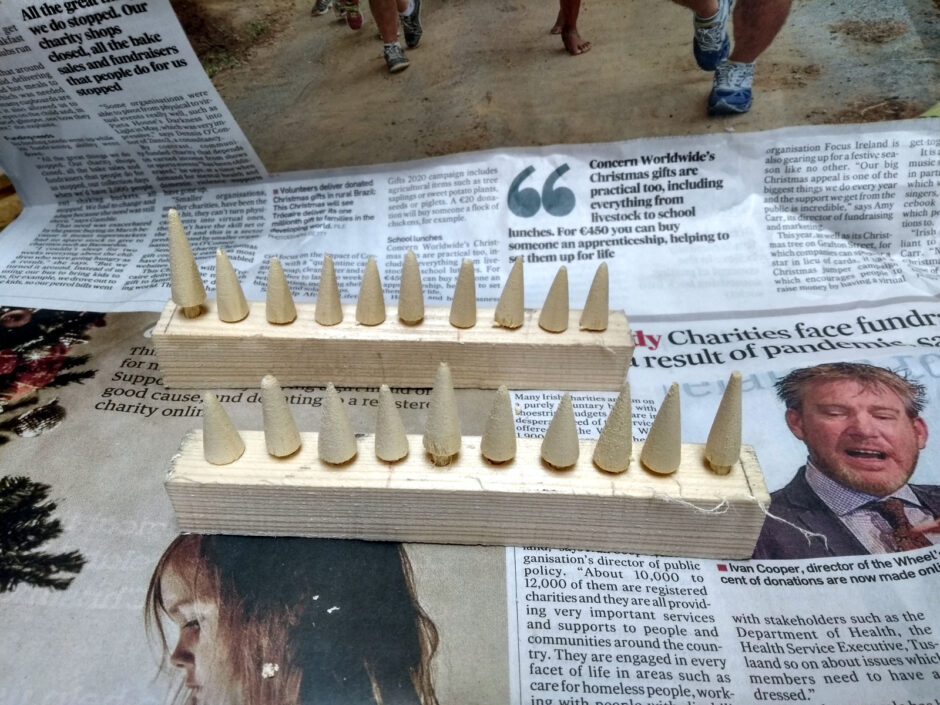
Then drilling for a nose was done by hand with a 3.5mm drill bit. And that meant it was time to crank out some noses….
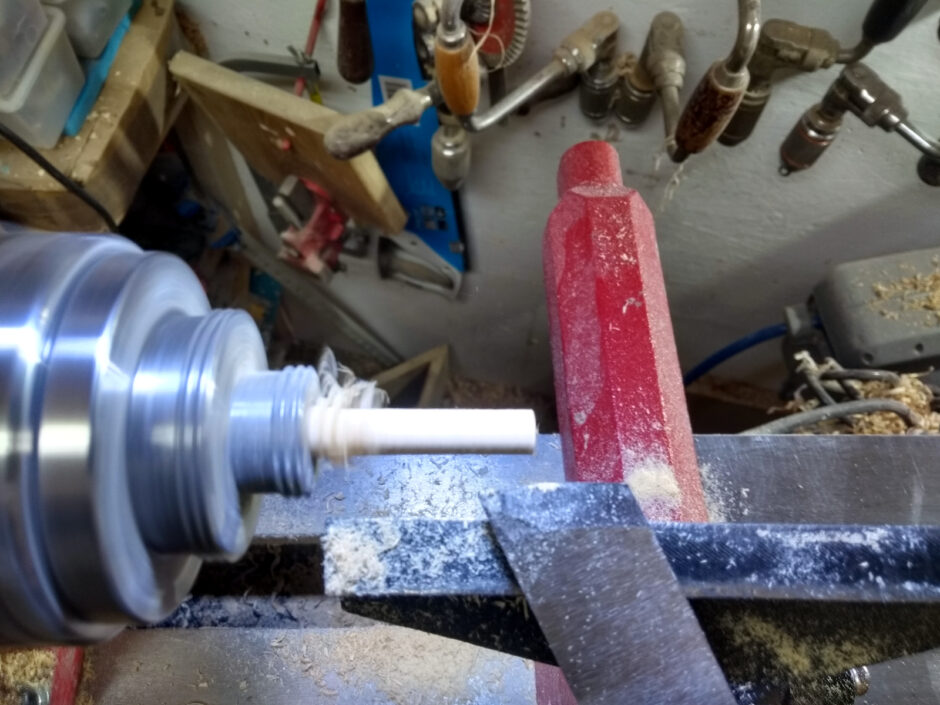
Step jaws (which are really meant for expansion mode inside bowls but they do grip down to a small diameter internally and are more stable than my pen jaws), and a dowel length bought some years ago in Woodies of all places. It’s probably poplar, at least it’s not pine.
And yes, I did redeem myself doing all of this with the skew. And after the first few noses, I actually got the rythym of it, and okay, Steve Jones’ job is safe, but at least I wasn’t quite so dismayed by the results this time.
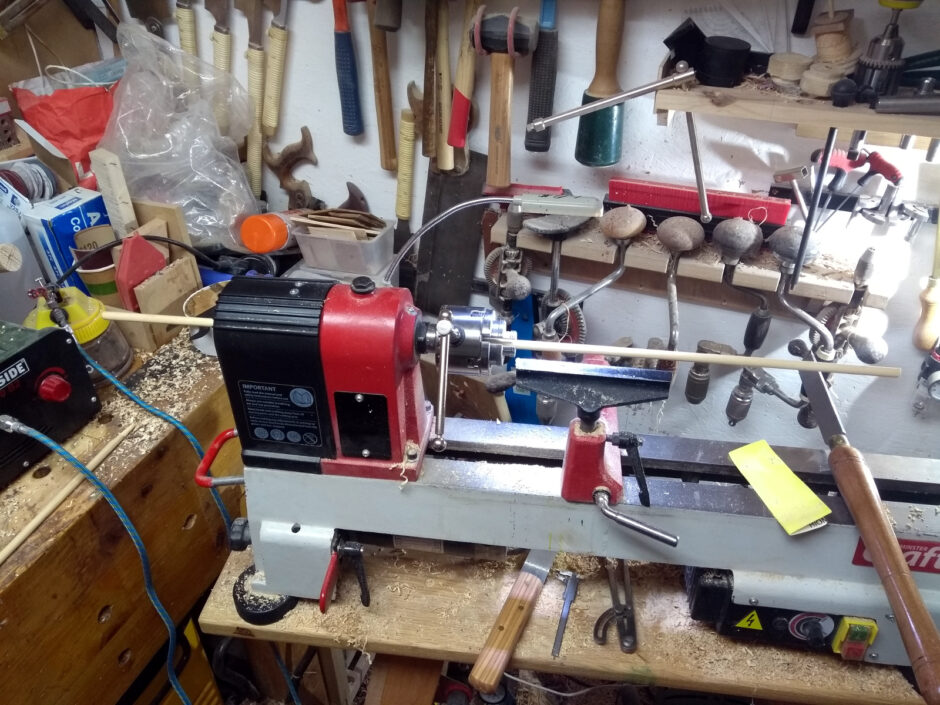
And yeah, that dowel goes right through the headstock spindle and you just pull out the 70 or 80mm you need to work on at a time.
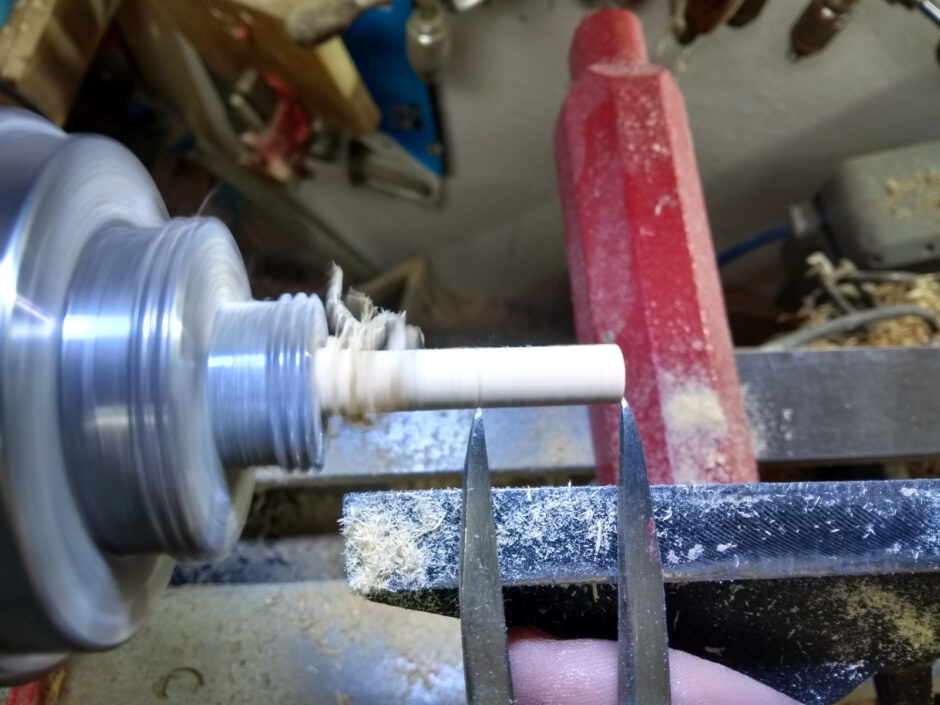
Mark off the nose length with dividers…
Deepen the mark for the base of the nose with the point of the skew and another mark for where the tenon will end (judged by eye, about 5mm).
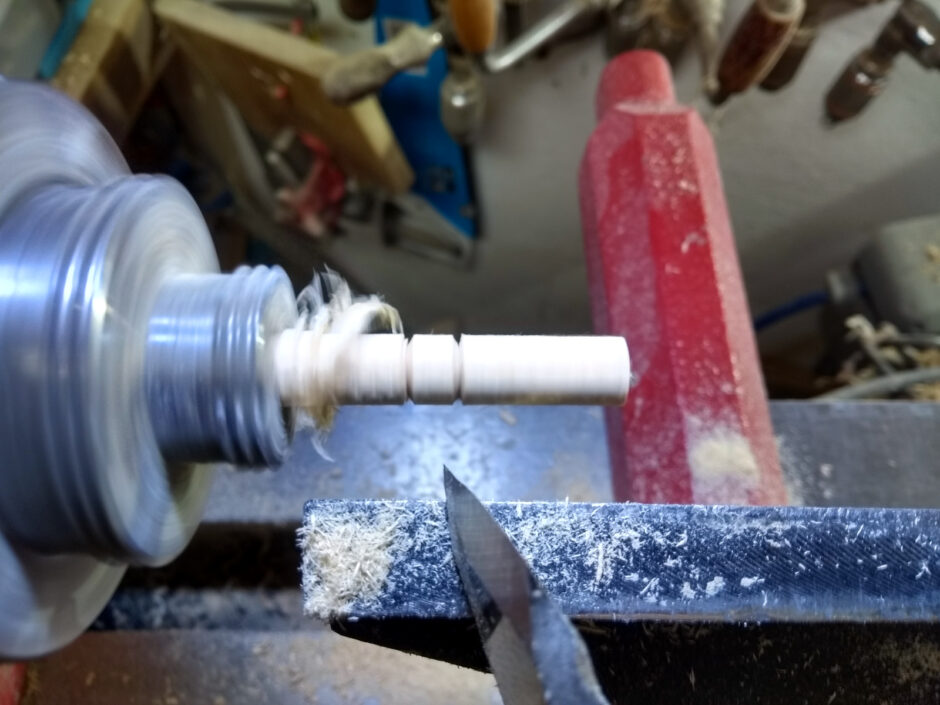
Shape with the skew – no, not scraping, but cutting, like a real turner 😀
Don’t look too close at that bevel btw. I’m going to sort out my sharpening jig, honest.
Sand to 120 grit at this stage, and on the other side of the work so I don’t have to move the rest.
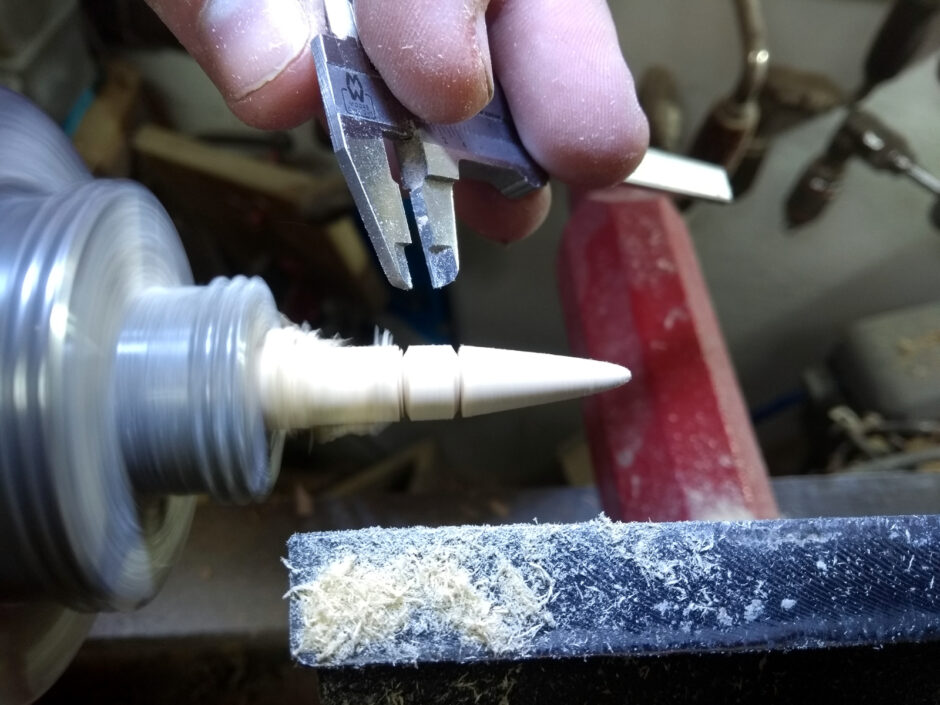
That there is a tiny dinky Moore&Wright vernier calipers that only goes to 70mm but is so damn handy to have to hand in the shed. Not giving up my 300mm one but this one is remarkably handy for stuff.
Also, that trick where you cut down to dimension with the caliper itself? Managed that a few times, kinda. Mostly it was just parting tool and guesswork but I got it once or twice.
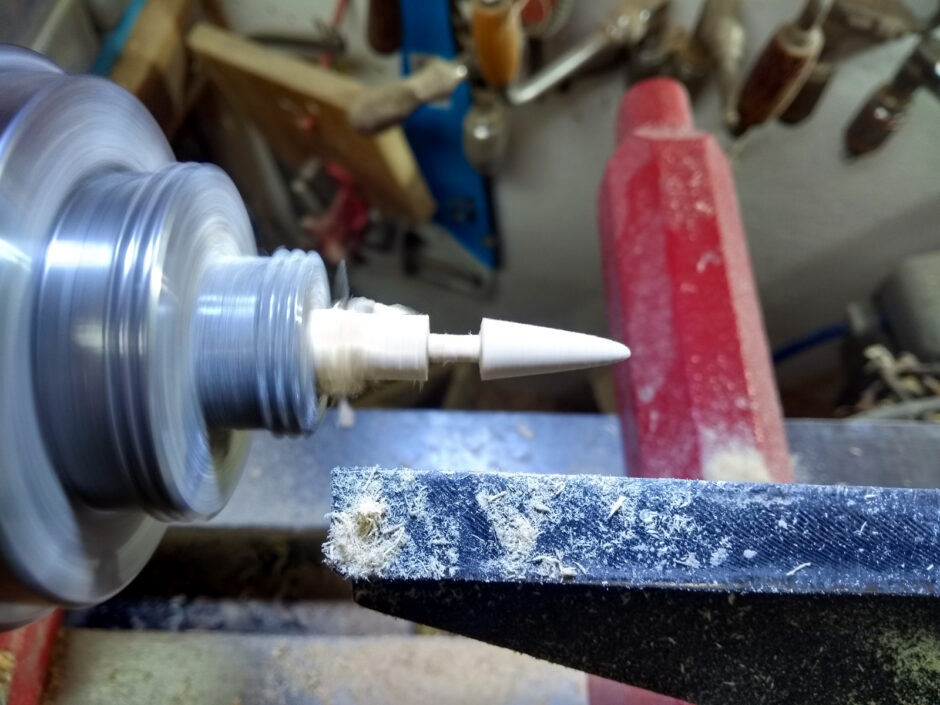
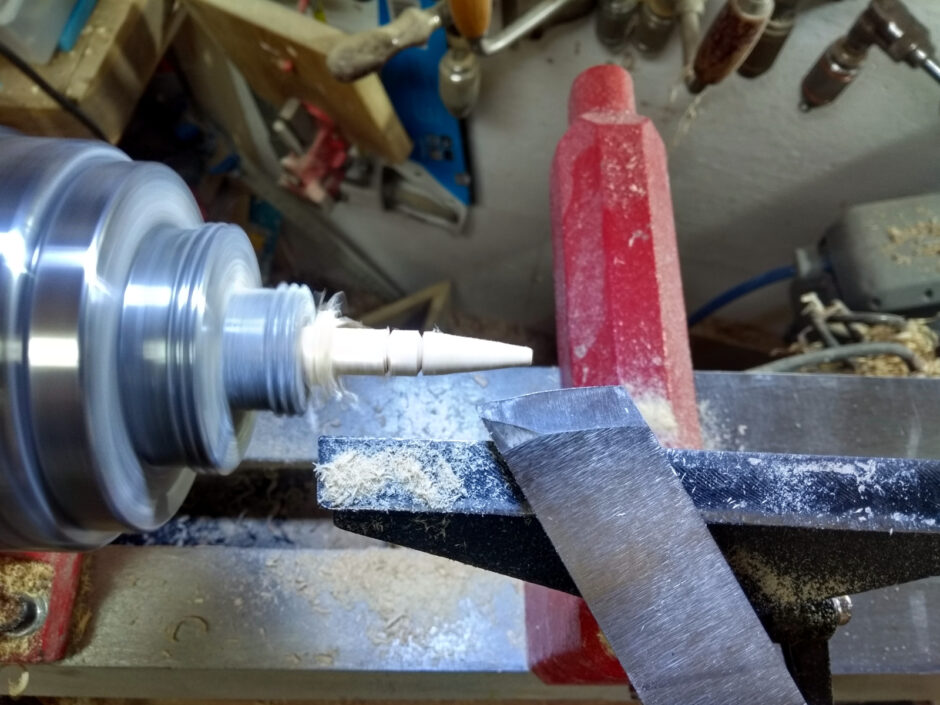
And then part off at the headstock side of that tenon, using the skew to get as much tenon as possible.
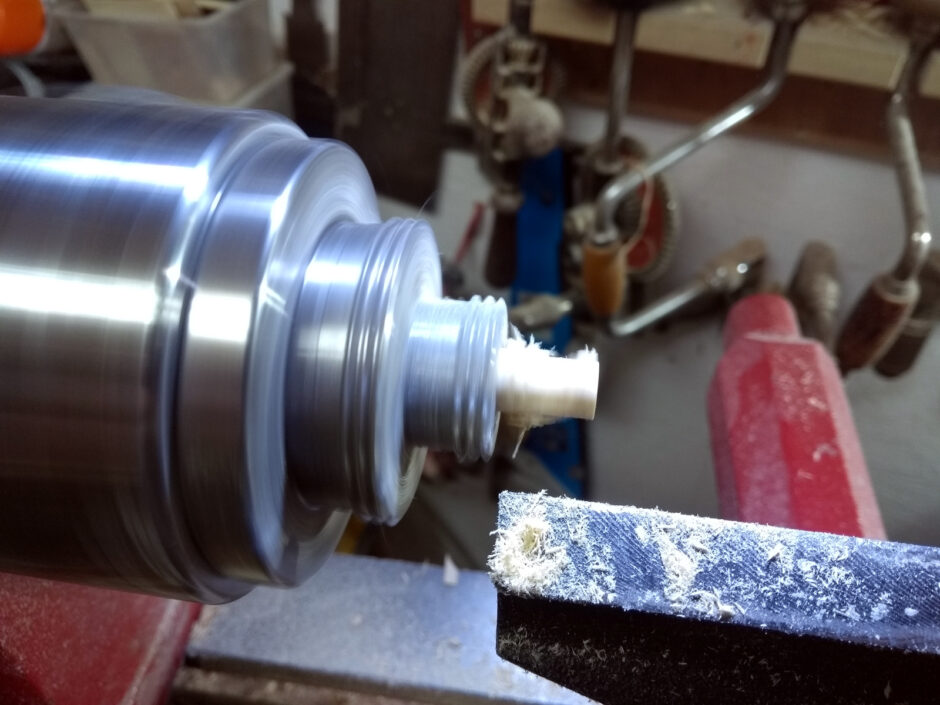
Now pull through the next 80mm (stop the fecking lathe first you daft eejit) and repeat 20 times because you miscounted how many you needed.
Honestly though, I was really happy with those.
Drill a bunch of holes in some scraps and get out the airbrush and….
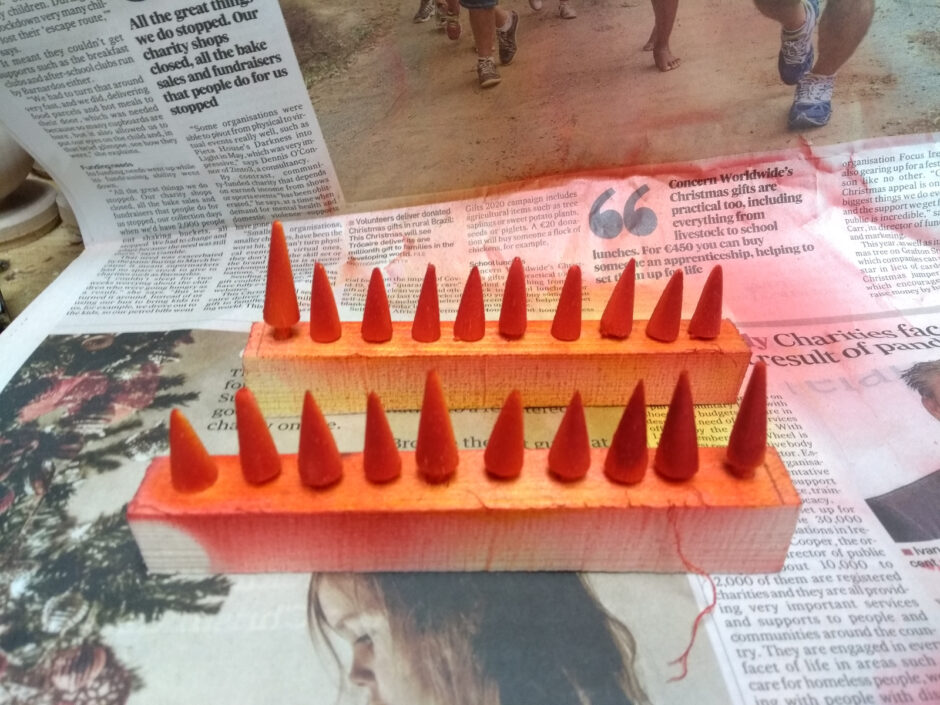
Two-tone carrot noses 😀
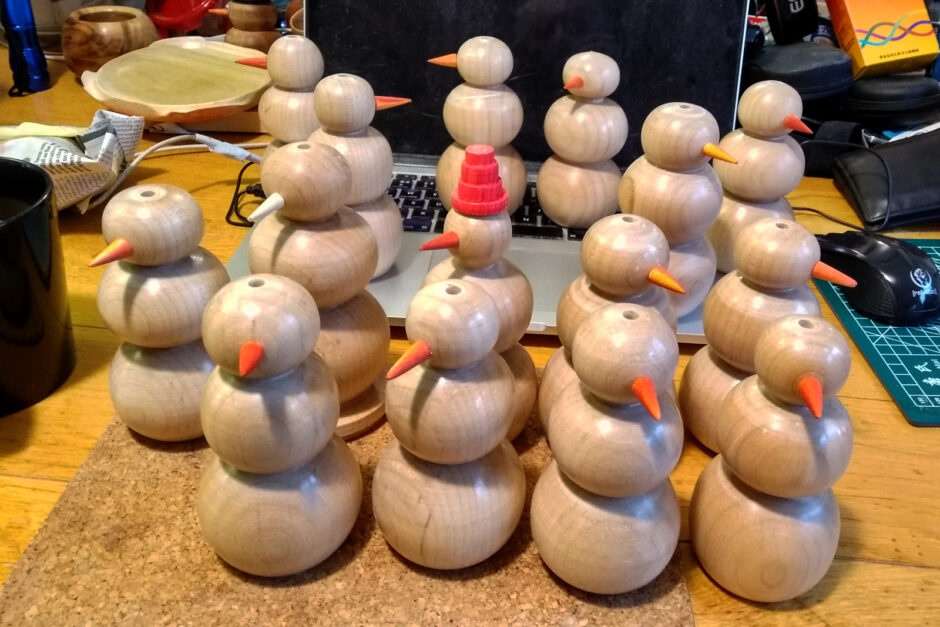
Oh, and also drill a 6mm hole in the top of every snowman’s head for hats, which you can turn in a few different styles (but you’ll have to explain the daft punk headgear to everyone apparently).
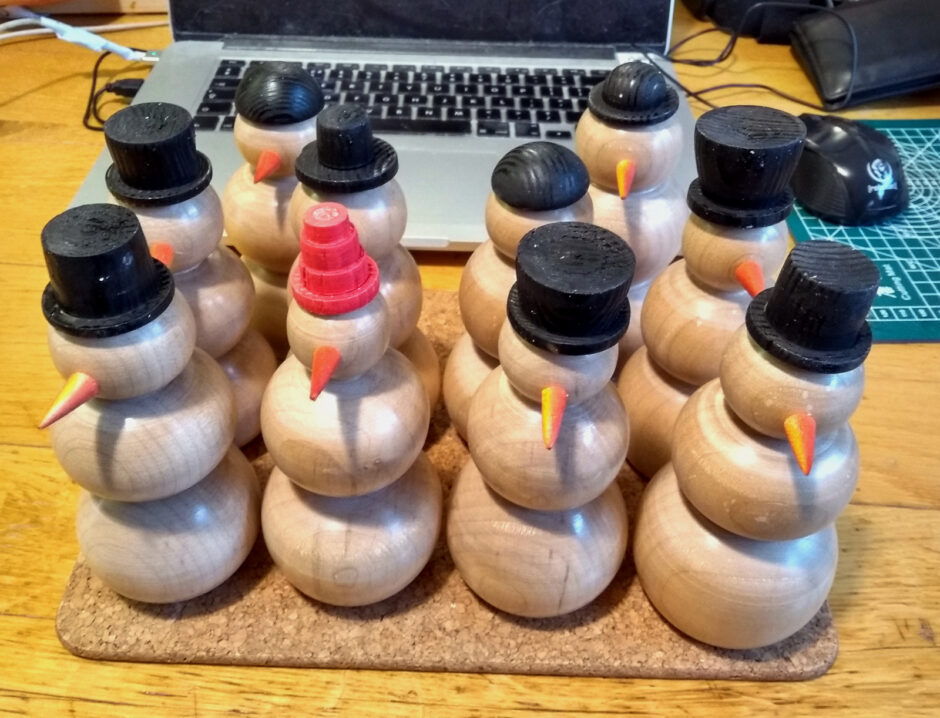
Chestnut ebonising lacquer for the hats works well I found.
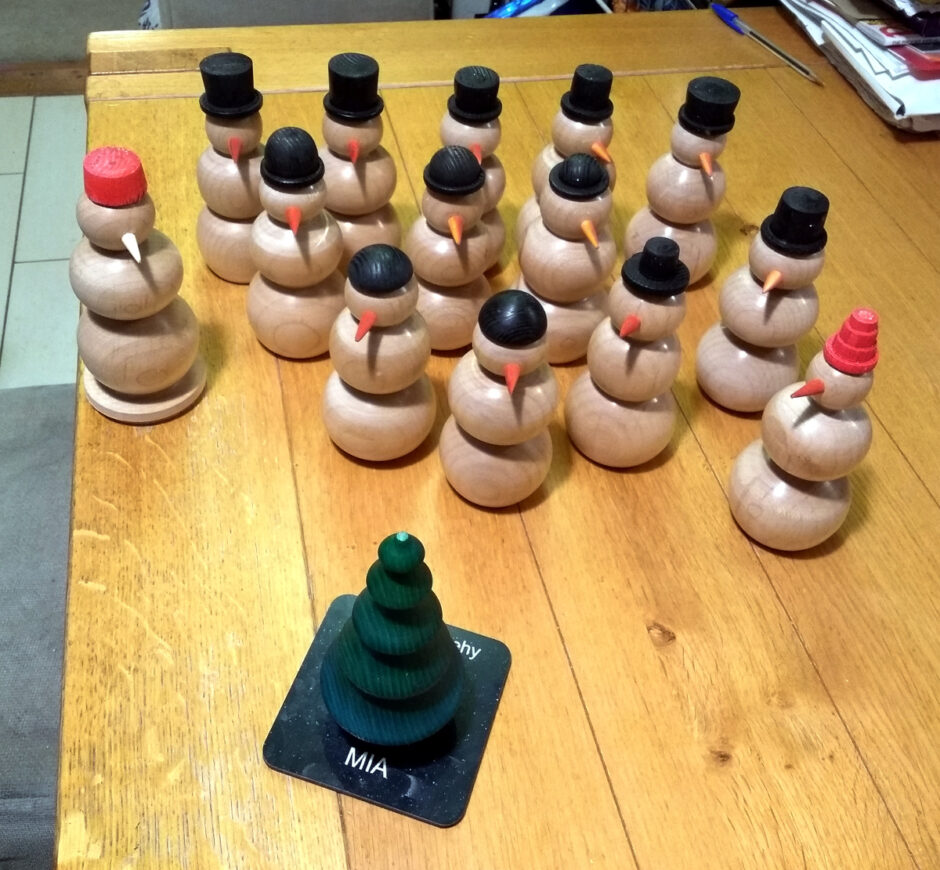
And now you just have to post them off mid-lockdown. Well, most of them. The one in the Fez is staying with us, and one or two others might as well. We’ll see.
Honestly, I only did 18 of them (including the prototype). I don’t know how BB Turning gets through hundreds every year without going loopy or absolutely mastering the skew.
Overall, I’m happy with them. They came out pretty well, and honestly adding the eyes and arms and things doesn’t give them a lot more. I mean, I did make a few with eyes, but I wonder how long those eyes will remain CA’d in place…

Also, I did finally ask Steve Jones about the kit he’s using (yes, I know it’s not the tool, but still) and as a result…
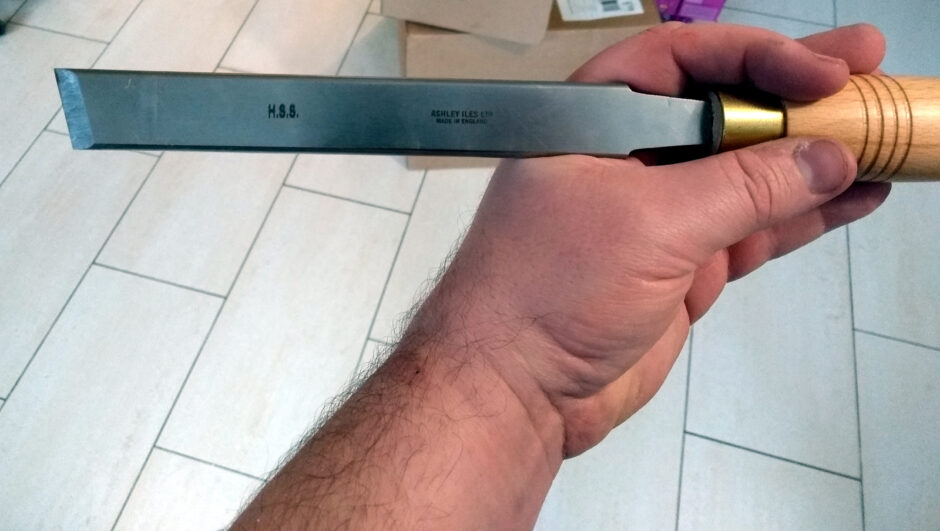
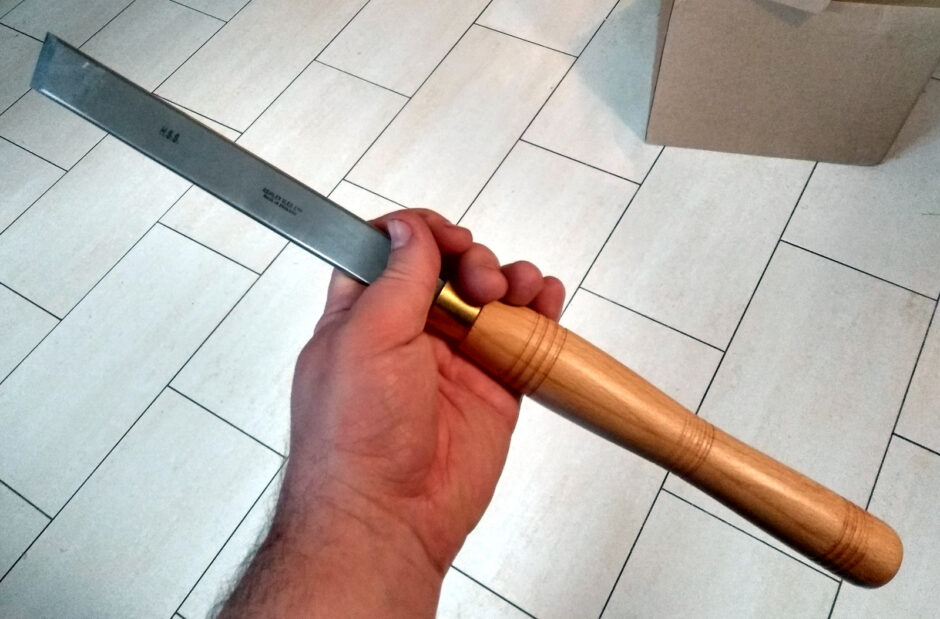
Ashley Iles 1″ flat skew. Not that spendy, about forty euro, but it’s such a more solid tool in the hand. Looking forward to trying it once I sort out the sharpening jig. It’s flat on the faces and round on the edges, so when I get a catch and the work slams it into the rest, it won’t dig out as sharp a gouge as mine does right now.
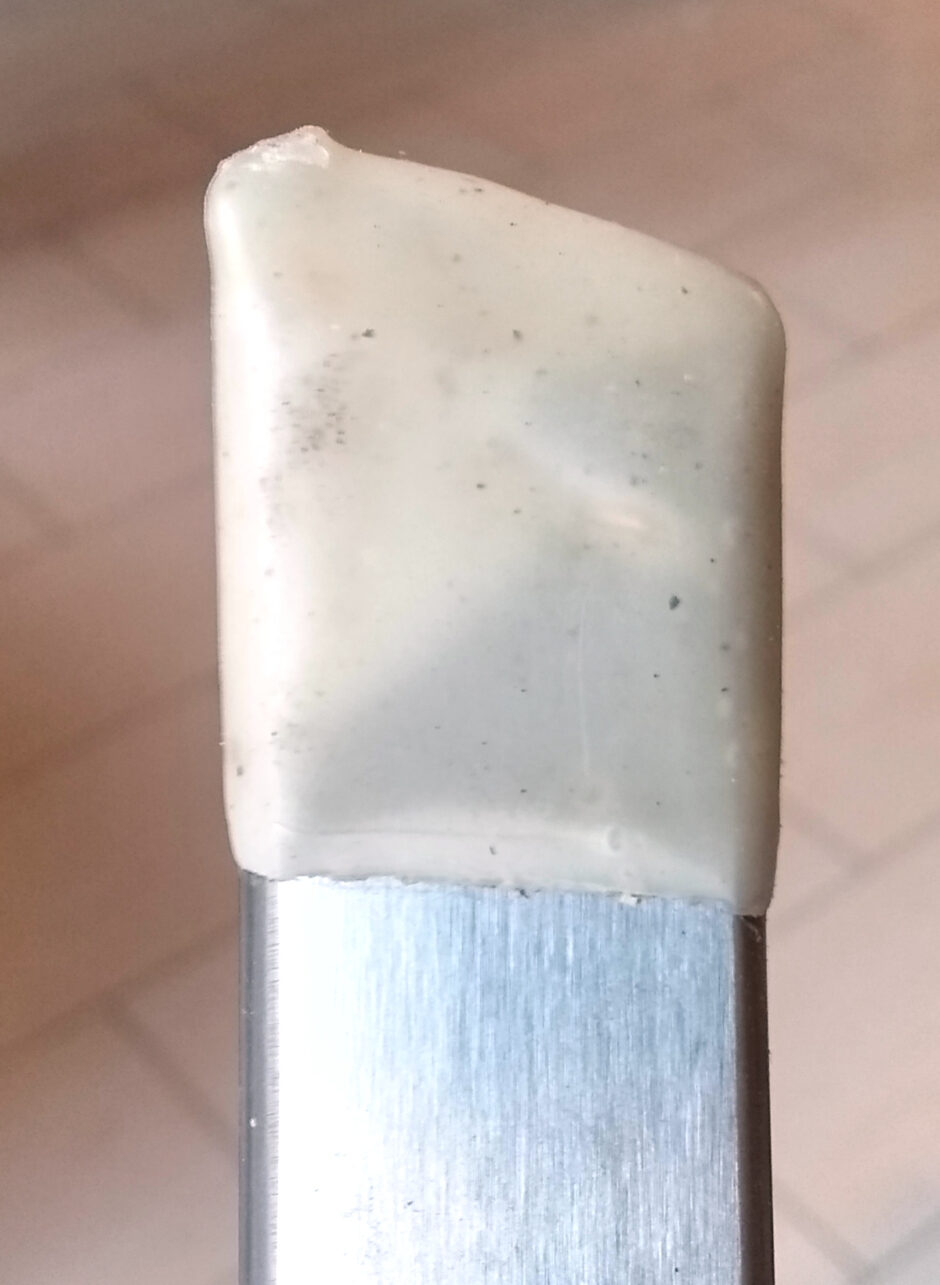
Tip came dipped in wax to prevent slicing yourself when unpacking it. It’s the small stuff like that that makes the difference with good tools like this – the tang is a bit longer, the fit and finish is that bit better and when you put that all together, it’s just an entirely different class of tool even though there’s no one thing I can point to and say “this is why”.
Really looking forward to using this. And still have some more spindle blanks…
Tags: skew, snowmen, spindle turning, sycamore, xmas


Mark,
On this side of the pond even without Brexit wood has go through the roof. Folks I know have stopped building their new house because of wood prices. I think they are making a mistake because I do not believe the price will go down much when all this is over, but I guess it could.
Love the snowmen but like you making a bunch would drive me to barking at the moon. Ashley Iles makes really good tools at a very fair price. I’m not sure how they do it but I’m glad they do.
ken
I have not mastered the skew because to be honest I don’t like it and using a half inch spindle gouge with my “different” grind is so quick and I am so used to it I don’t see the point in changing at this stage. Nice work on the snowmen by the way, keep it up
To be honest Shay, the stuff you’re doing doesn’t seem to suffer from a lack of skew work, it’s pretty enough as it stands!
I’m finding that the biggest problem I have with the skew is that I cannot step past a line that’s at right angles to the ways and about two inches behind the headstock because that’s the edge of my workbench; so my skew runs into my built-in waist-mounted tool steady and comes off a right angle to the work and then catches and it’s off to the races and the work gets textured.
So easy fix, I just need a bigger shed or a diet… 😀
Mark if you have a spare spindle gouge try putting a bowl gouge grind on it, ie give it wings. Try that and see if it helps. It’s what I use.
Shay