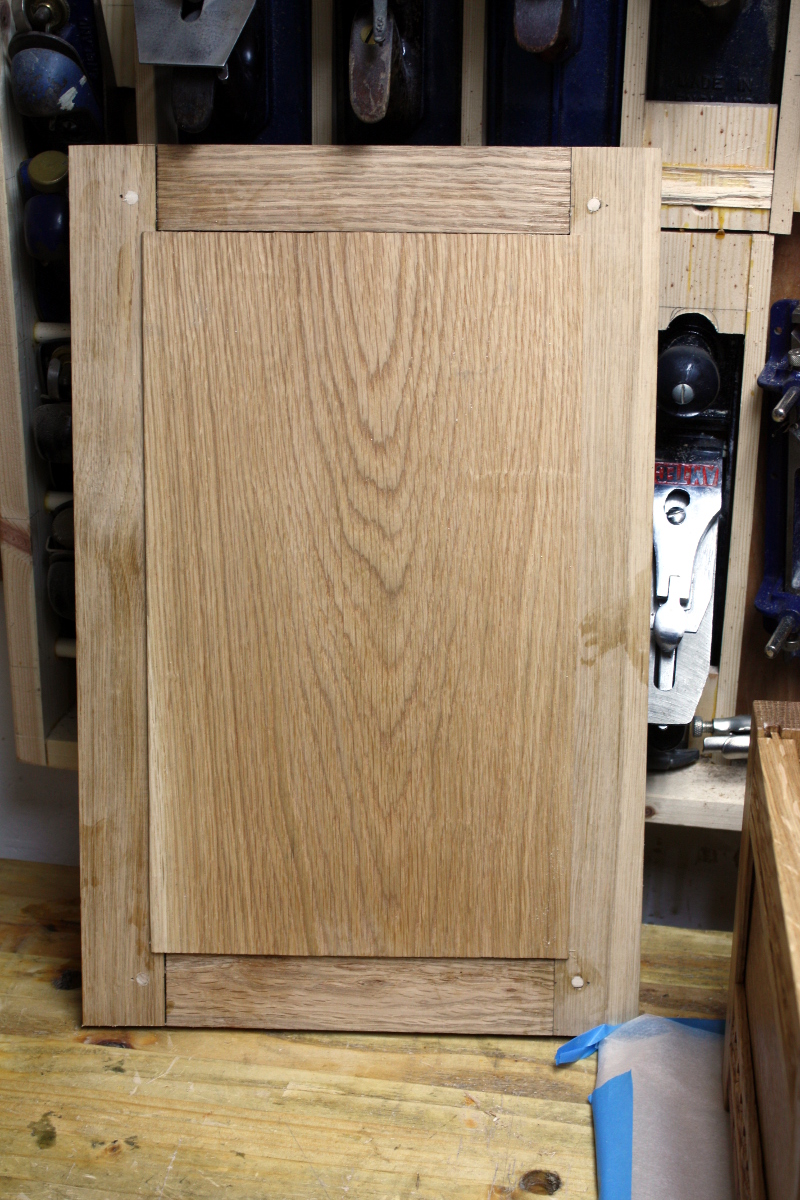
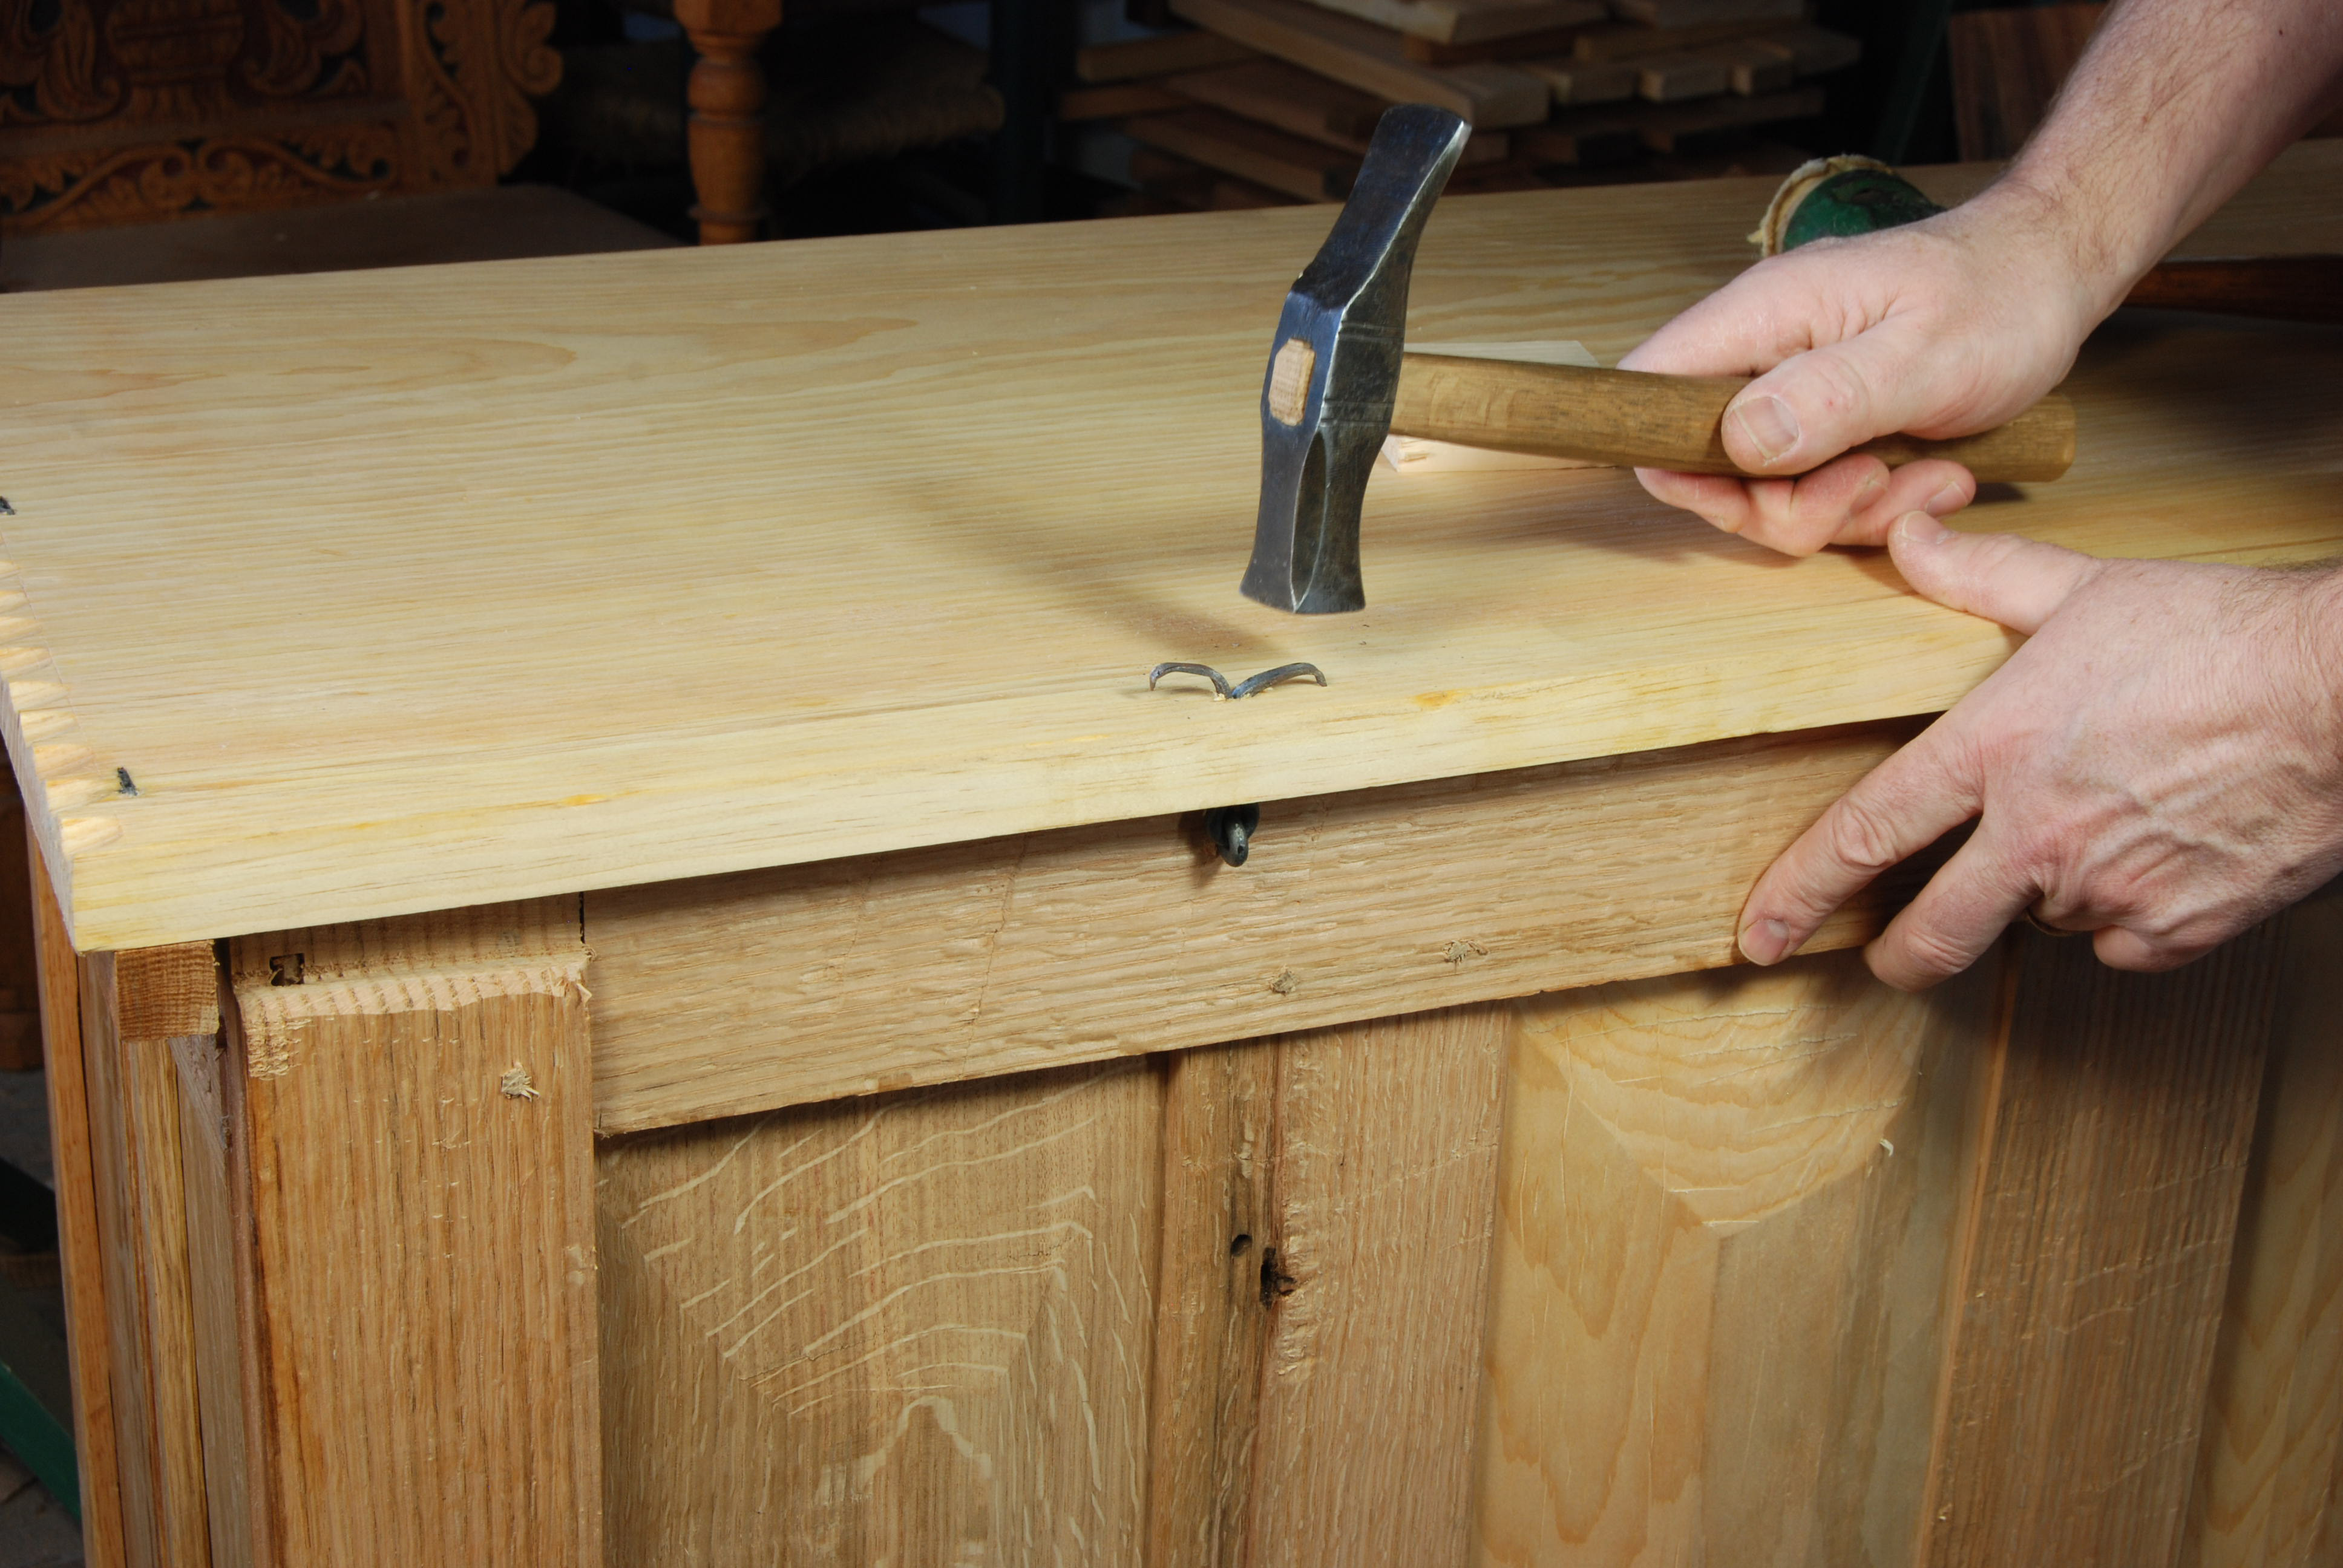
Last stretch now. Start off by cleaning up from the glue-up last night. Trim the pegs with a flush-cut saw and run a chisel over the surface until it passes the fingerprint test. Use the plastic razor blades to get any glue squeeze-out I missed last night.

Those things are remarkably useful for this by the way, particularly in hard-to-get-at spots.

Gets right in there, doesn’t mar the surface at all.
Then saw off the horns so I can see what I’m working with.
Right. Test fit that on top of the chest and centralise it, make sure I have enough room for dust seals on either side plus the width of the dust seal again, and then mark off that point as being the final width of the lid. And then, very careful sawing. I got lucky and didn’t hit any of the mortices or crack anything from the stress of sawing (clamping cauls helped enormously here). Then I paused before putting away the chest again to decide on the hinges.
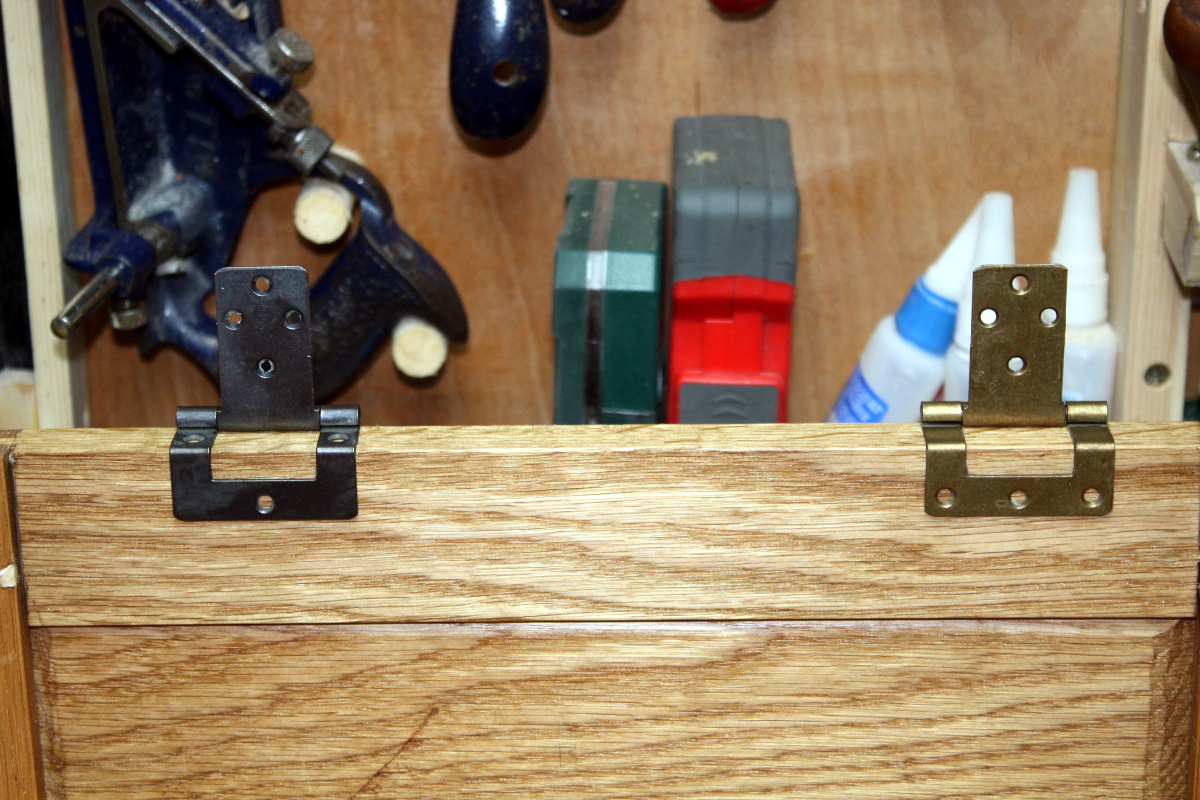
I went with the black in the end. I’m not sure why, but it just seemed to match the wood more.
Then on to the lid again, and shaping the front (where it’ll be grabbed most often) to be comfortable to hold.
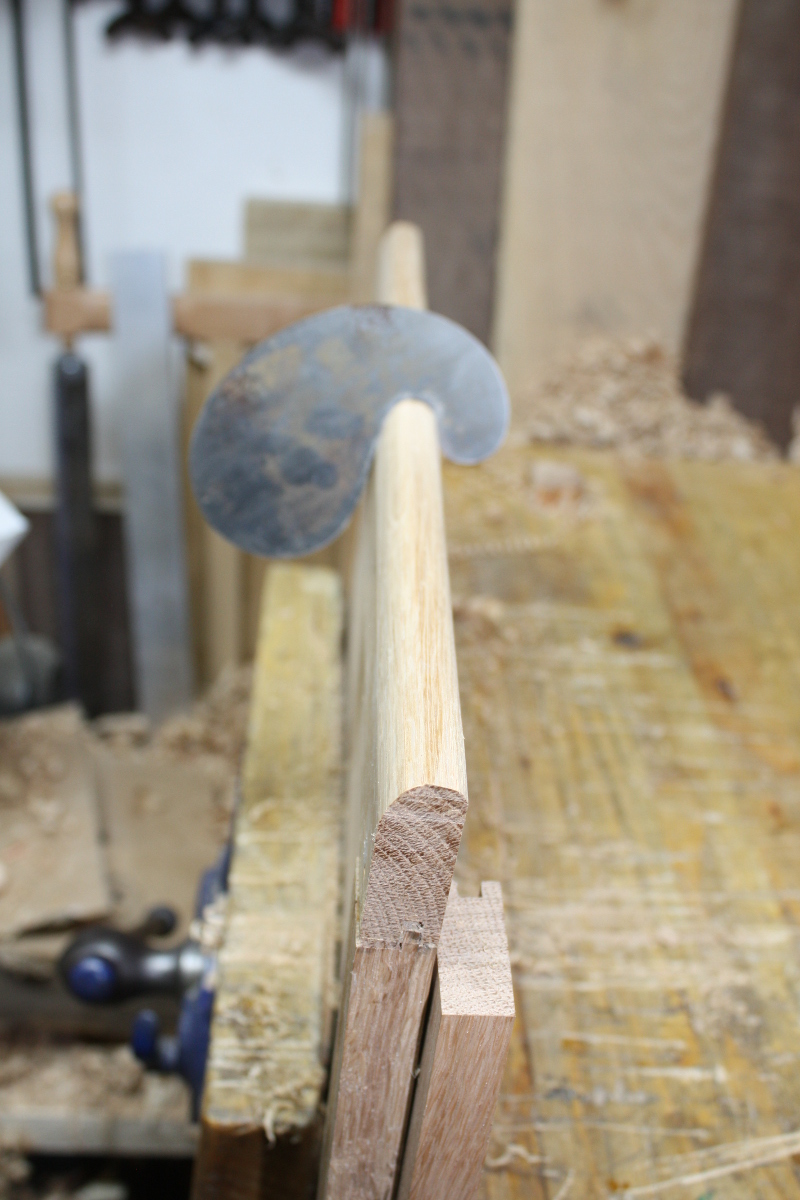
First time that gooseneck has come in useful for me, but it more than earned its keep tonight. I broke all the other arisses as well, and then I sawed one of my pieces of material for the dust seals in half to give me some dust seal blanks, planed them to be matching – or close to it – and shaped a curve at the front.
When I was happy they looked okay and matched, I drilled for two screws, countersunk, painted the mating surface with hide glue and screwed them into place on the lid. Then I turned to the last job, fitting the hinges.
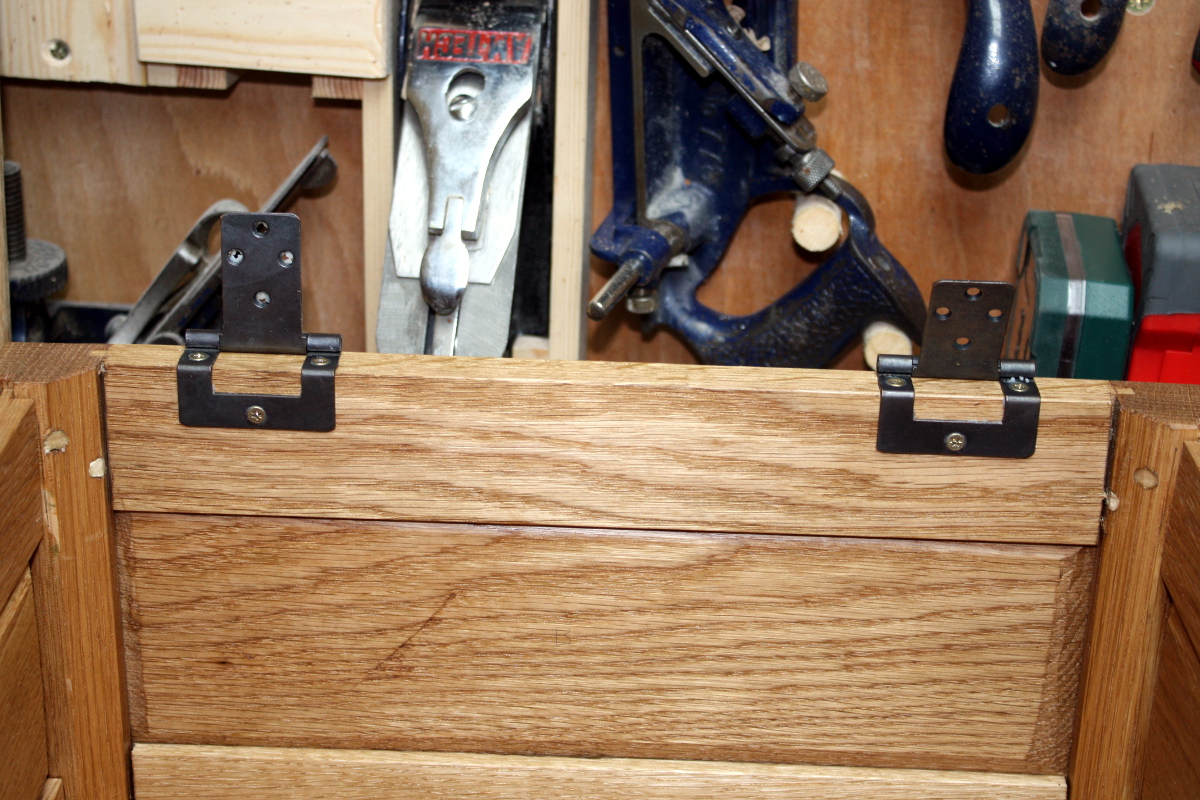
I don’t like this job much, I’m not terribly good at it. First I attached to the chest, and then using wedges and cauls to hold the lid in the right position, attached to the lid.
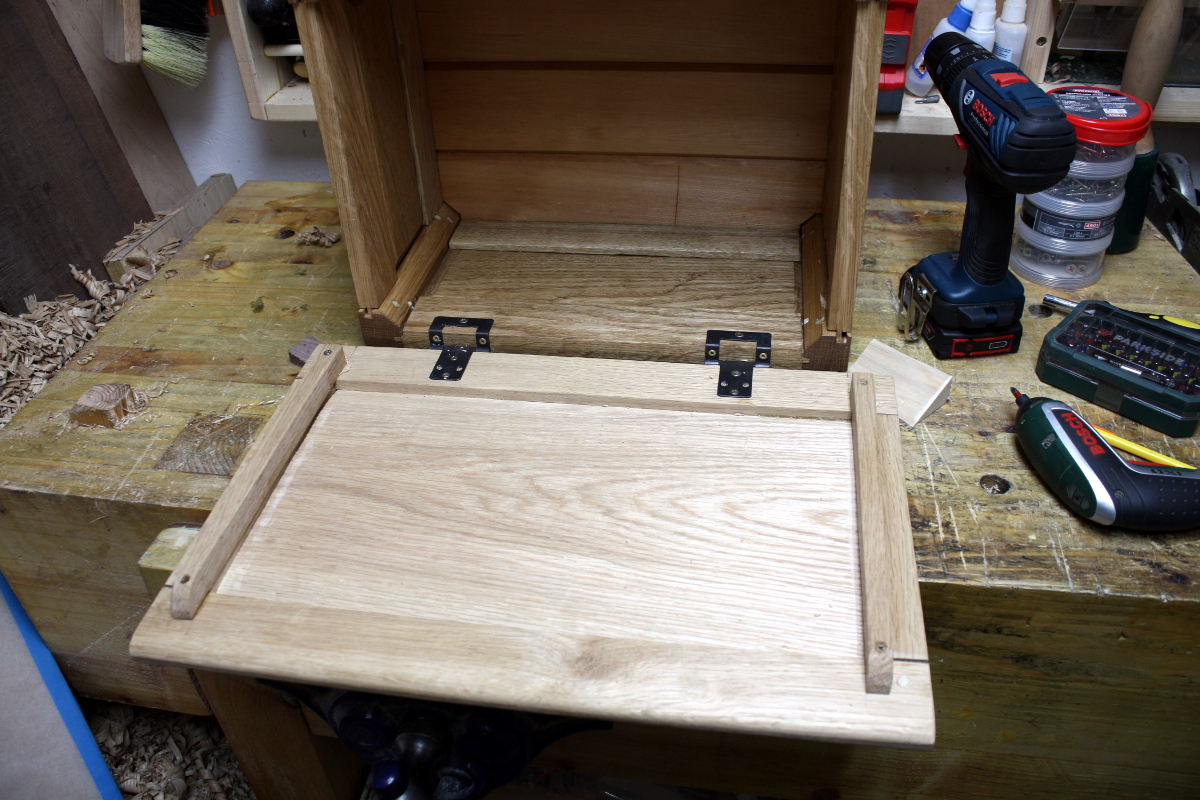
And then I spent the next twenty minutes refitting and fiddling with them to get the damn lid to sit flat.
Hinges.
They’re enough to make you tear your hair out.
I suppose it could be worse, these hinges are definitely not 17th century pieces (or even replicas of it). Period correct hinges would be these things:
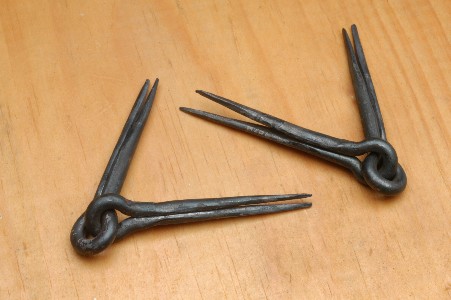
Depending on who you talk to, these are snipe hinges, gimmel hinges or something even odder-sounding. But they’re not terribly pretty on the inside of a chest when fitted:
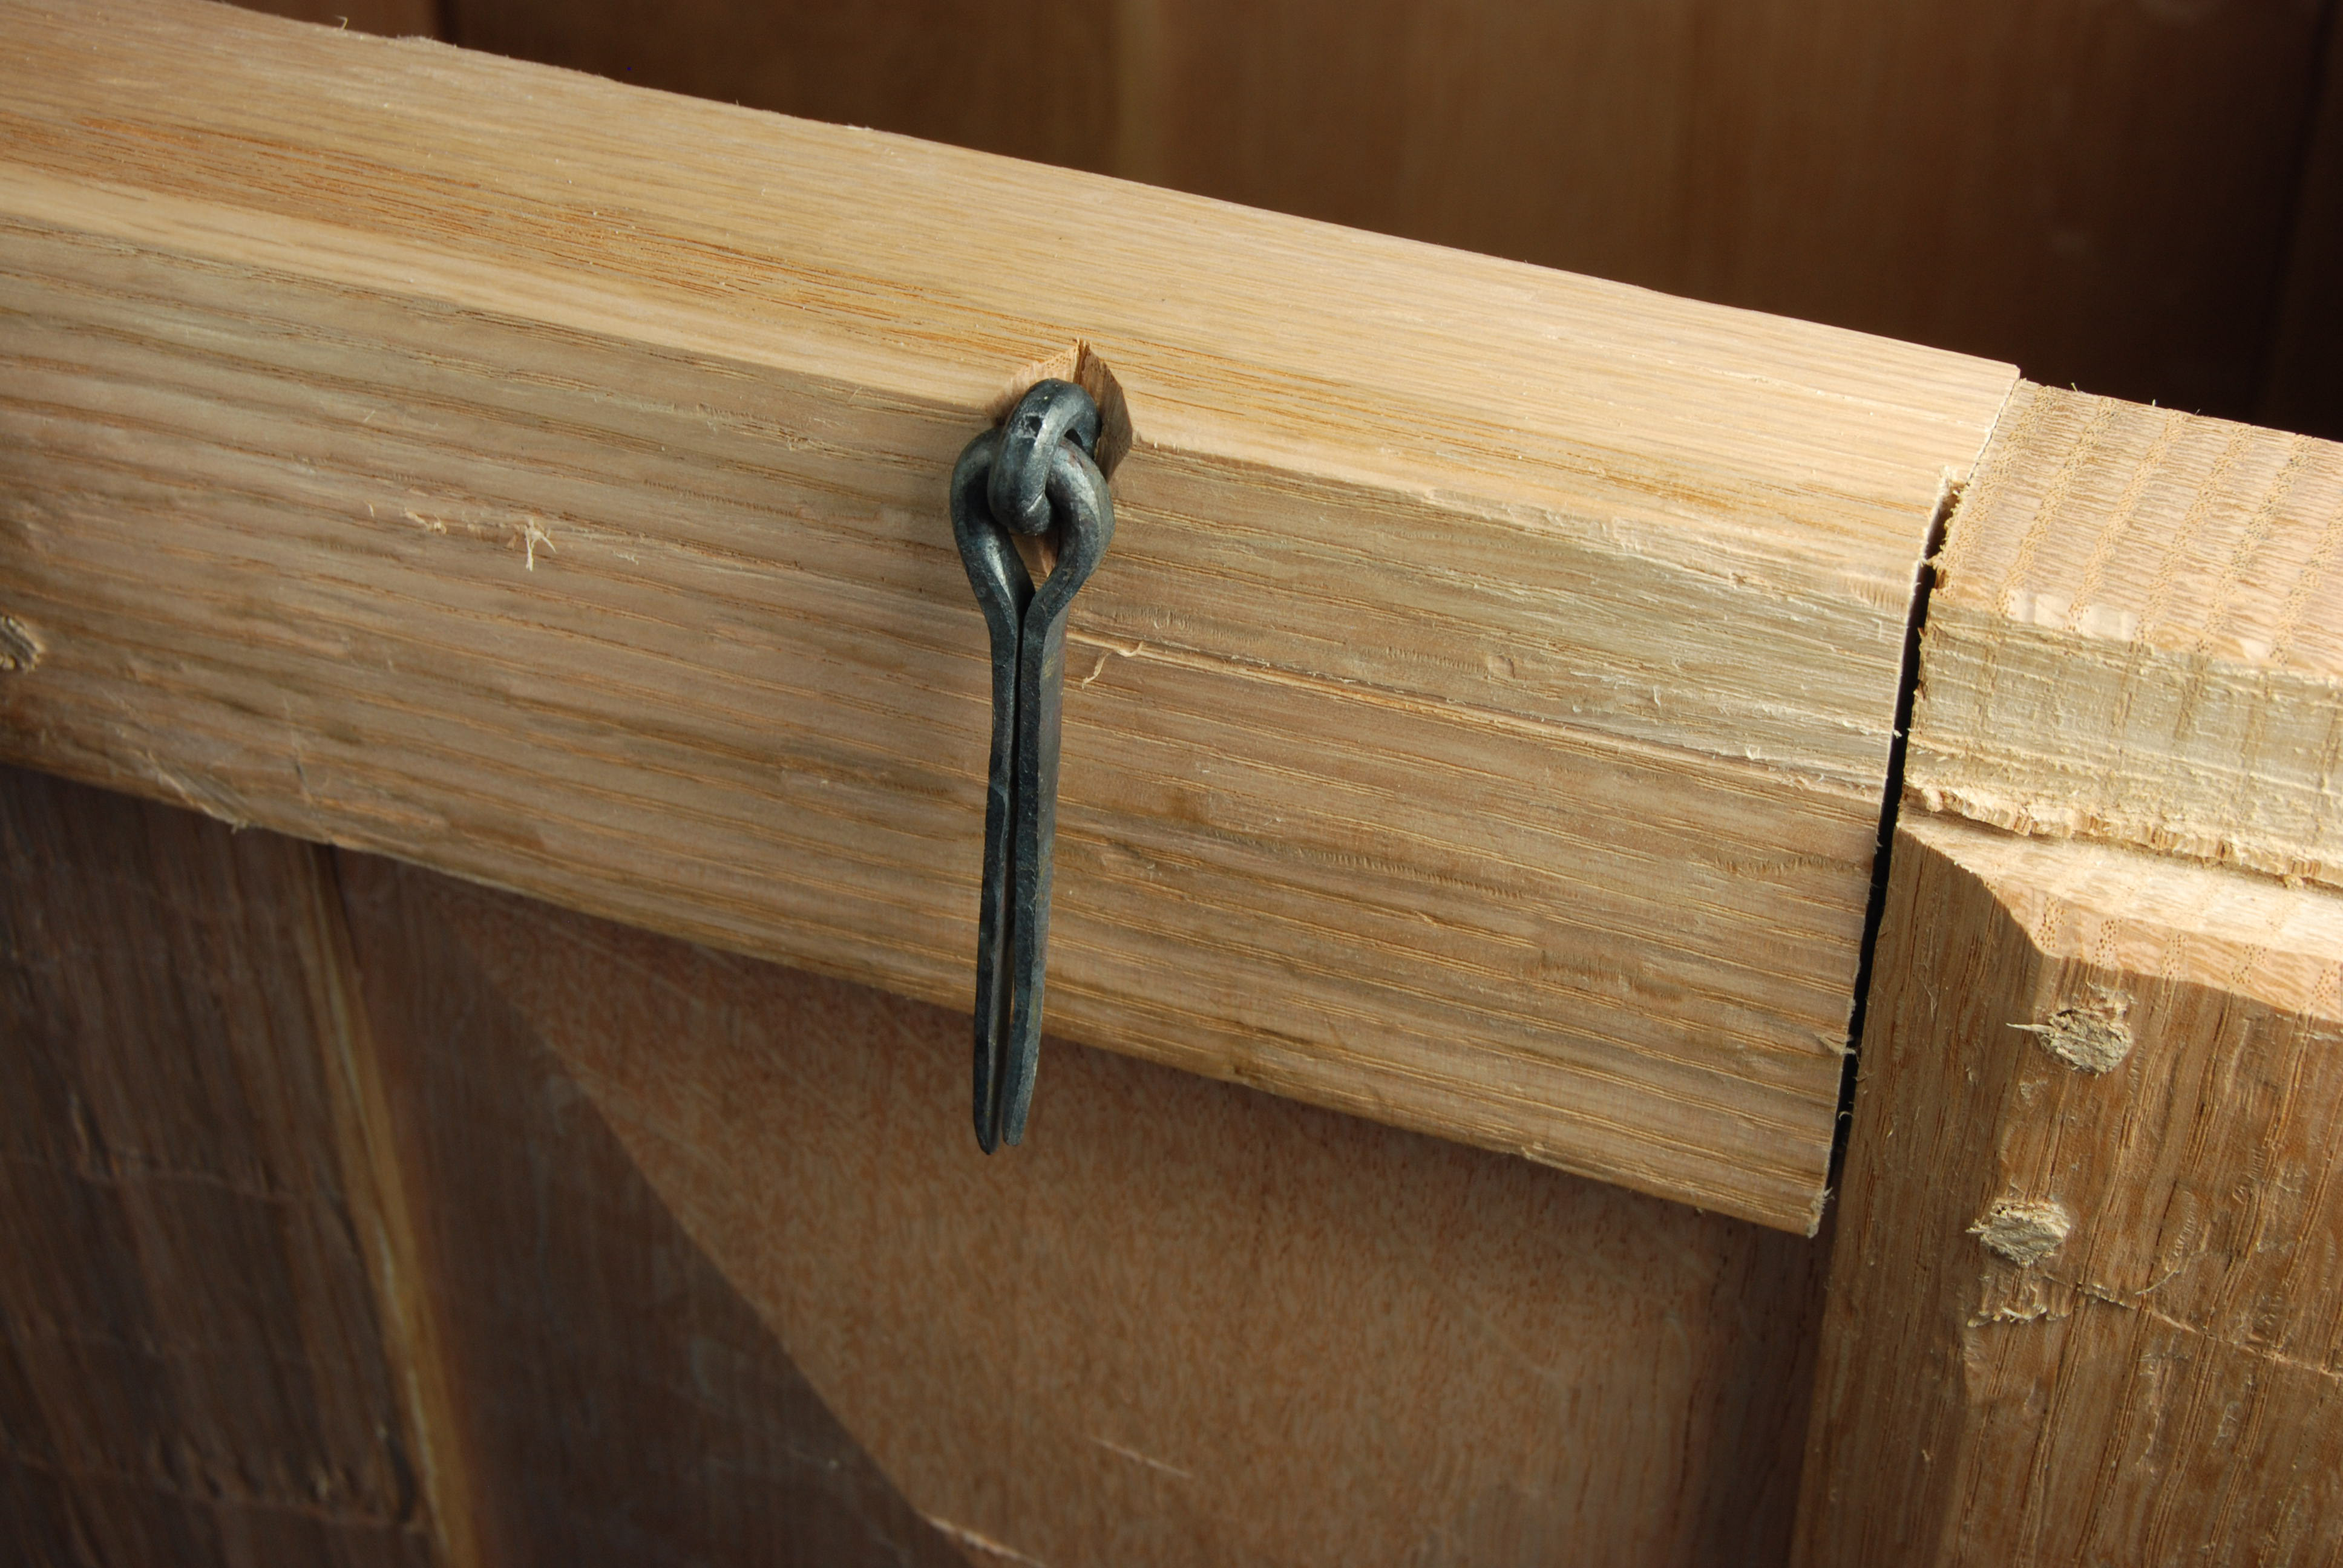
And even Peter Follansbee can’t make them look good on the outside:
Oh well. Count your blessings I guess.
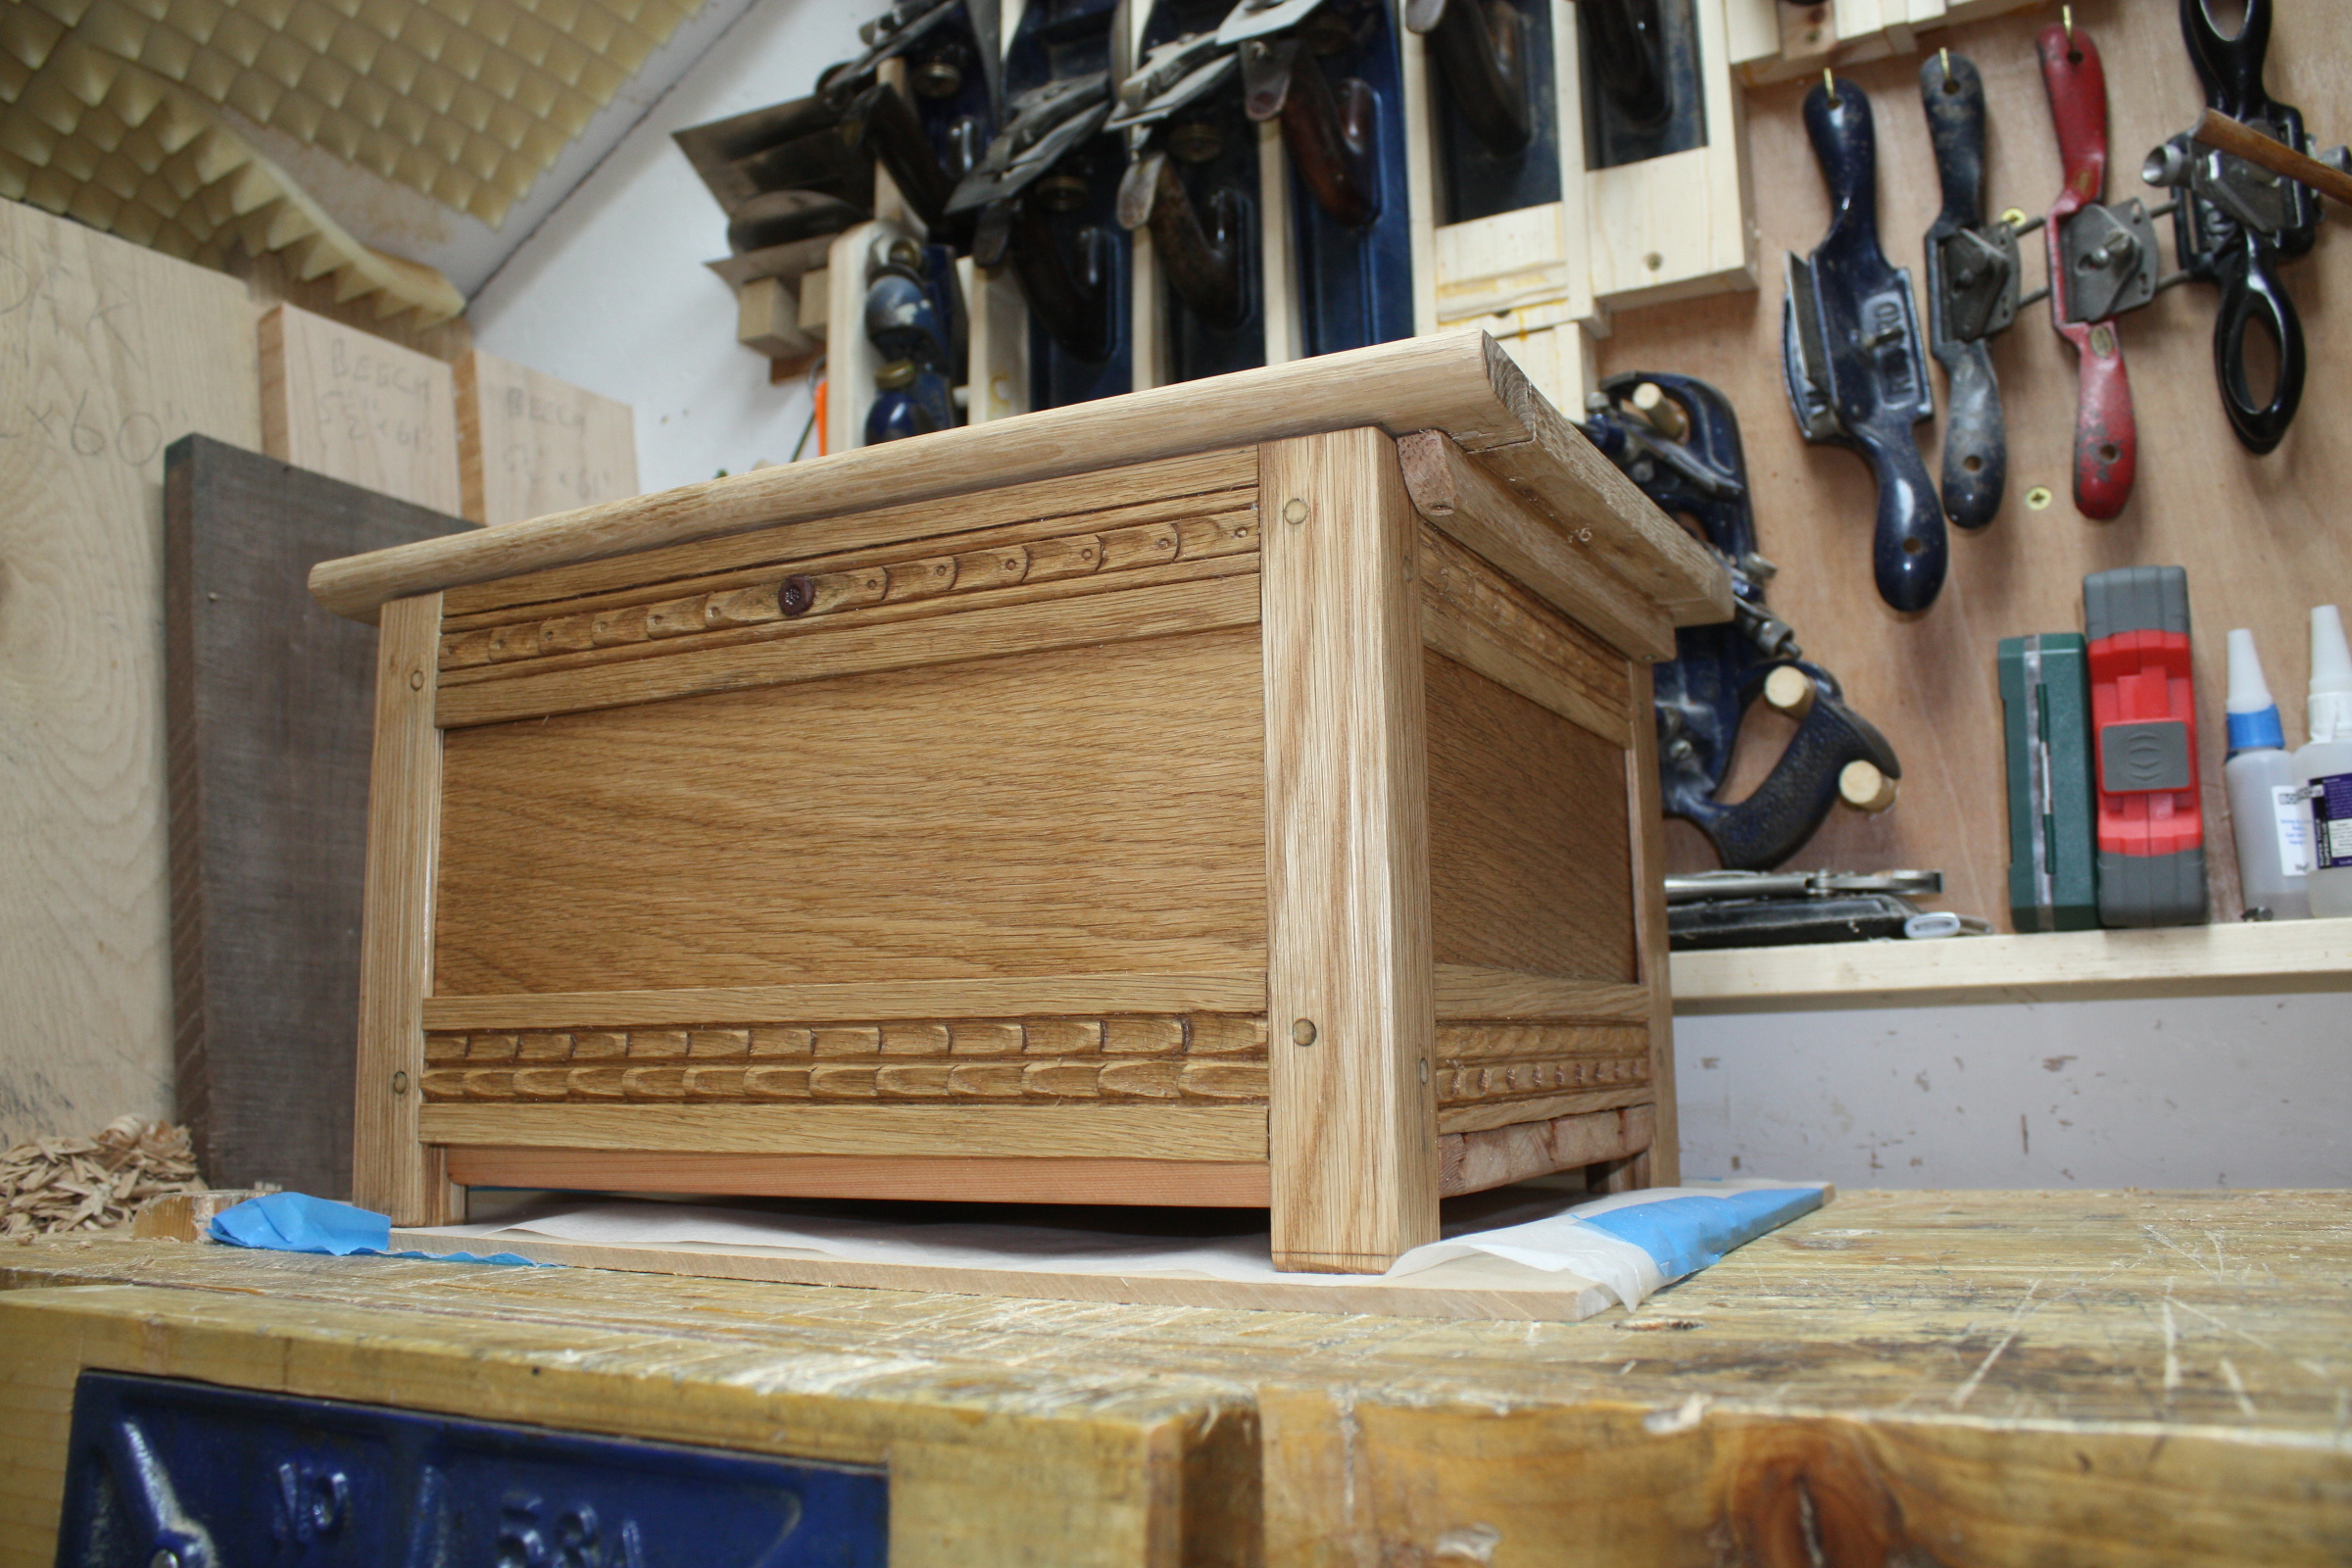
And with that last job done, that was it. Build complete.
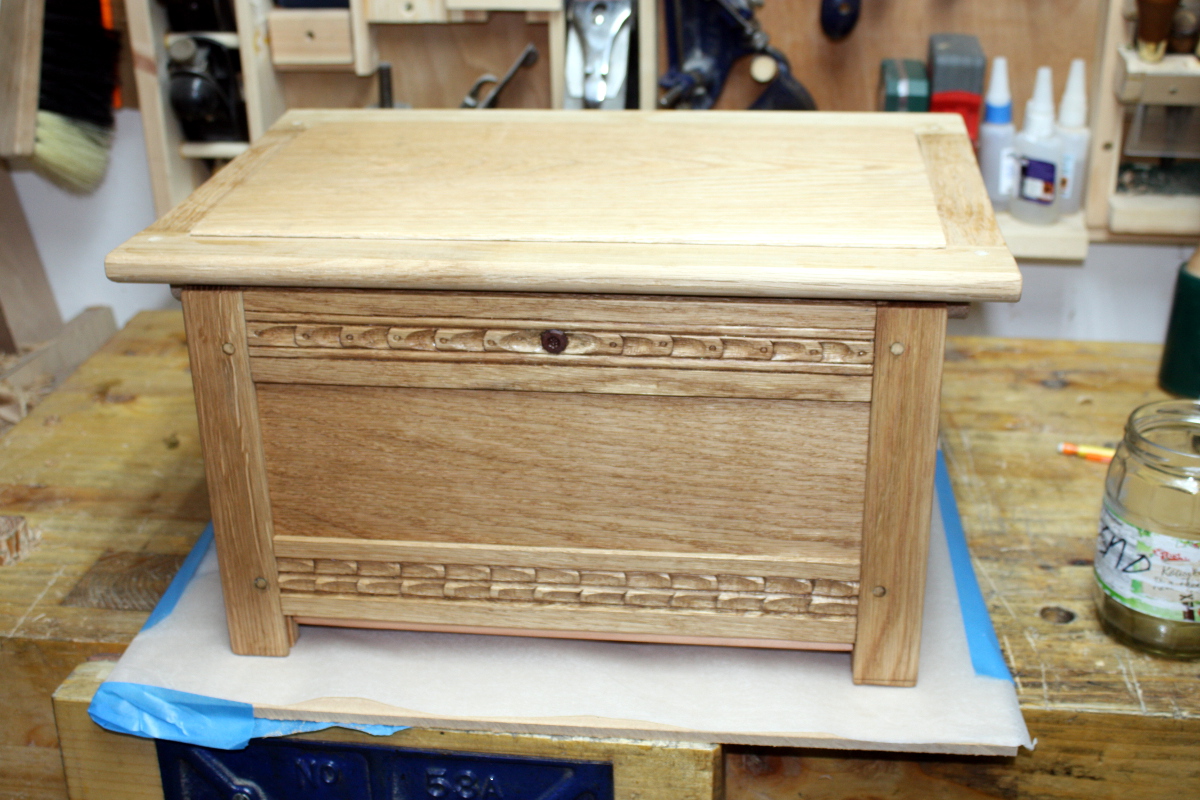
Well. The lid needed a coat of osmo, so I did that. But that was it then, nothing to do but wait for the osmo to cure (which it’ll do in the house tonight so the panels can start drying – if they’re going to do something weird on me I’d rather they did it now instead of after I deliver the piece).
You know, it didn’t come out too bad in the end.
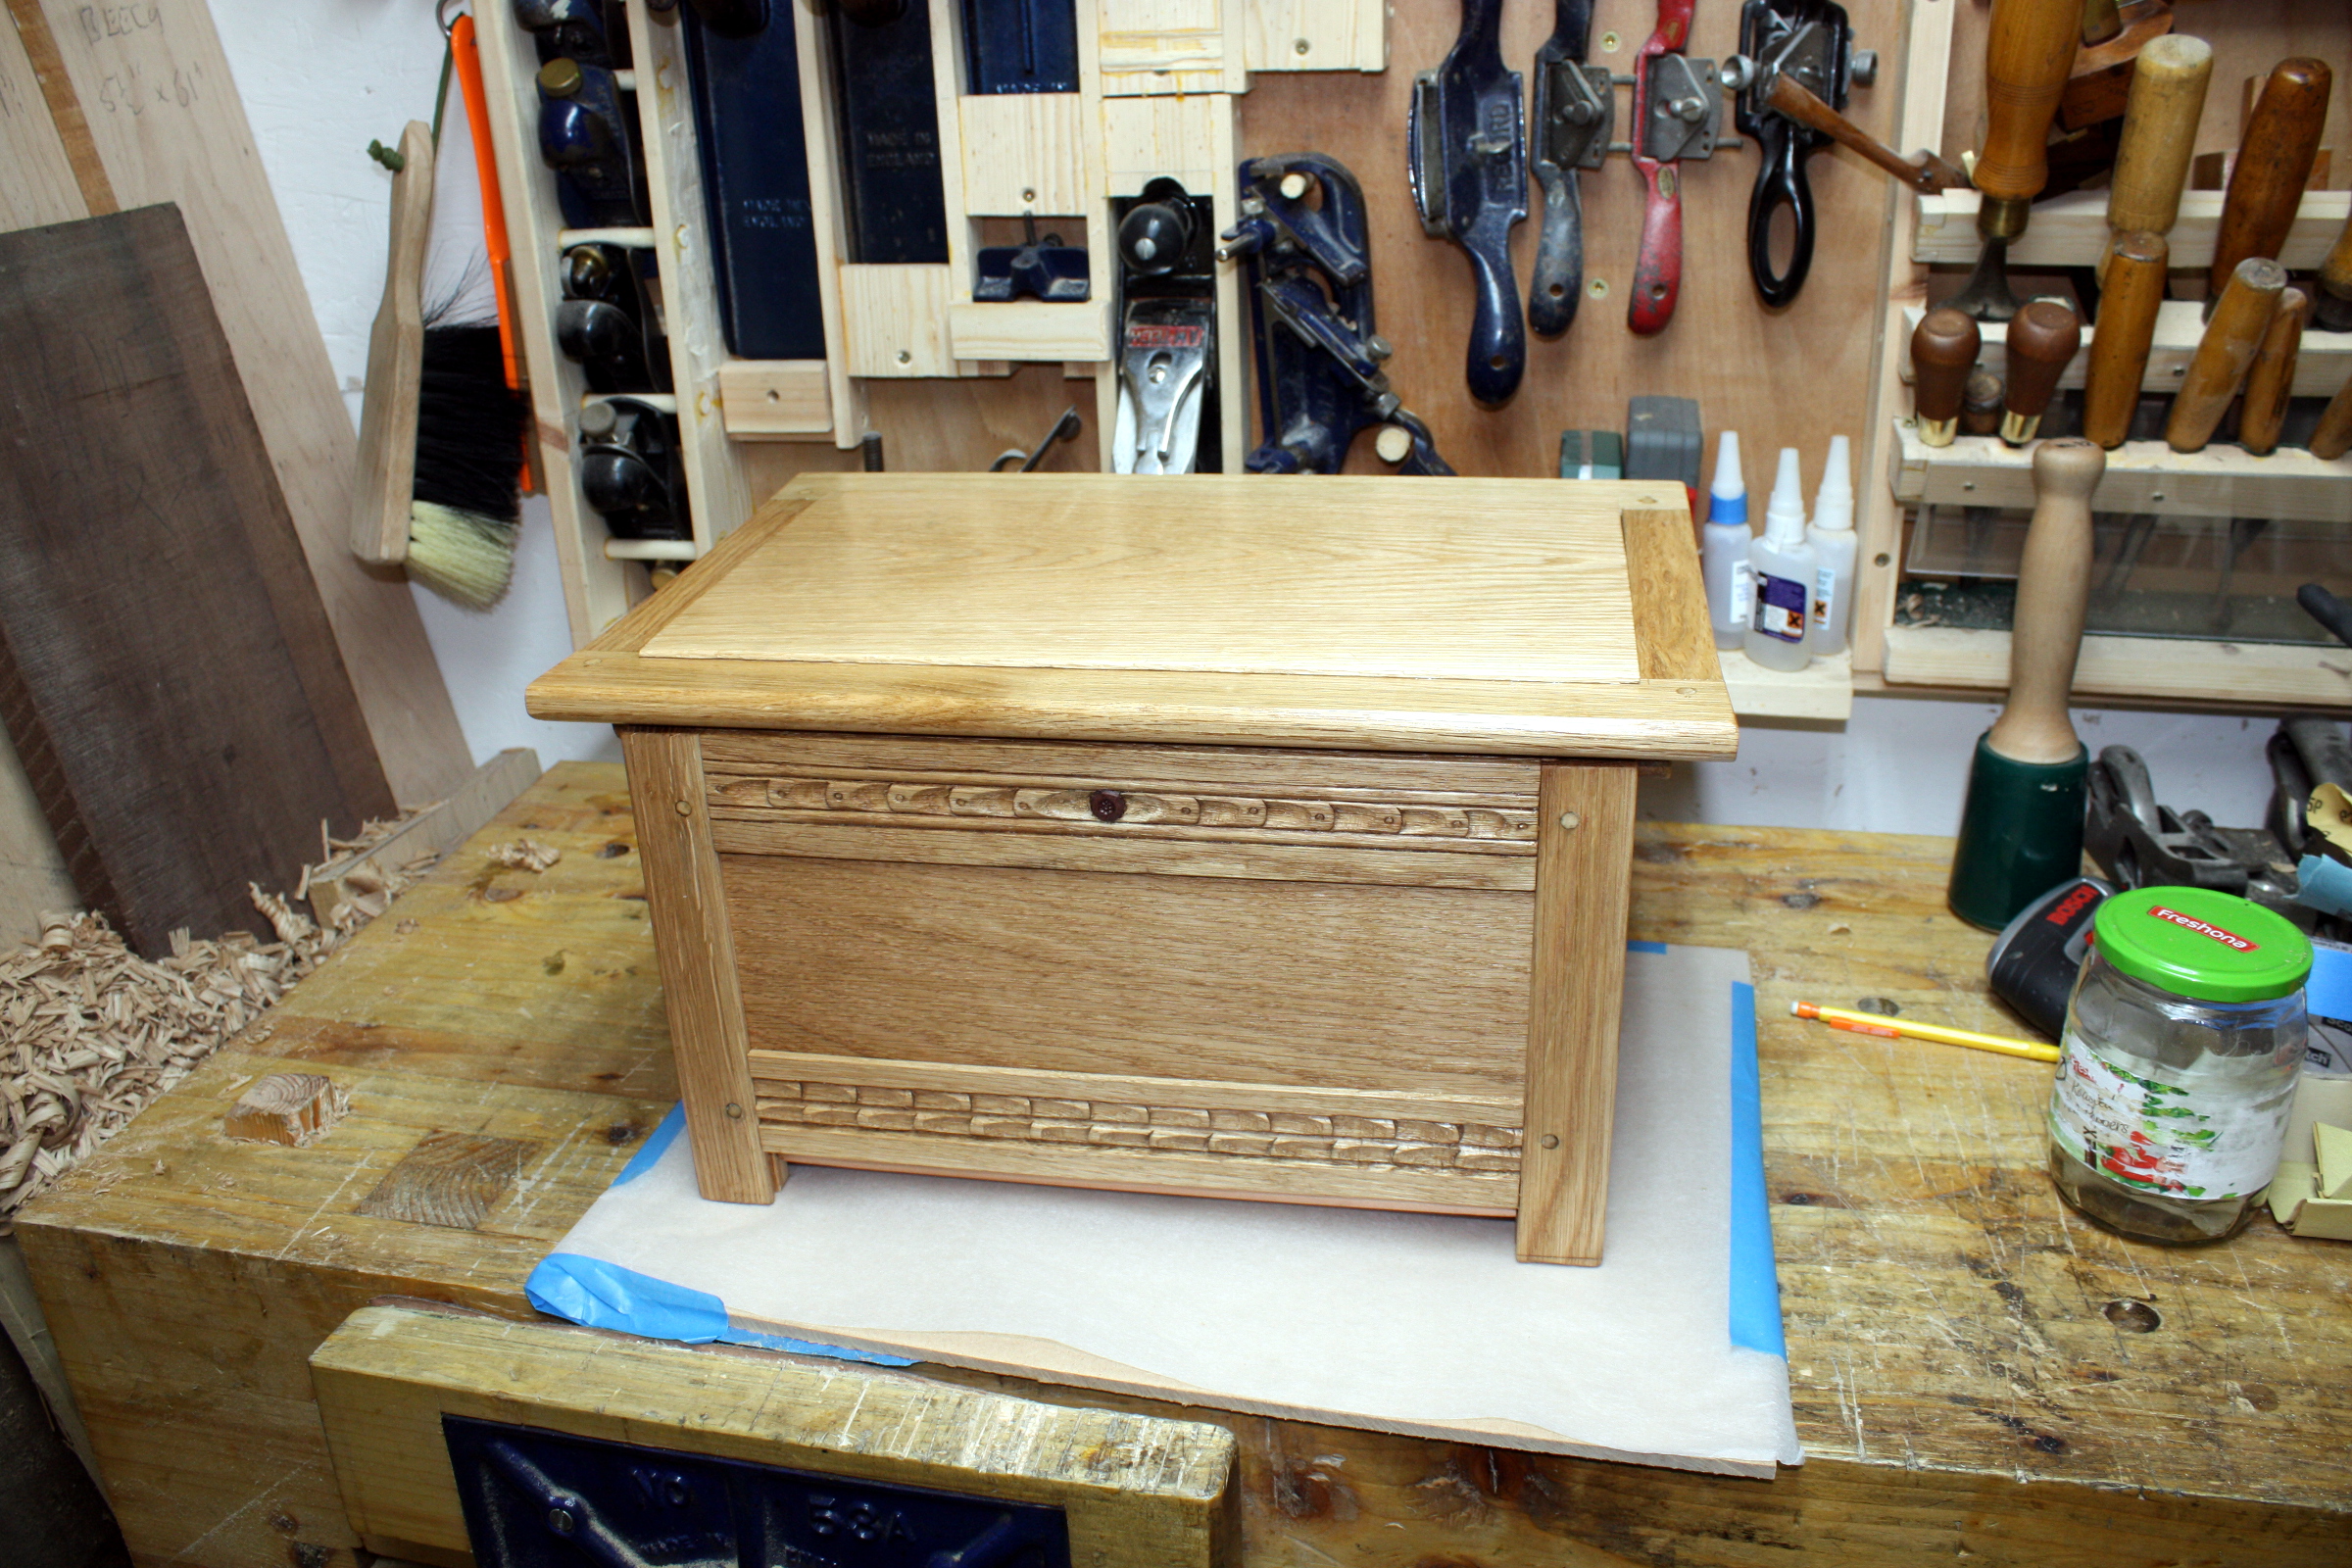

Even the dust seals look good.
Oh, and for those who were wondering what it was for…
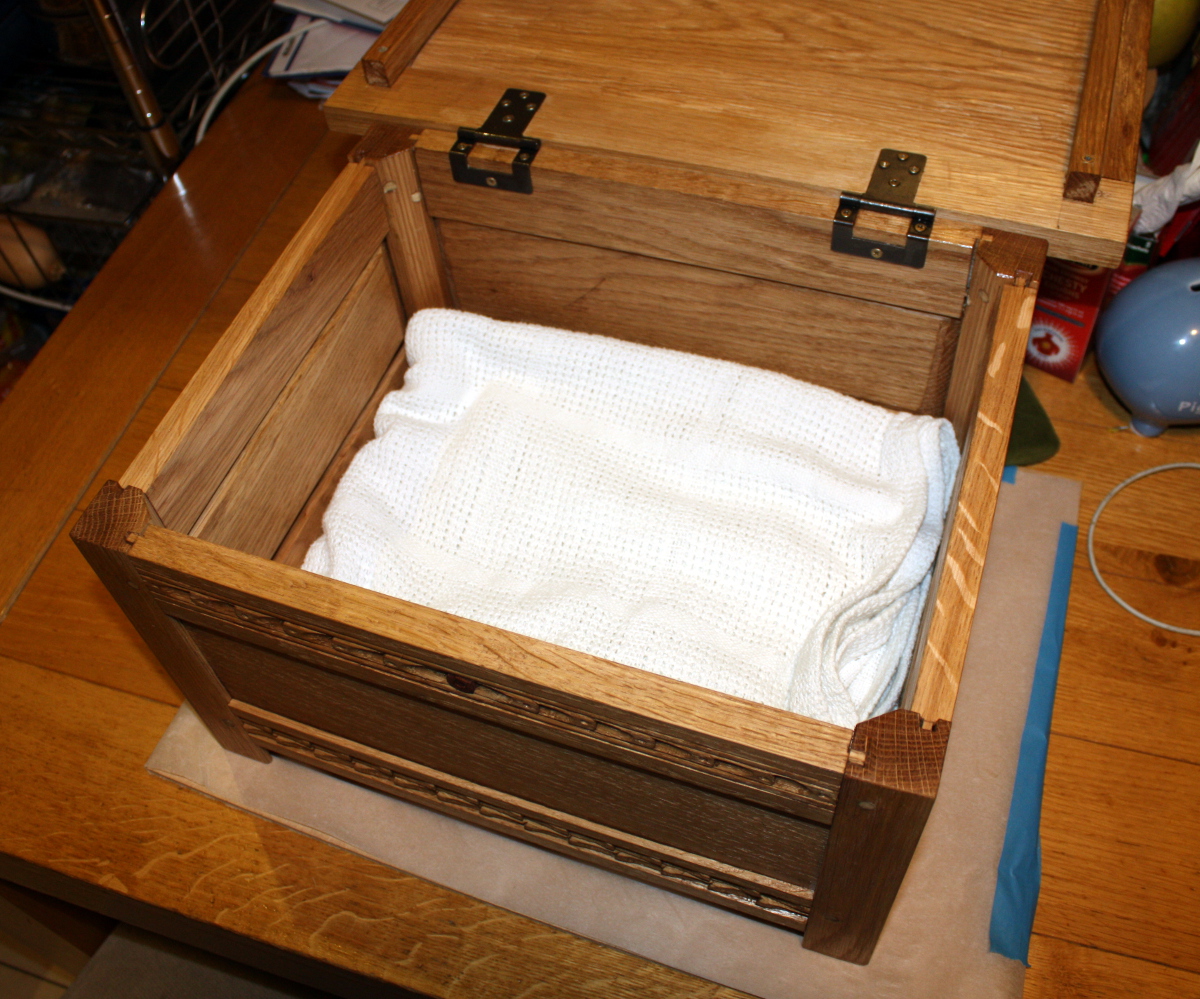
A friend at work and his wife are expecting their first in the next few days. In the 17th century, chests like this were four feet wide and three feet deep (or even larger) and they held a household’s linen or blankets. Today they’re called blanket chests. But this one is a baby blanket chest; the name is a bit of a pun in both construction and intended usage. It’s sized so that you can take four to six cellular blankets from mothercare, fold them the way you’d normally fold a blanket when you’re tired and in a hurry, and they’ll drop right in here. It’s also a baby version of the full-blown blanket chest, which would never fit in my shed 😀 (There are examples of miniature chests like this from back then, so they’re not unheard of – just uncommon).
Plus, I had wanted to make a chest for a while. They’re a fun build. Might do another one during the year.
Next up however is: tidying up the shed after building this. There are shavings everywhere…
Tags: hand tools, oak, osmo, Woodworking


did you rive the stock for this?
Afraid not Shannon, that would require access
to oak logs, some tools I don’t yet have and some way to dispose of the shavings ad debris (not to mention that the log wouldn’t really fit in the shed!). It’s all flatsawn kiln-dried stuff.
I’m actually glad to hear that. I love Peter Follansbee’s stuff but it’s all rived and I don’t have the tooling for that kind of operation. Seeing something similar in kiln dried material is awesome.
He did make the point in his video on New England Carving that riven green oak that’s air-dried for 2-4 weeks is the best material you can get for this, but that it’s far from the only material – granted, flat-sawn kiln-dried is the worst kind of oak to use for this (quartersawn air-dried if your timber yard carries it would be much better it seems), but you can totally use it. In fact he’s blogged about that point:
https://pfollansbee.wordpress.com/2011/01/22/about-flatsawn-stock-again/
There are several photos there of examples of carving in flatsawn stuff that he’s done and that he’s found from as far back as 1699.
He’s also made several boxes in woods other than oak, he shows them off at the start of his Carved Oak Boxes videos, and mentions some made by other people on his blog as well:
https://pfollansbee.wordpress.com/2011/12/20/carved-boxes-but-not-mine/
Oh, and also: https://pfollansbee.wordpress.com/2009/10/18/theres-oak-then-theres-riven-oak/
Sparks,
the flower imprint on the dowel, is that I stamp I could buy? I like that idea and I would like to try it.
Definitely Ralph, I got mine off ebay here: https://www.ebay.ie/itm/Beadsmith-Trio-Pack-Metal-Design-Stamp-Punches-5mm-Stamping-Tools-Choose-Design/182090593457
Beadsmith is the crowd that makes that one, but there are other makers and they’re relatively cheap and there are a wide range of designs; not all work so well in every wood though. That flower for example, shows up nicely in tight-grained woods like poplar and walnut or as there in the end grain of sapele; but stamp it into a face of oak and you just get a blurry dent!
The circles, incidentally were a common nail set, and the stippling was a piece of mild steel that had a file taken to it. I got my one of those secondhand in a job lot, but I had been planning to make mine and still might – getting a short length of mild steel is the hardest part to it if you know how to sharpen a saw, and I have a piece here. I just have some cleaning down to do first 😀