So I had a 2330h callout last night after finishing in the shed and got to bed around 0100h; and then had another callout at 0430h that wrapped at 0530h and then went into work about 40 minutes later than usual because the last remaining scrap of the morning routine was blown out of the water when junior came down with a temperature (he’s caught the cold Claire and I have had for the last week). So I was a wee bit braindead for most of the day, came home early, and all three of us had an hour’s nap. After that, and another quick call for work (on-call is turning into much fun this week) and dinner, Claire and junior packed it in for the night and I headed to the shed to try to finish the chest.
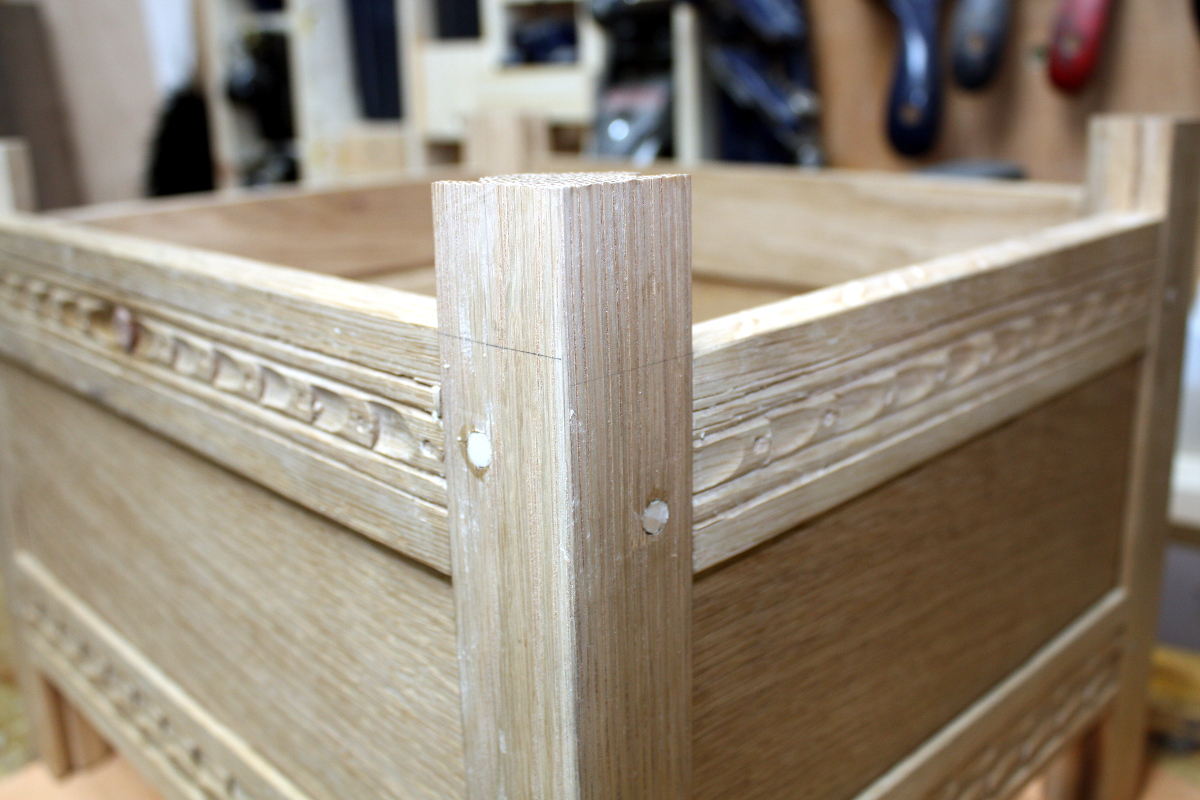
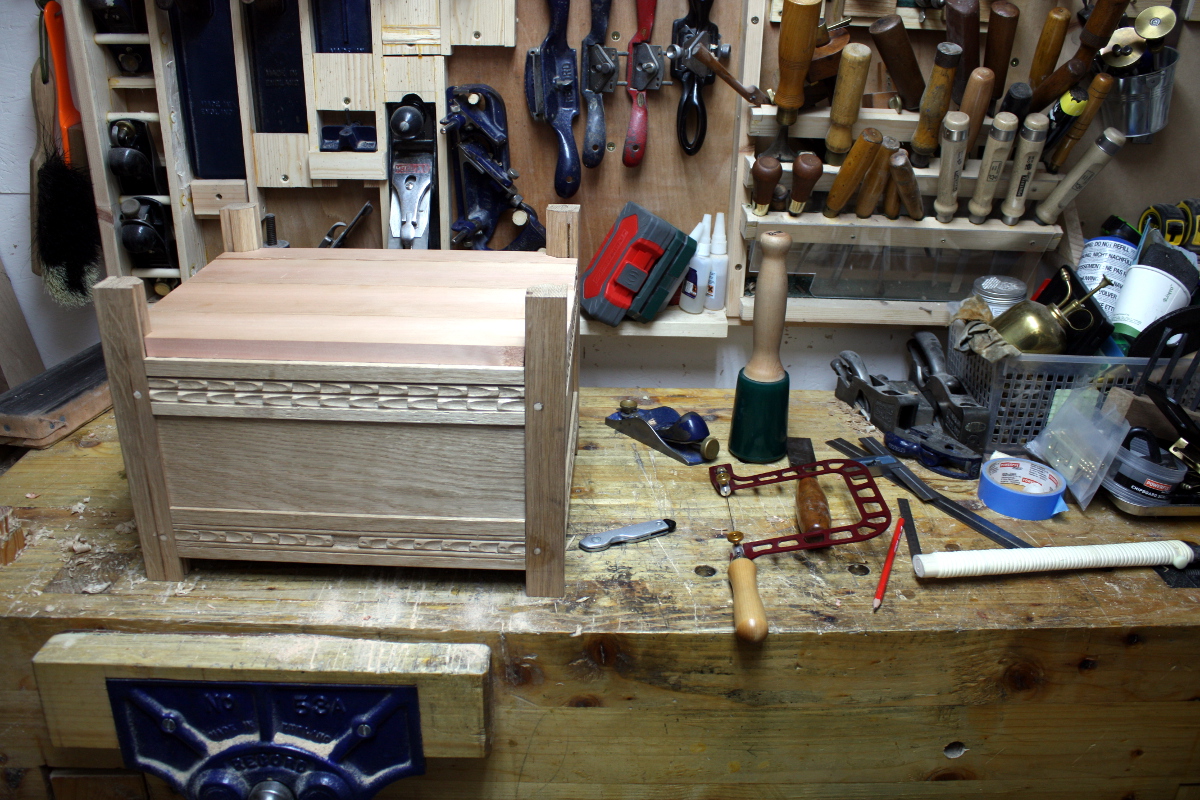
Right, first order of business, those pegs need to be trimmed with flush saw and chisel.
A bit finicky in places, but mostly this was straightforward. There are still some dark lines in places where the pegs weren’t perfect, but the surfaces pass the fingertip test. With that done, the next job that had to be done in order was the floorboards.
But first, I wanted to take a minute to look at options for hinges for the lid to see if I could mortice in the hinges before finishing started.
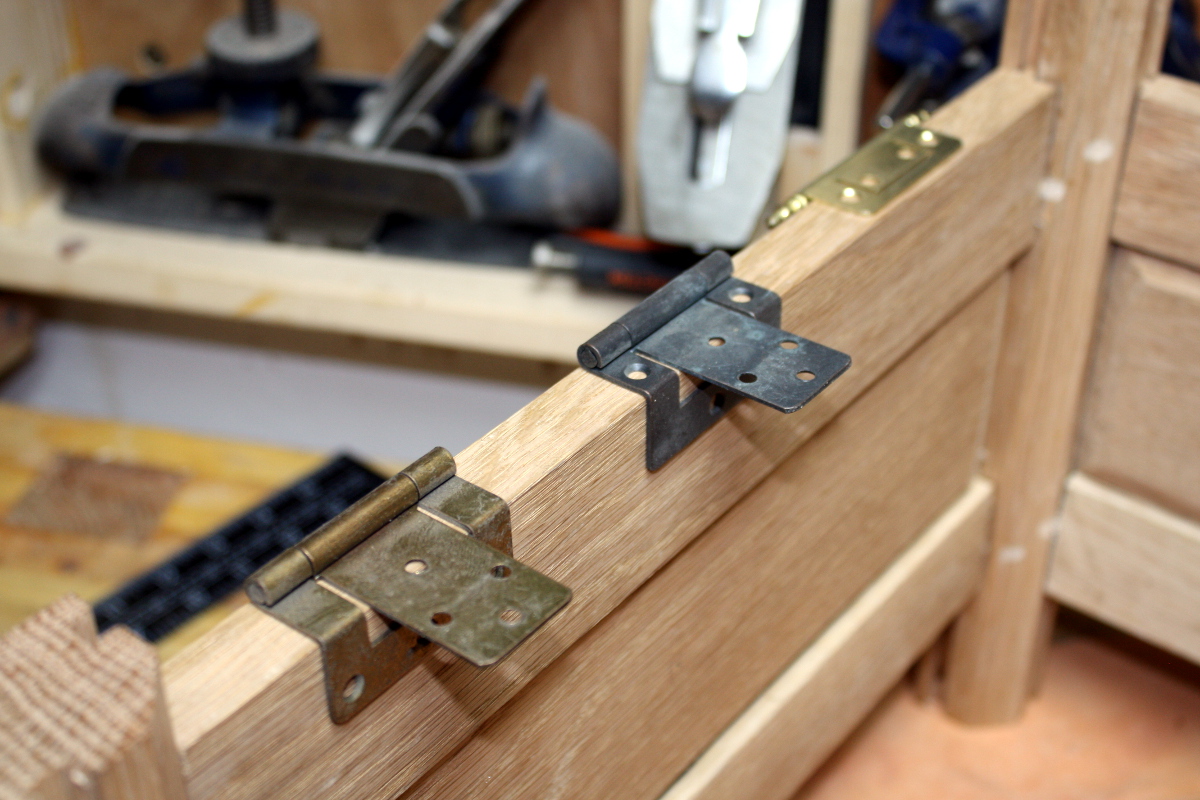


I had gotten a few choices of hinge in the sales over xmas (and those are just the ones that would take the weight of a lid this size), but that oddly wasn’t making this much easier. I don’t like the shiny brass ones much, not on oak. They just look out of place, far too bright even against what the wood will look like when it’s finished. The bronze effect isn’t bad (and it’s definitely just an effect unless bronze sticks to magnets now), but that black effect one is I think the best match (especially as I think it’ll look blacker when I oil it). But I didn’t come to a final decision because the barrel of the hinge being where it is on those two means a cutaway at the back of the lid which is extra faffing about. Not the end of the world, but sod it, I don’t have to choose today so I’ll sleep on it. Unless work calls, of course.
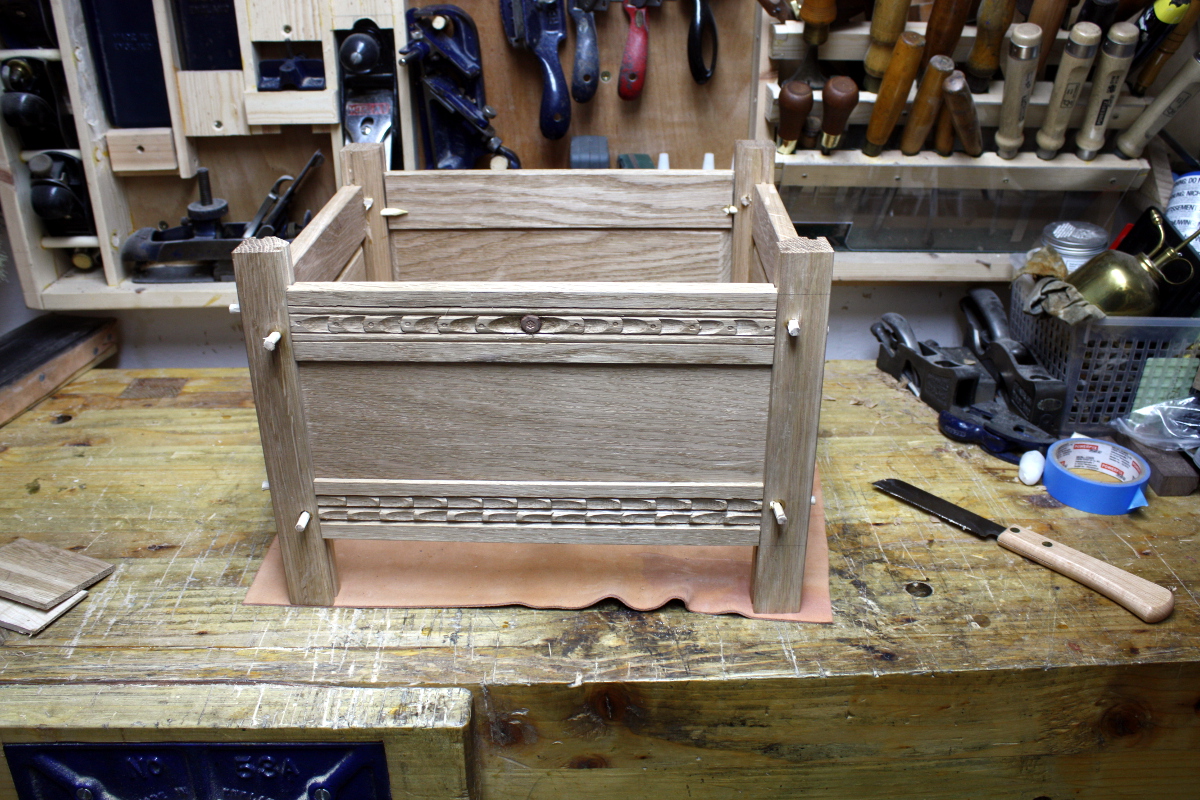
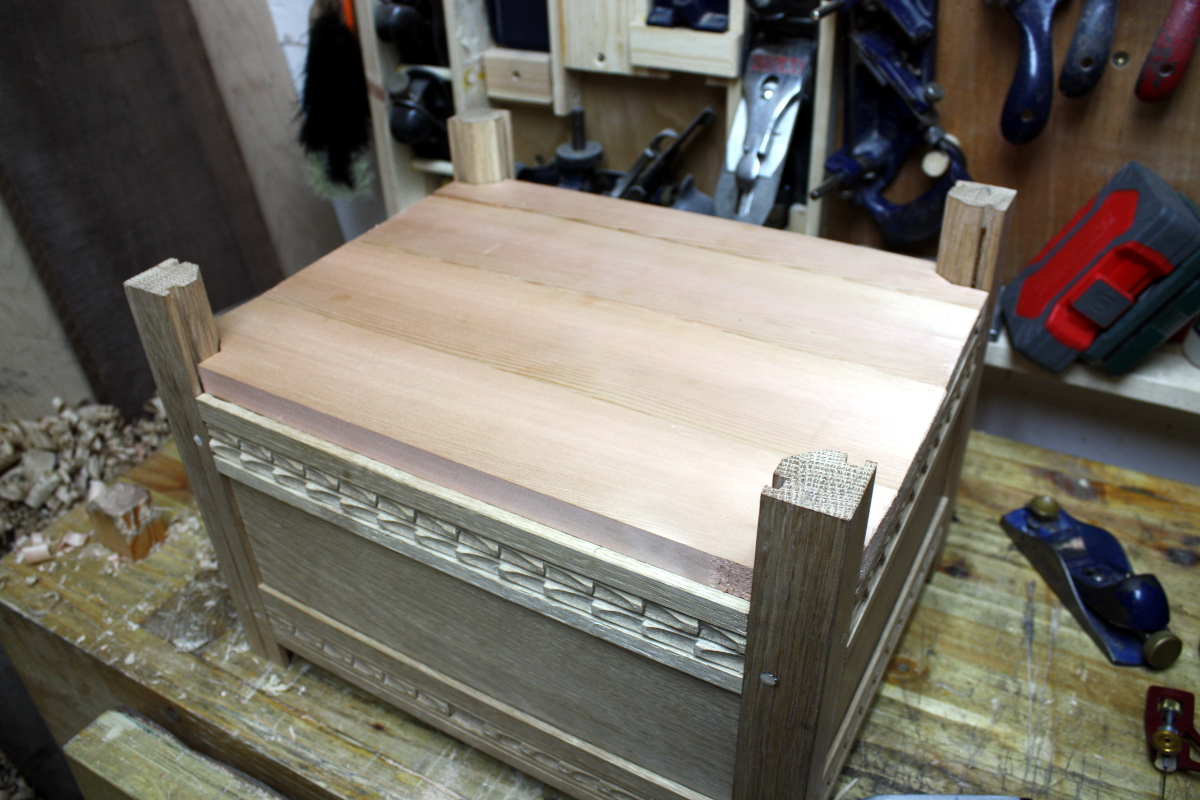
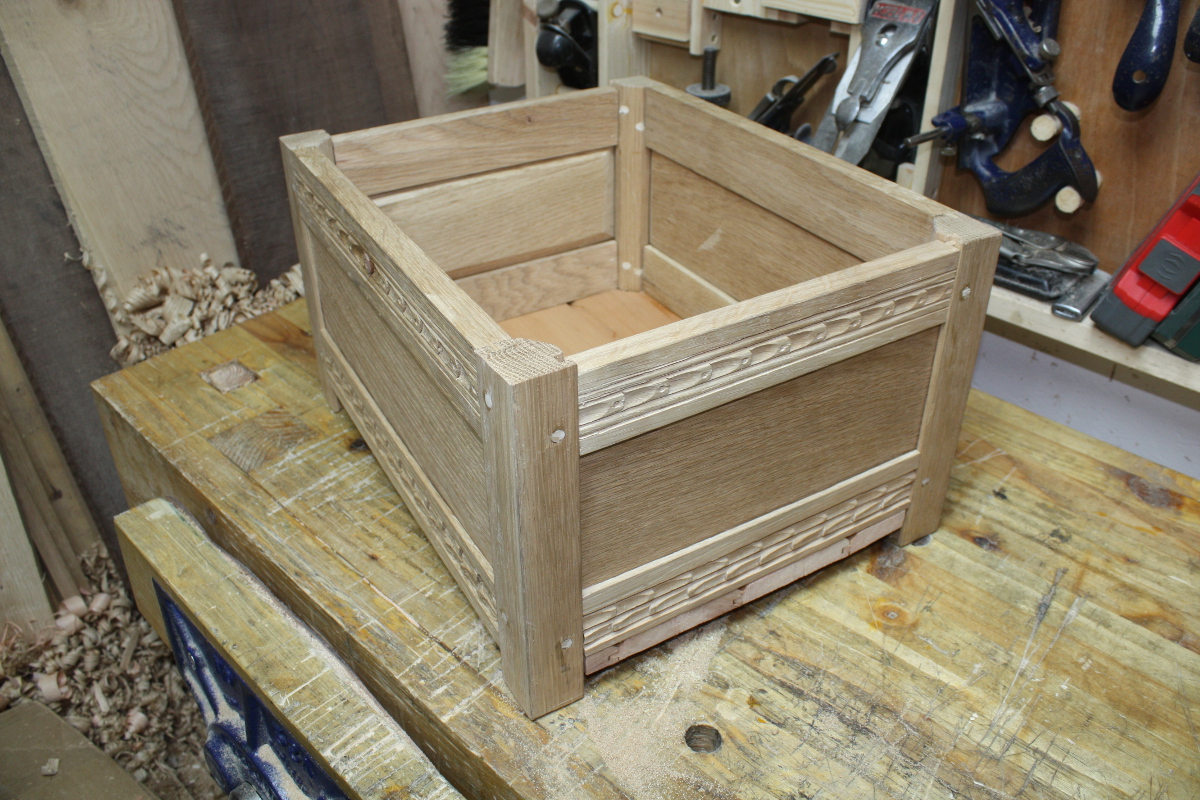
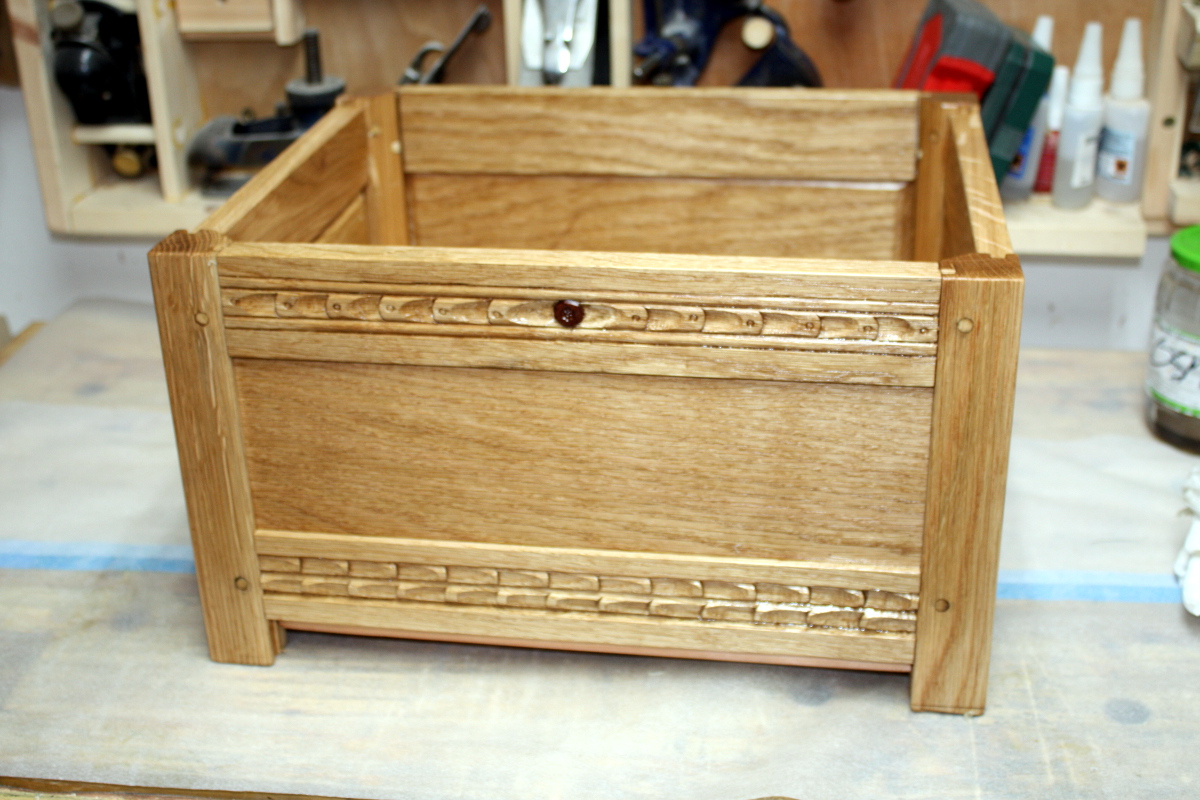
Then I checked the levels of the sides against the front and back.
The top levels don’t match, they’re out by just over 2mm (all around). I suppose I could saw them down to match but there’s not a lot of point in that – the disparity will be hidden by the lid, which will have a dust seal around it. And it’d spoil the look of the carving.

The bottom levels don’t match either, they’re out by 4mm all around, but that’s useful – the front and back will hide the floorboards partially. It’s still a bit untidy though. Something to do better next time. And with that checking done, on to the floorboards. The width on them was mostly fine already, but the two outermost needed to have their excess tongue and groove removed, and had to be shaped to fit around the stiles.
Not a hard job, but time consuming because after the initial rough cut it’s a cycle of test fit and then adjust with chisels and test again until you’re sick of it 😀 And you can’t just hack it out or there’d be a great big gap inside the box letting you look down at the floor. Next time, I do the grooved side/front rails and narrower back rail with floorboards running front to back and nailed into the back rail, it’d be less work. But eventually, they were fitting well enough to go with.
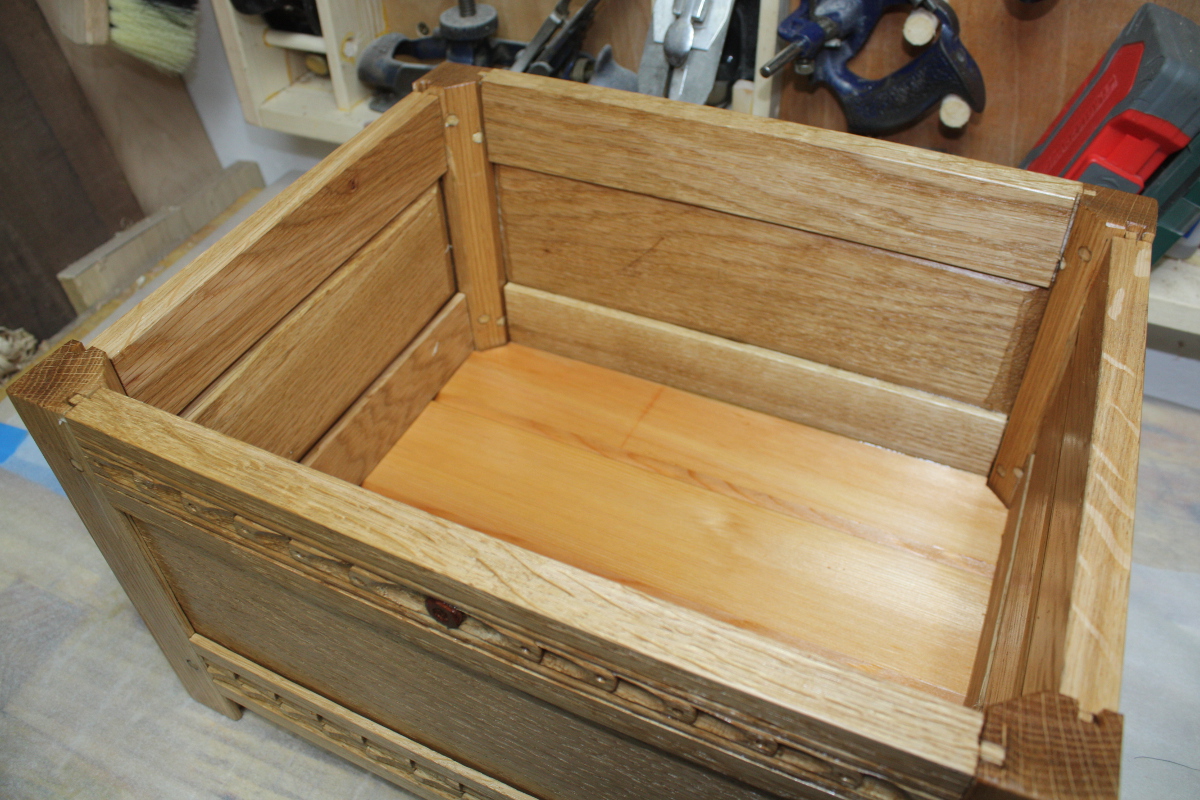
Next, prepping for nails – I’m going to use the Dictum cut nails for this, get that nice medieval-ish look in there even if it’s hidden away a bit. But the last thing I want at this point is splitting.
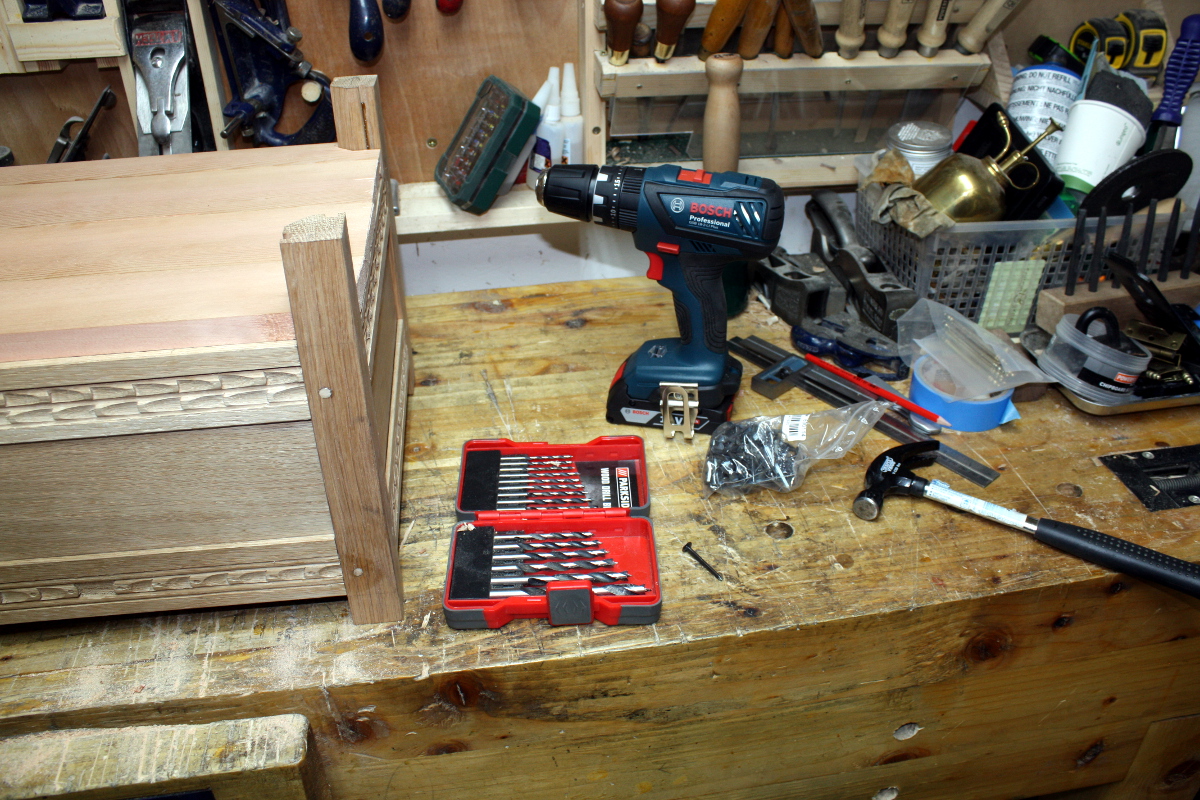
I was worried that the smallest drill bit I had in that index wasn’t small enough and the nails wouldn’t have any meat to grab onto, so I tried using my pin vice to hold a smaller drill bit and hammered some nails into a test piece.
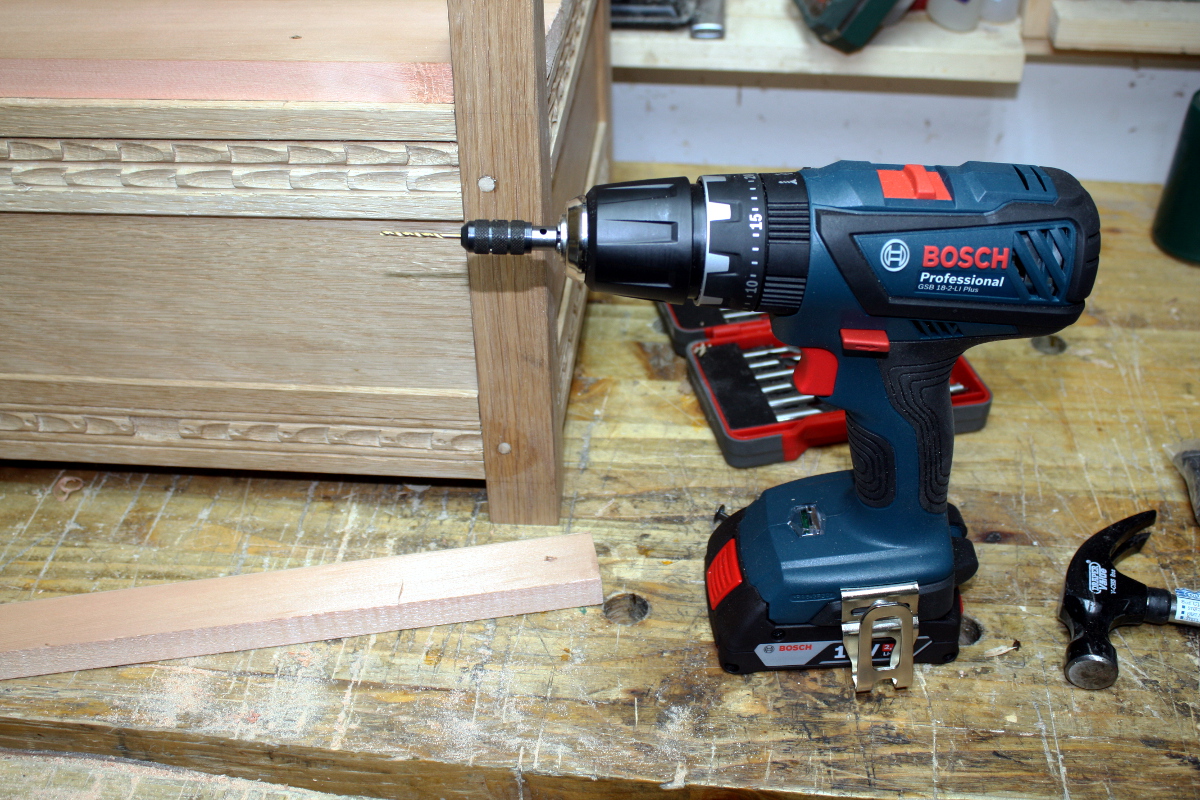
Seemed to work well enough in cedar (but that collet was useless, I just put the 2mm bit in the chuck and the bosch held it just fine). But when I went to hammer in the first nail, there was so much resistance when the nail went from cedar to oak that I was worried the pilot hole wasn’t big enough to prevent splitting so I redrilled the oak hole with a larger bit and did that for all the other nails (2mm in cedar, then widen to 3mm in the oak, then nail the floorboard in place). The first board, the back one, also got glued to the back rail because why not. That edge is the only secured edge for that board and glue’s cheap (and it won’t be expanding across that joint, just away from it).
Might not be the best job in the world (that cedar really does look a bit too thick to me now, plus it’s western red cedar, and I thought it was cedar of lebanon when I bought it – doh 😀 ). But it’ll do.
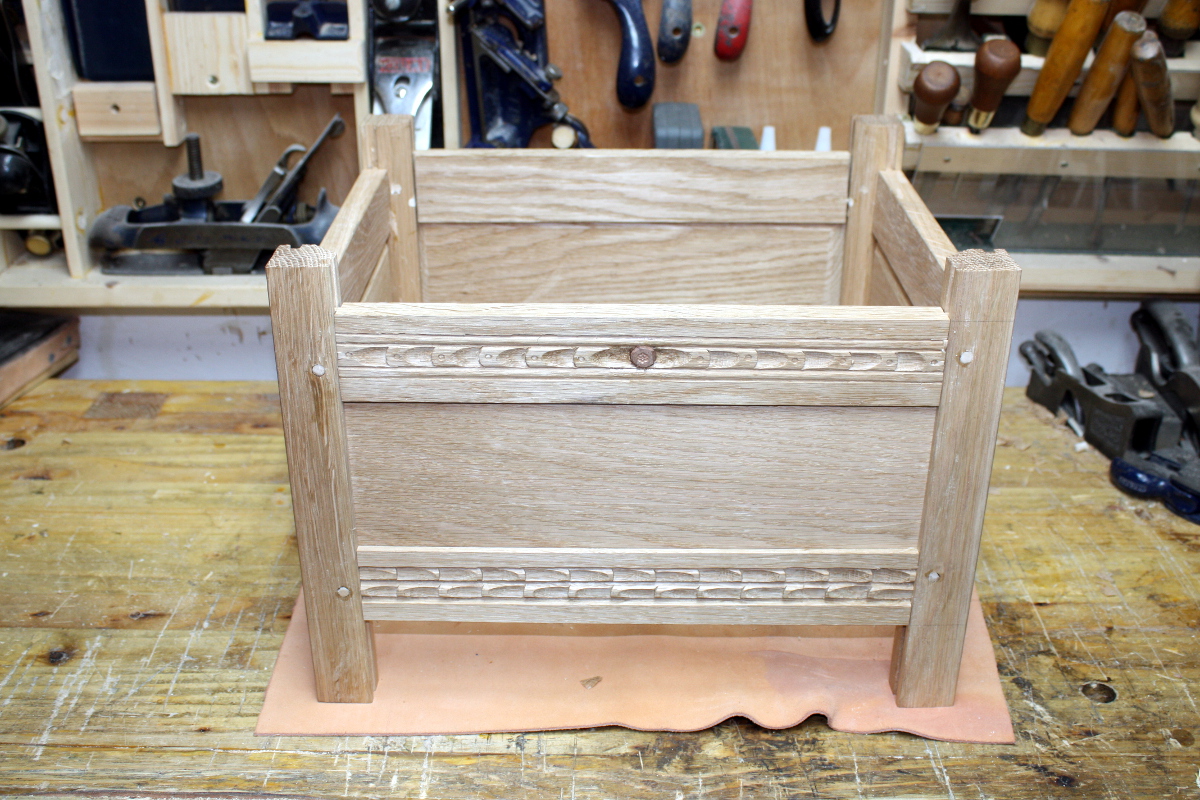
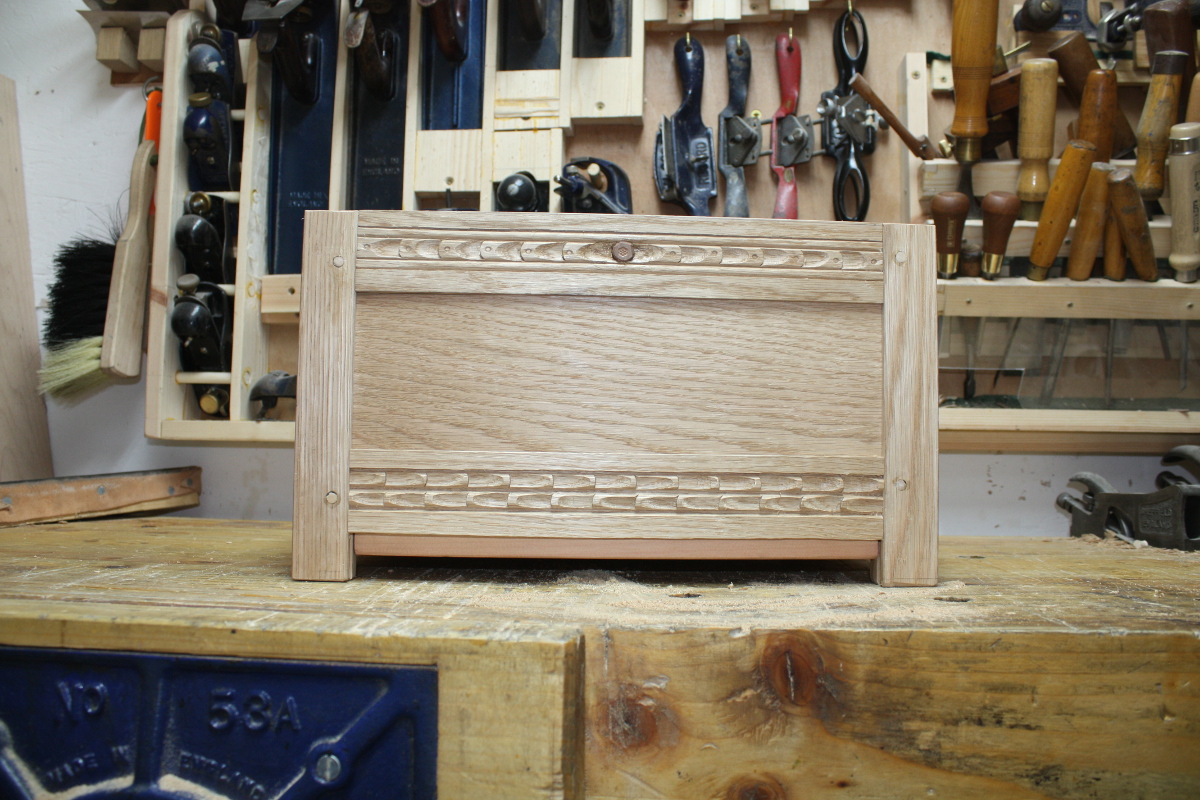
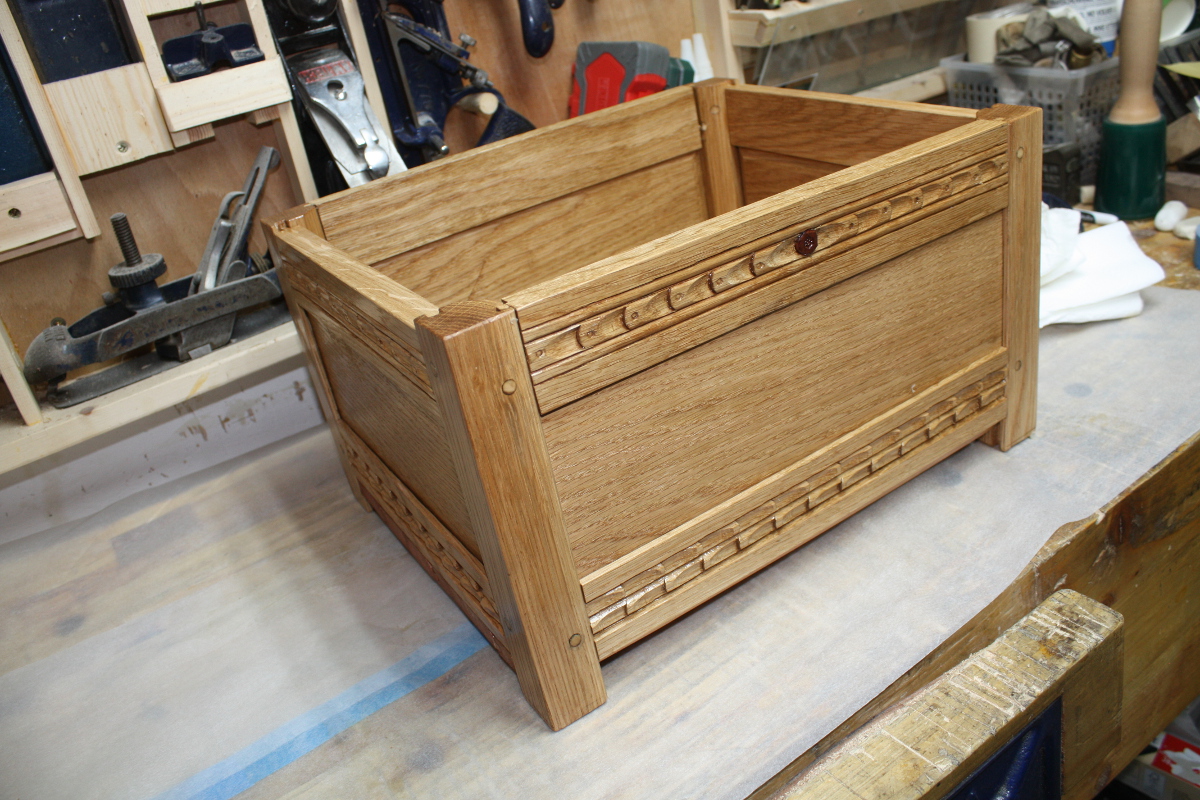
And with the floorboards in place, the next thing is to cut the bottom horns off and to cut the legs to length and eliminate the small amount of rocking the chest has at the moment (it’s square to within 1mm corner-to-corner, but the legs are uneven by 3-4mm or so).
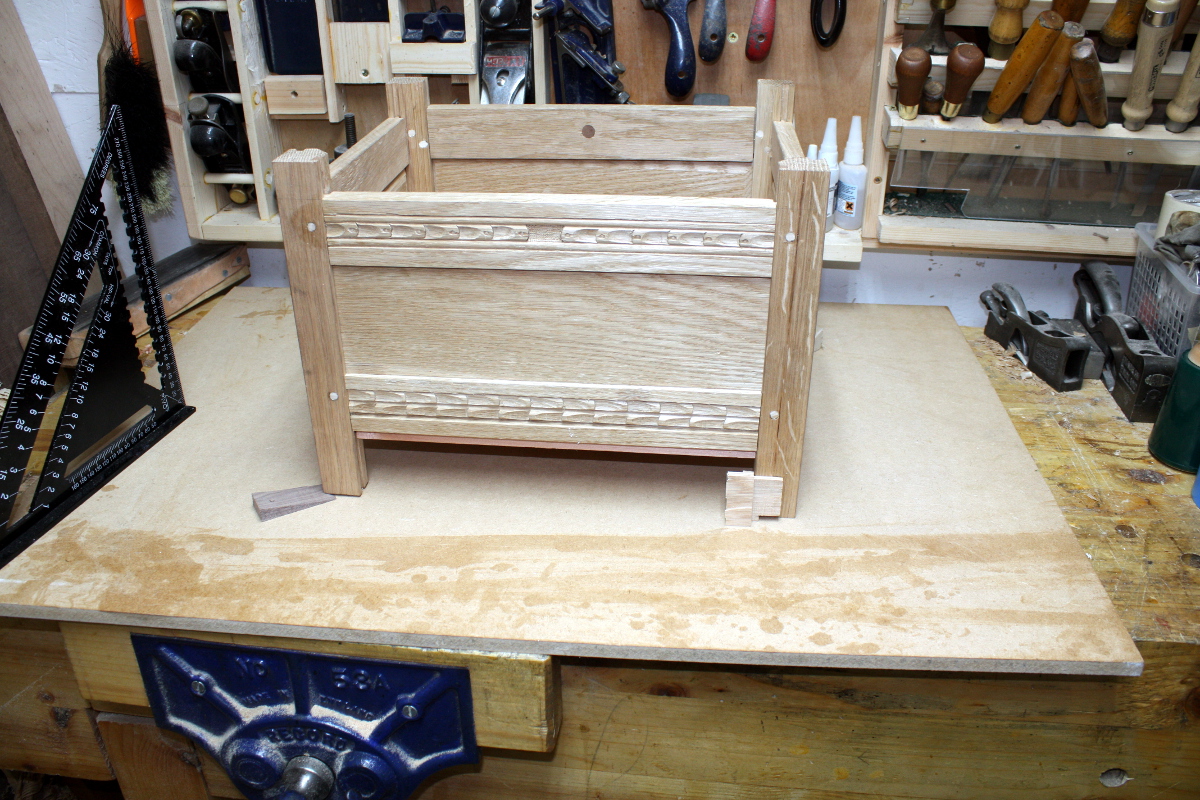
I keep a sheet of thickish MDF in the shed for this task (I don’t like to make stuff from it, but it’s handy when you need a really flat surface and aren’t going to load that surface). I put the chest on it, let it balance itself (two legs up in the air at this point by different amounts), and wedged them carefully, checking that the stiles were vertical when wedged (you don’t want to just shove the wedge in under one leg and wind up cutting the legs so the chest sits nice and stably at a cant). Then I picked out a piece of wood of suitable size and used it as a reference to mark off where to cut the legs to get them even; and then out with the ryoba and crosscut across the knife lines carefully. Hold your breath and put it back on its feet on the bench…
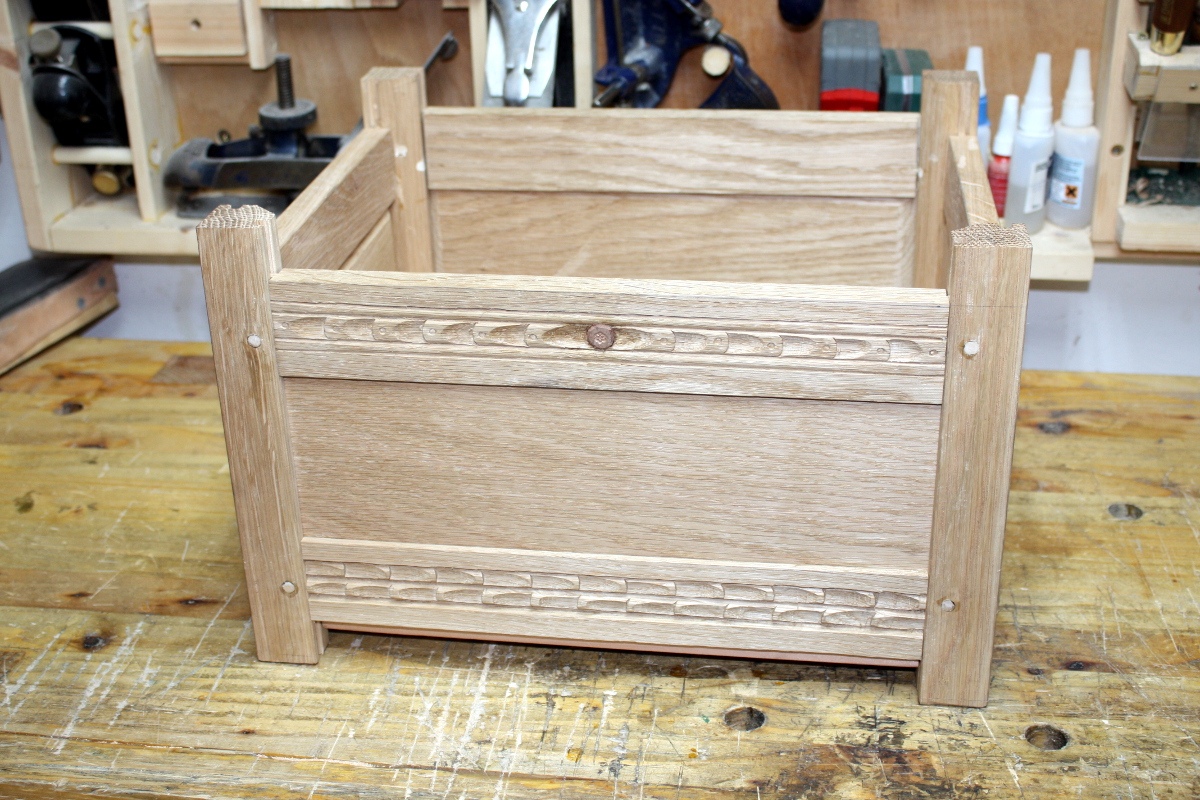
And phew. No rocking. Got it the first time, nice and solid. Well, next up is just removing the top horns. Already have pencilled in the lines, so away I cut with the ryoba…
Not bad. I went over it one last time with an eraser to remove any pencil marks and generally just tidy things up…
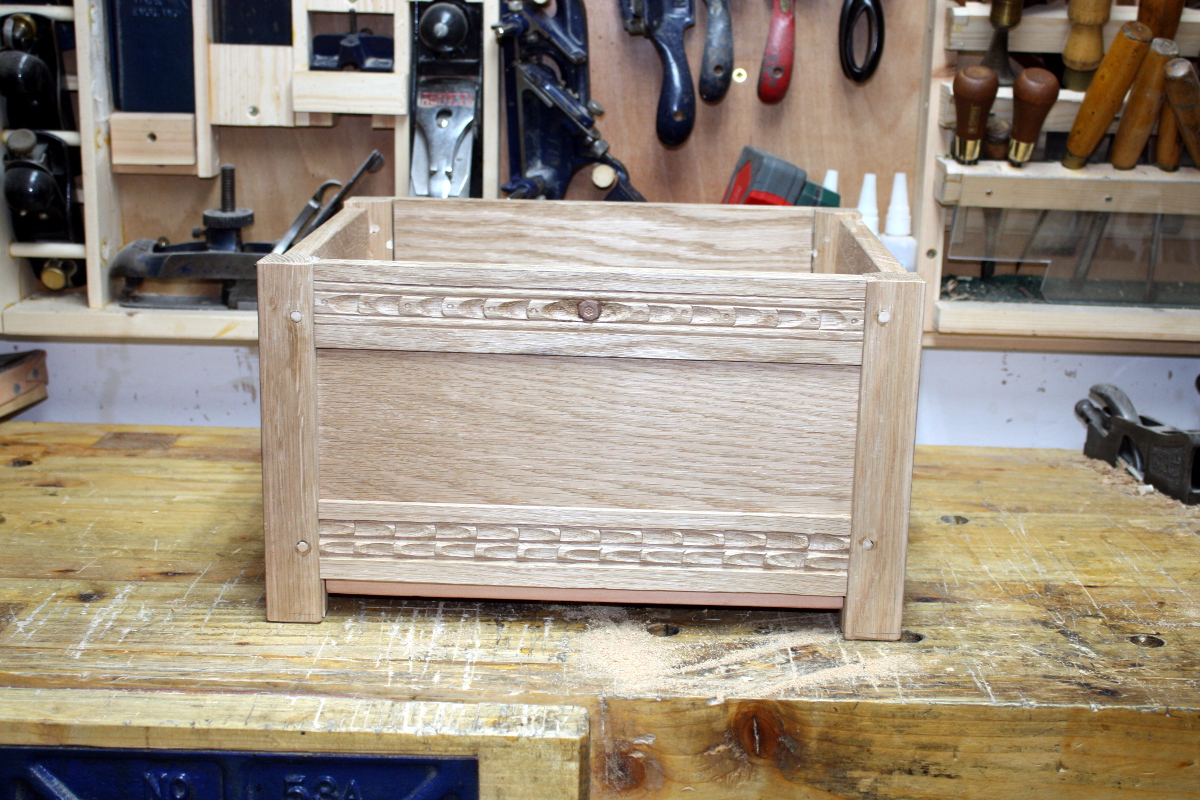
And out with the chisel and just chamfer the new sharp edges, make sure there’s no arises to hurt hands or anything, and did a fingertip check over the whole surface to see if there was any last little thing to take care of.
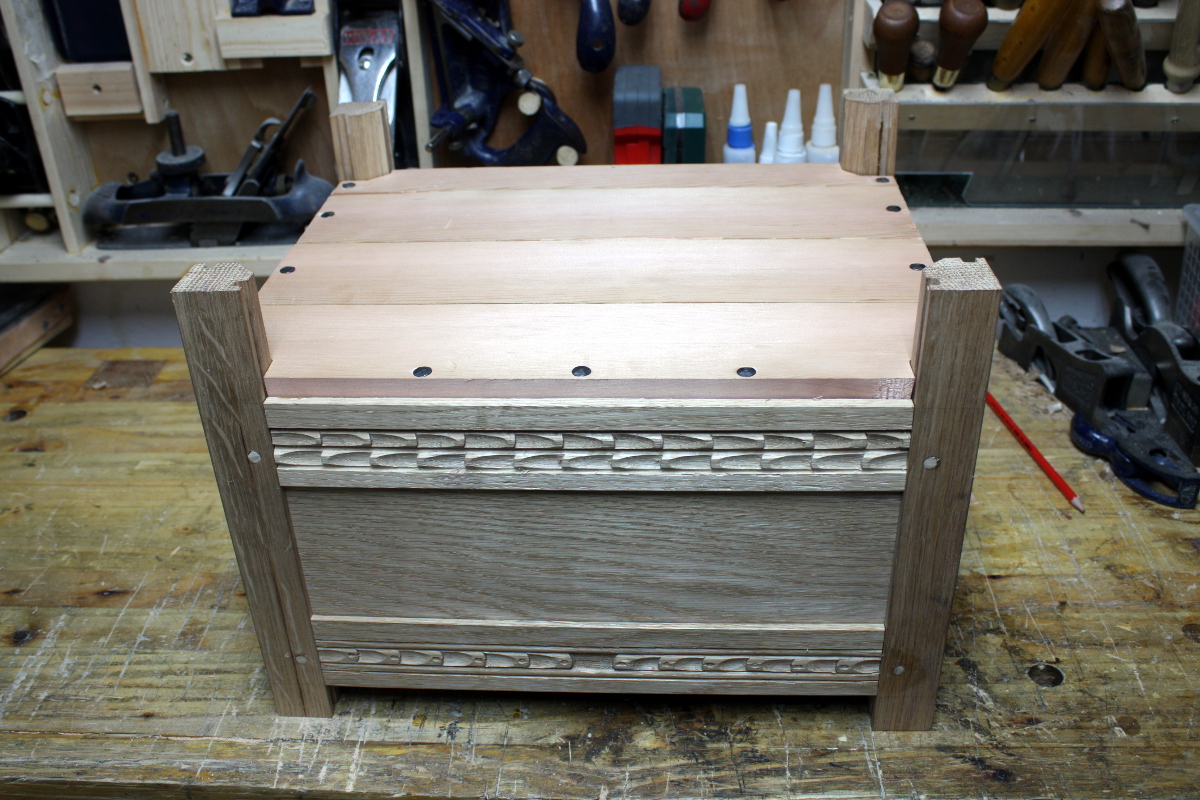
And that’s now ready for finishing.
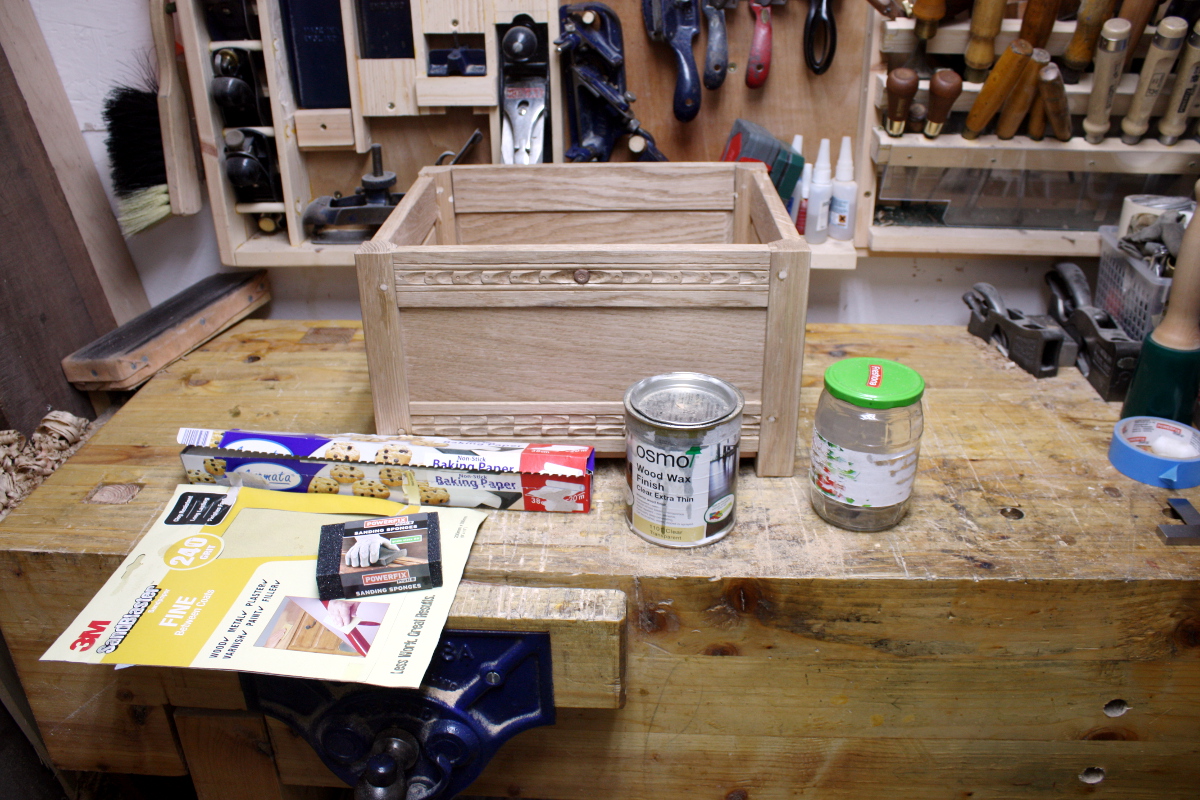
I went over the edges and corners with some 240 grit sandpaper just to soften them a bit, and in some of the groove lines in the carving to clear out any last fuzzy bits, and the inside corners of the chest as well. Then I laid down some parchment paper (I’m not being prissy, but I have a lid yet to build so not dousing the bench in finish would be useful), decanted the last of my Osmo (Hmmm. Need more. Not sure where to get it fast enough. I may need to switch brands of hard wax oil which is never a good idea) and donned some nitrile gloves (because I have about fifty cuts in my fingers at the moment thanks to the #778).

First coat will be heavy and brushed on, left for 15 minutes and then the excess ragged off.
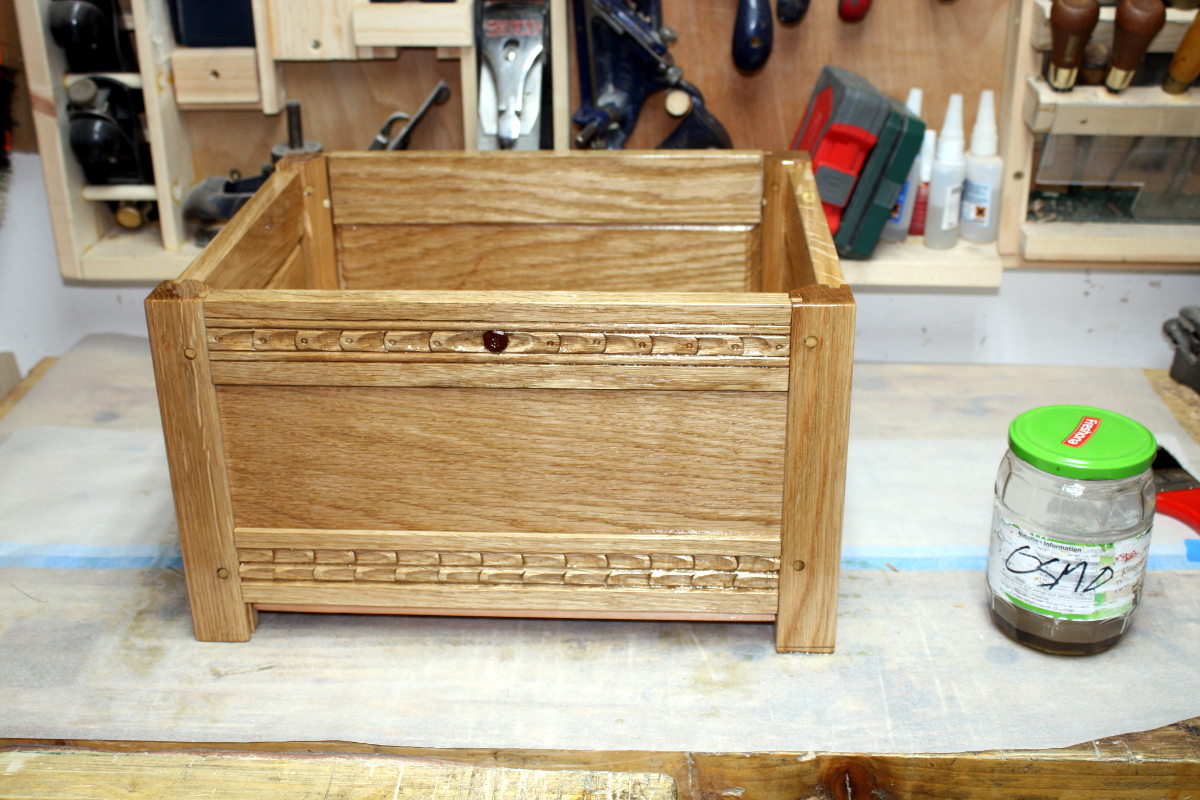
Nice. And now back inside for a cup of tea, and 15 minutes later I came back out and ragged off the excess, and it’ll cure overnight.
Gotta say, it doesn’t look too bad.
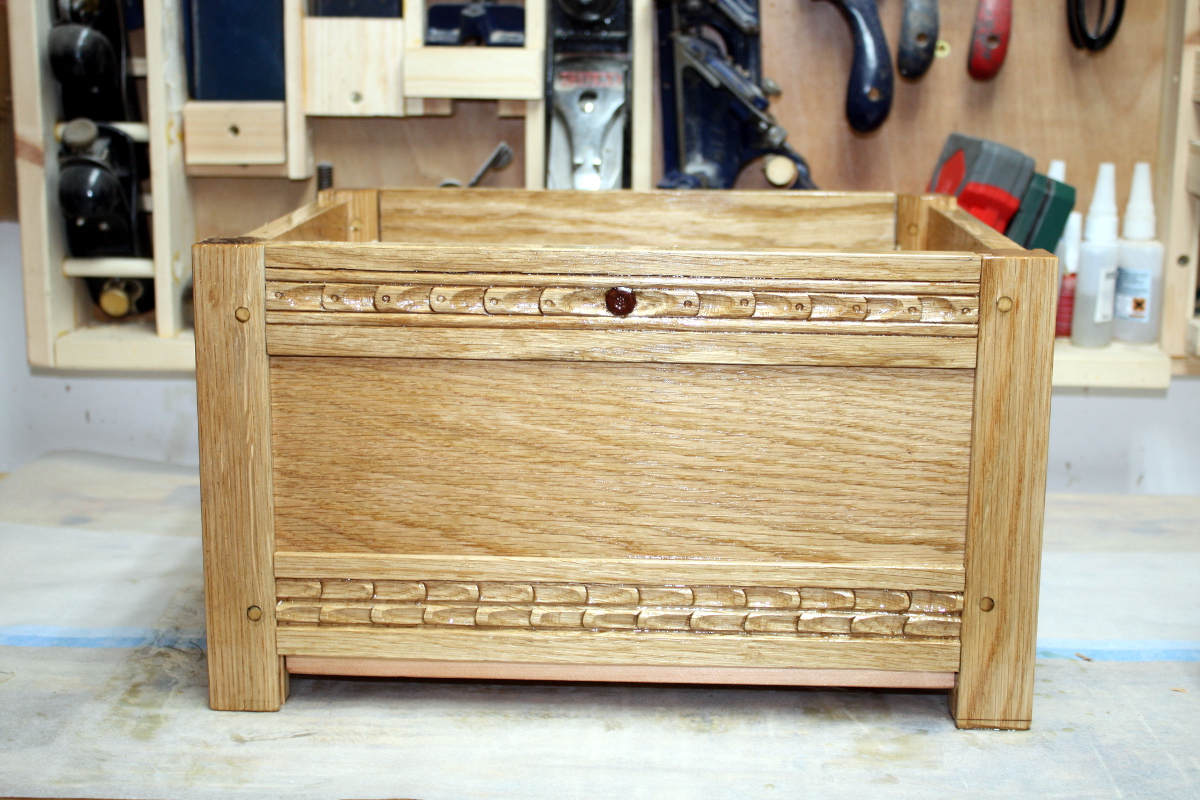
The project’s not done yet – I need to make a lid and install hinges yet. But still. Look! Pretty! 😀
And I do like how the carving draws the eye away from the imperfections in joinery and alignment 😀
TDL:
Rip out lid frame parts- Groove lid frame parts
- Cut lid frame M&T joints and drill for drawboring
- Measure out lid panel size
- Groove lid panel
- Shape lid panel
Cut box tenons and drill M&T joints for drawboringGroove bottom box rails for floorboardsCrosscut floorboards to widthPlane panelsCut panels to final sizeBevel or rebate panel edges to fit grooves in railsPlane away inside corner on stilesCut edge floorboards to fit around stilesClean up drawbore pegs and any missed glue squeezeoutSaw off top hornsPlane top of chest so all four sides are exactly levelWhen floorboards are fitted, stand chest on legs on a flat surface and mark off base of legs to eliminate any wobbleCut legs to sizeShape legs- Assembly
- Hinges
- Finishing with Osmo (three coats at least)
Tags: chisels, hand tools, oak, osmo, Woodworking