[stextbox id=”alert” caption=”Note!” collapsed=”false” shadow=”true”]
Edited to add lots and lots more photos and video.
And this recipe is now up on the boards.ie cooking club!
[/stextbox]
I love pretzels – the large, soft, chewy kind, not the breakfast cereal wannabe crunchy things – but the only place I can buy them round here seems to be Marks&Spencer’s bakery and they don’t even sprinkle them with salt (there’s a fantastic shop that sells them in Kilkenny in the upper floor of the Market Cross shopping center on the main street, but none round here). The other day, I went into M&S to buy some only to find they had none, but instead had taken the dough and made rolls with them. And they were great. And less futzing about is needed to shape the dough, so why not? I put together a decent recipe using a few online recipes and Alton Brown’s good eats episode:
Ingredients 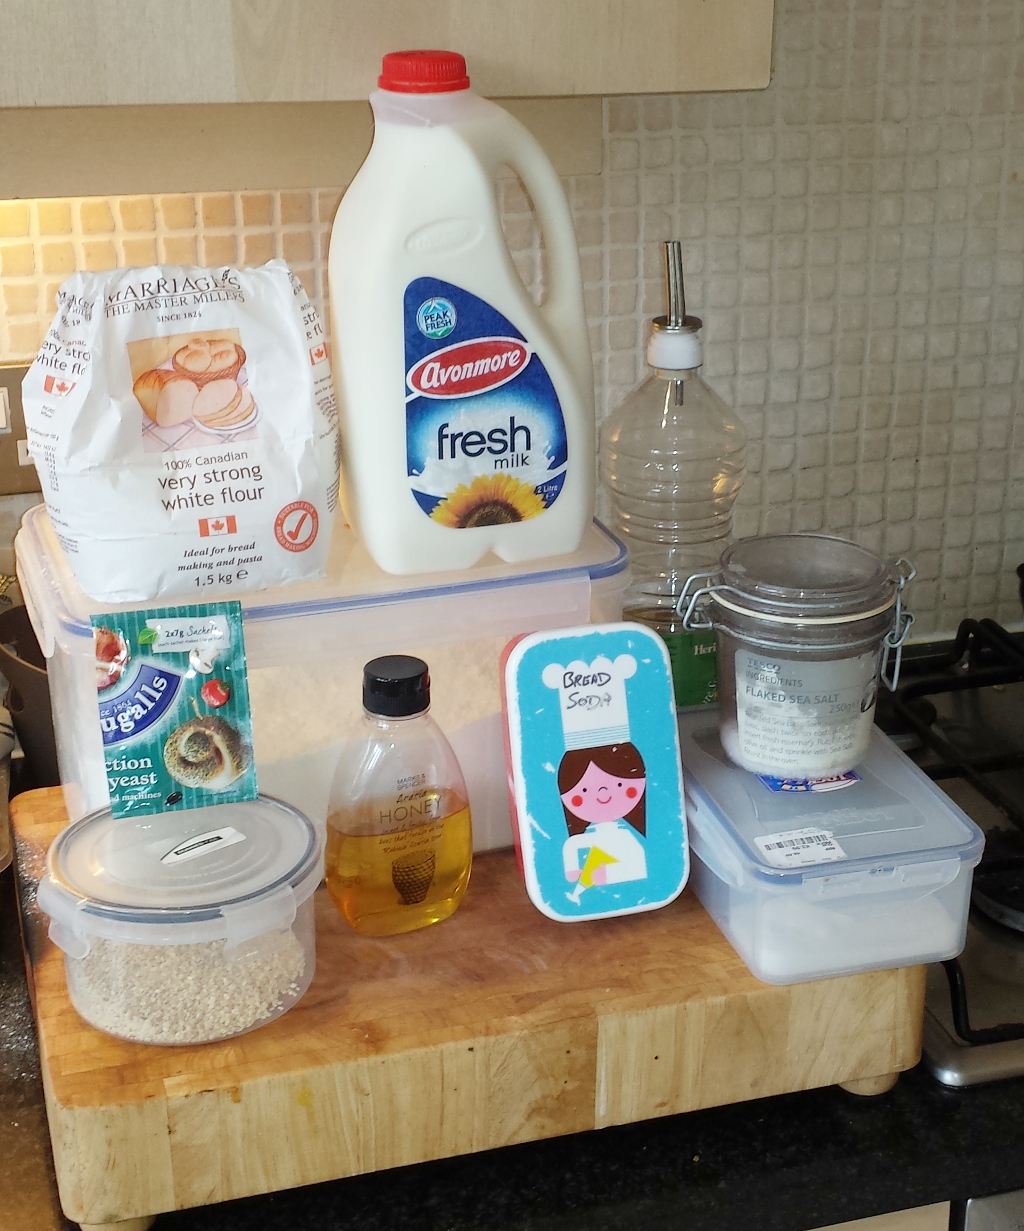 For the dough:
- 1 pkg fast-action yeast (ie. the only kind you find on Irish shop shelves)
- 1 tbsp vegetable oil
- 1 cup warm milk
- 3/4 cup warm water
- 1.5 tsp salt
- 1 tbsp honey
- 1 cup bread flour
- 2.5-3 cups plain cream flour
For the alkali bath:
- 3 litres water
- 2 tbsp sugar
- 1/2 cup bread soda
And you need coarse salt, poppy seeds or sesame seeds for sprinkling. Unless you want to make baldies (which aren’t horrible, but really, you’ll prefer these with toppings, and I personally prefer the sesame seeds myself). You don’t need to use a stand mixer to make this recipe, by the way… but unless you have popeye’s arms, you’ll want one. Start off by adding the oil and salt to the bowl of your stand mixer. 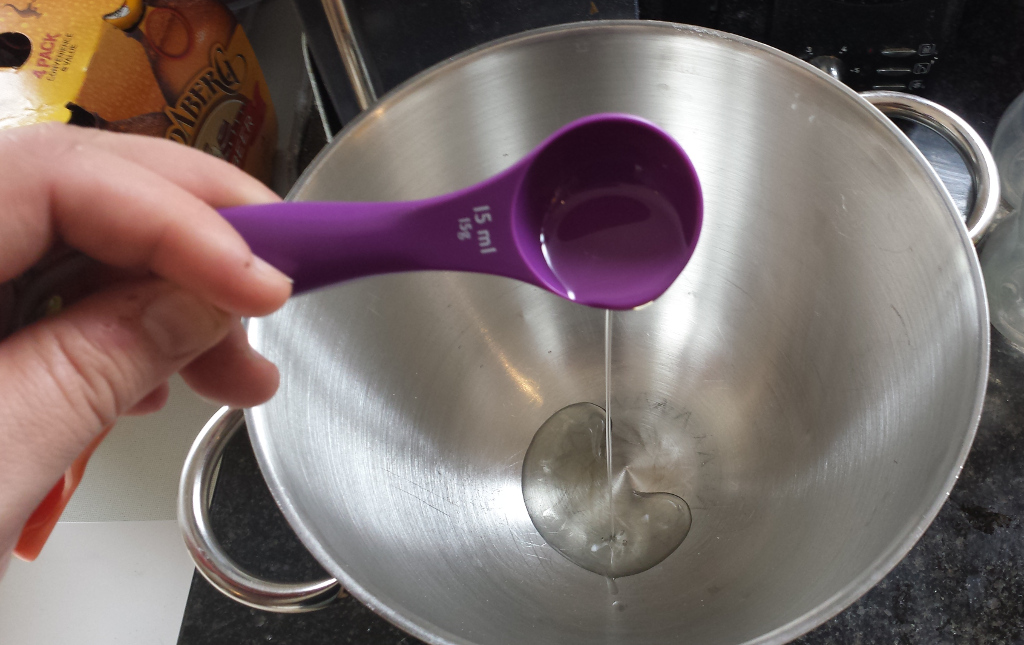 New measuring spoons. Aren’t you jealous? Oh yeah baby…
 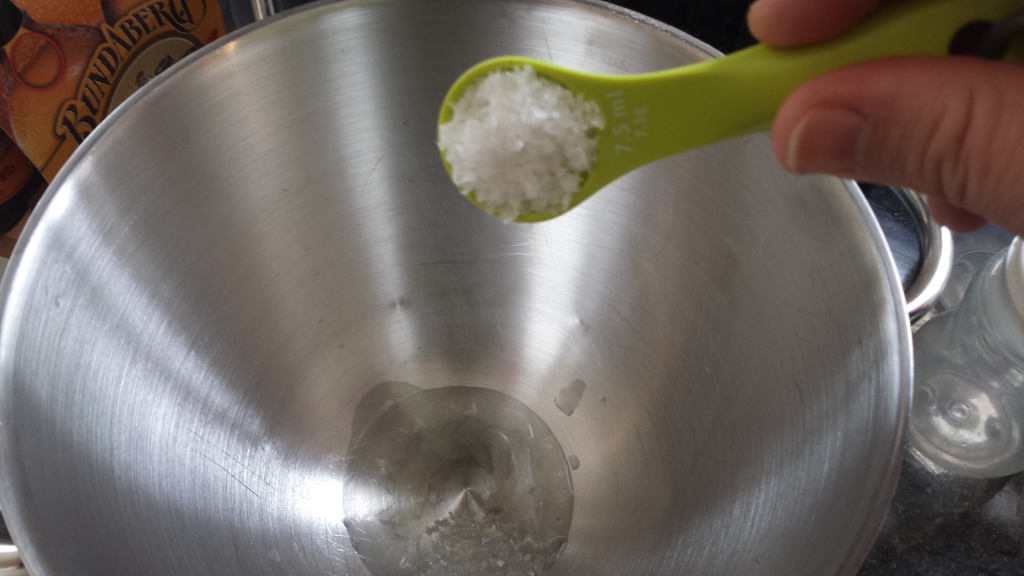 Now mix the water and milk in a microwave safe jug and nuke it till it’s warm (not hot, and definitely not boiling – we want to give the yeast a headstart, not kill them).
 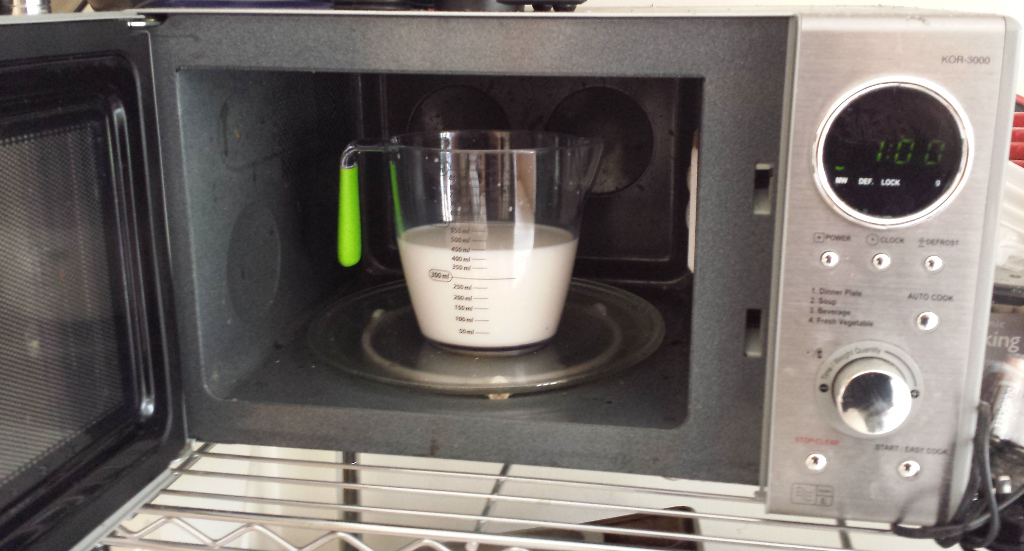 And once it’s warm, add it to the bowl.
 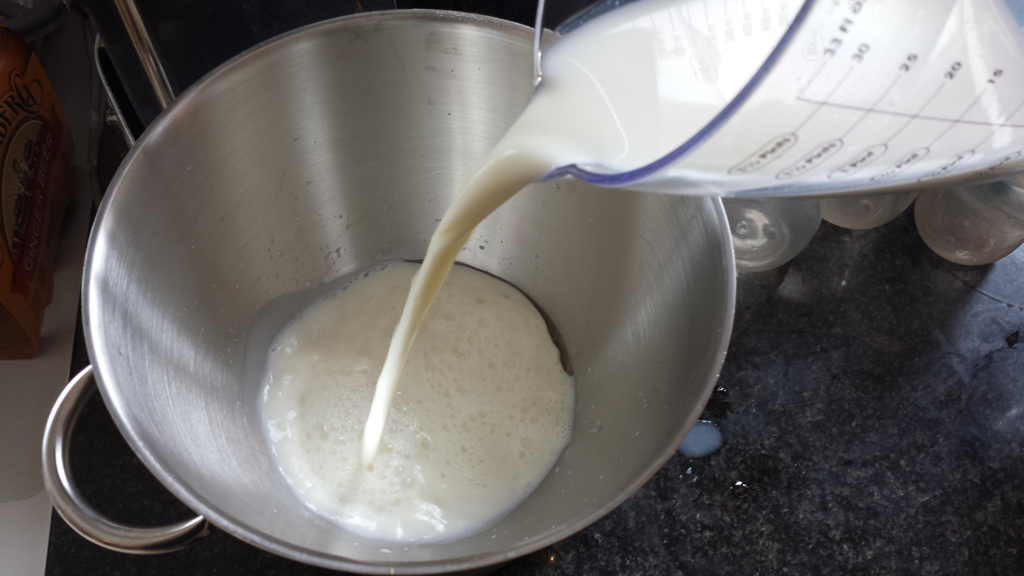 Now attach the paddle and mix that for a few seconds (mainly you’re getting oil and liquid up the sides of the bowl here to stop the dough clambering out later on).
 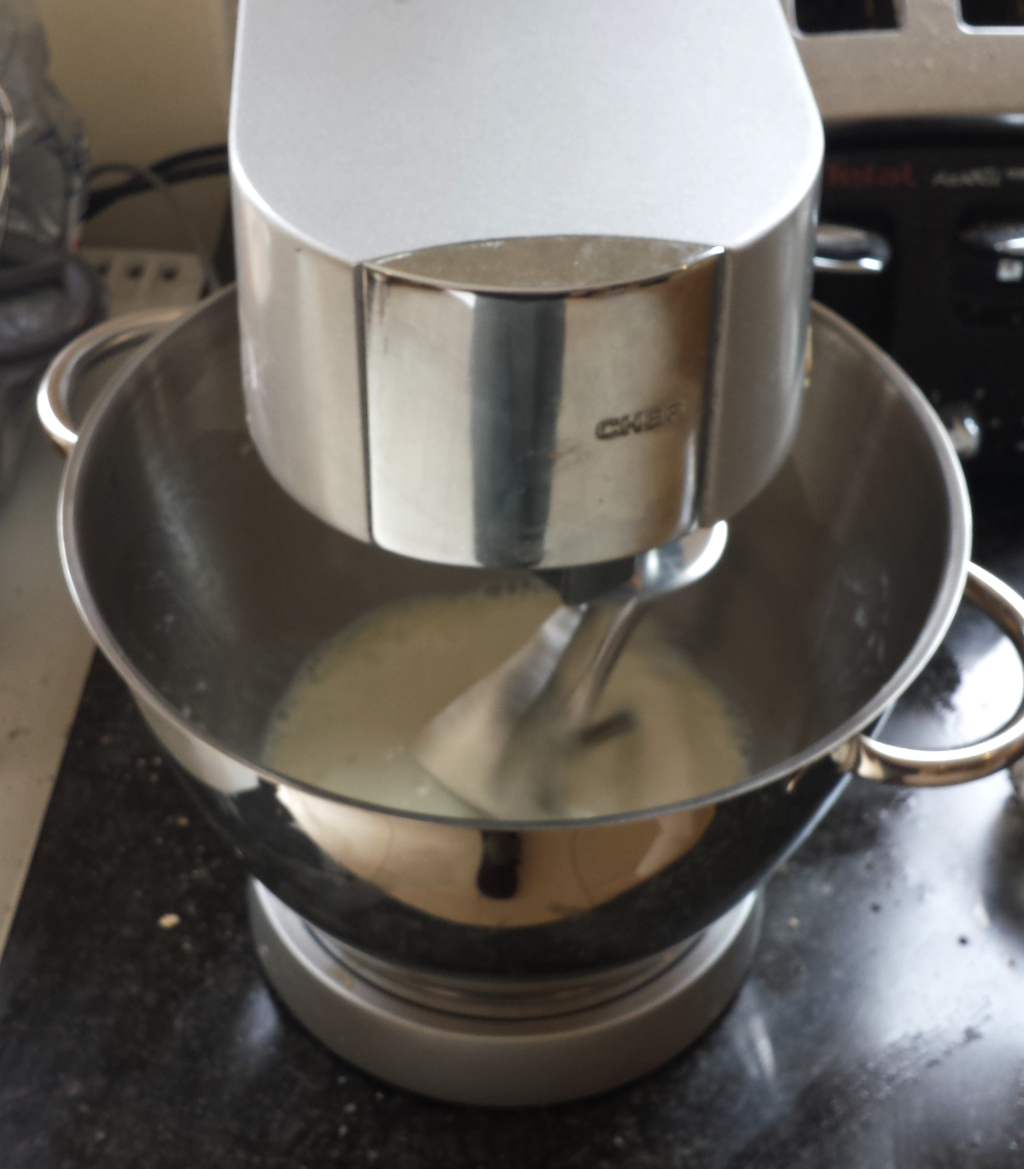 Now add the flour. I start off with the bread flour (and don’t you dig my sweet 1 cup measure?)
 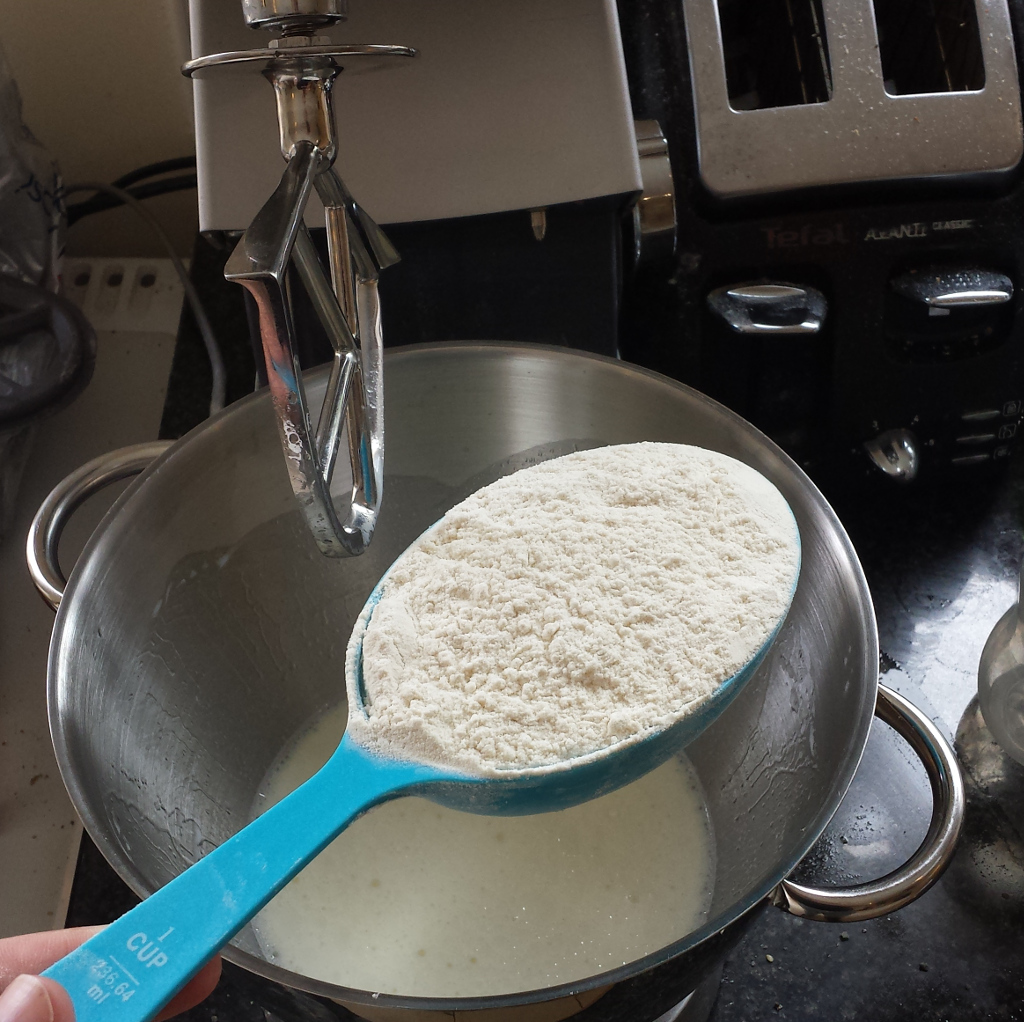 Now add two of the cups of plain flour (just two, hold off on the last half-to-one cups)
  Now add in the yeast on top of the flour.
 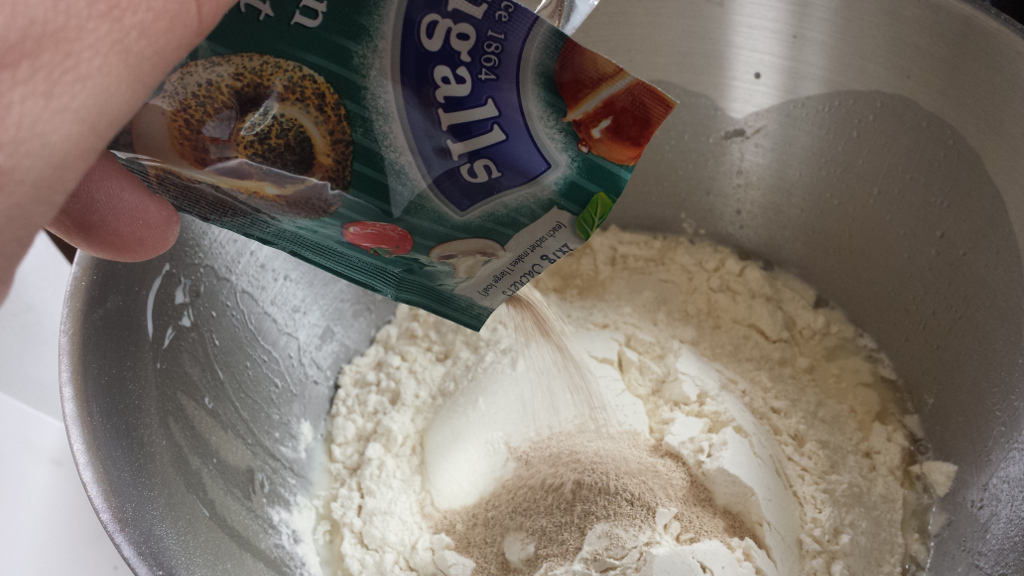 And now add the honey on top of the yeast (we want the yeast to have easy acces to the sugar)…
 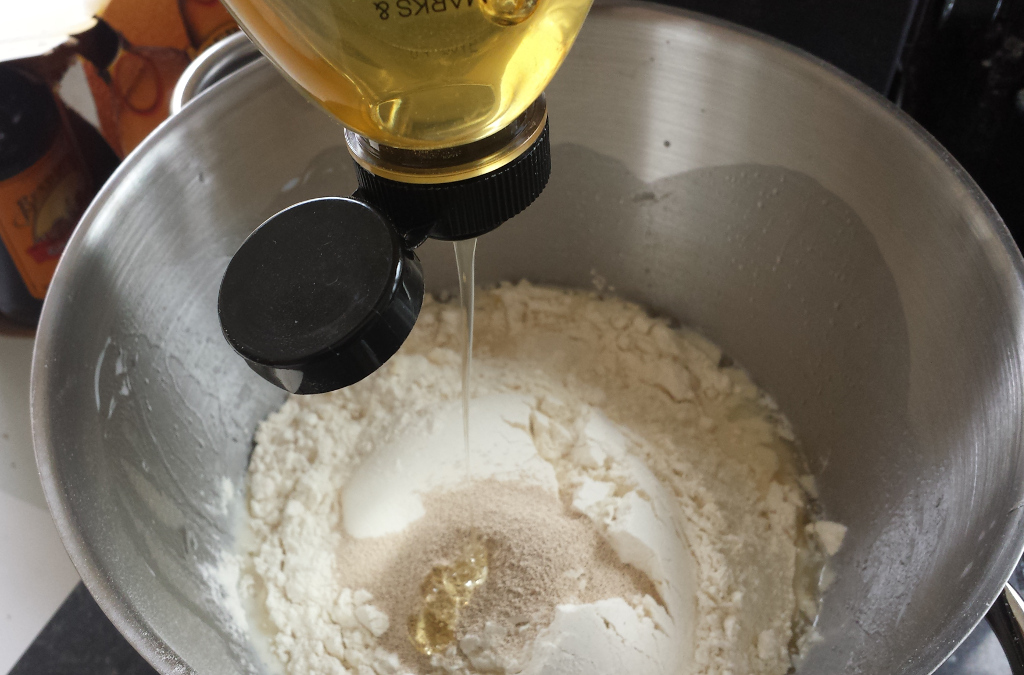 And now add the next half cup of plain flour on top of the honey (note that I’ve very cleverly switched to a quarter-cup measure here. I’d use the half-cup measure but my toddler used it as a drumstick and broke it…)
 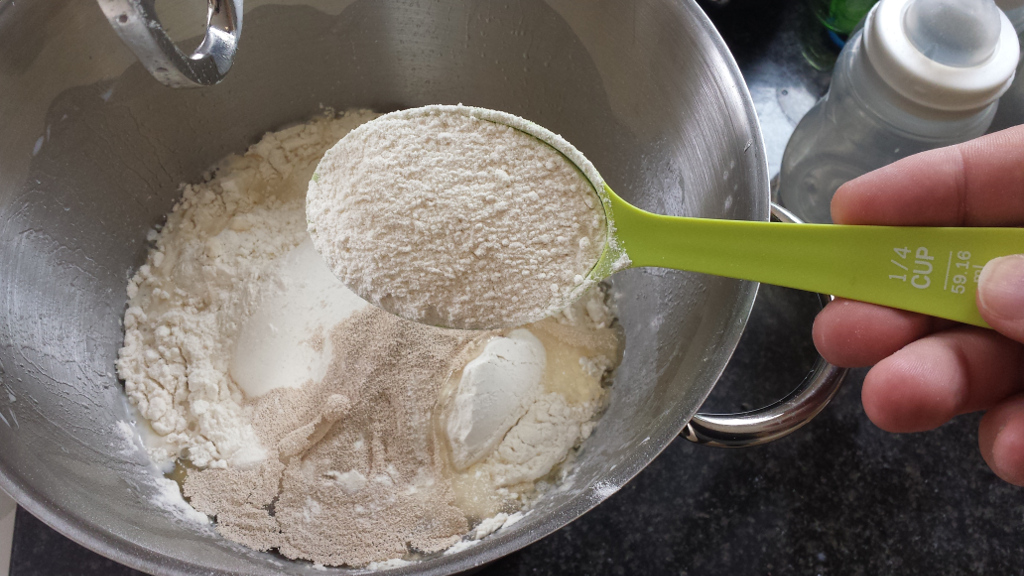 Now mix this with the paddle until it all comes together in one large sticky mess (shouldn’t take more than 30 seconds).
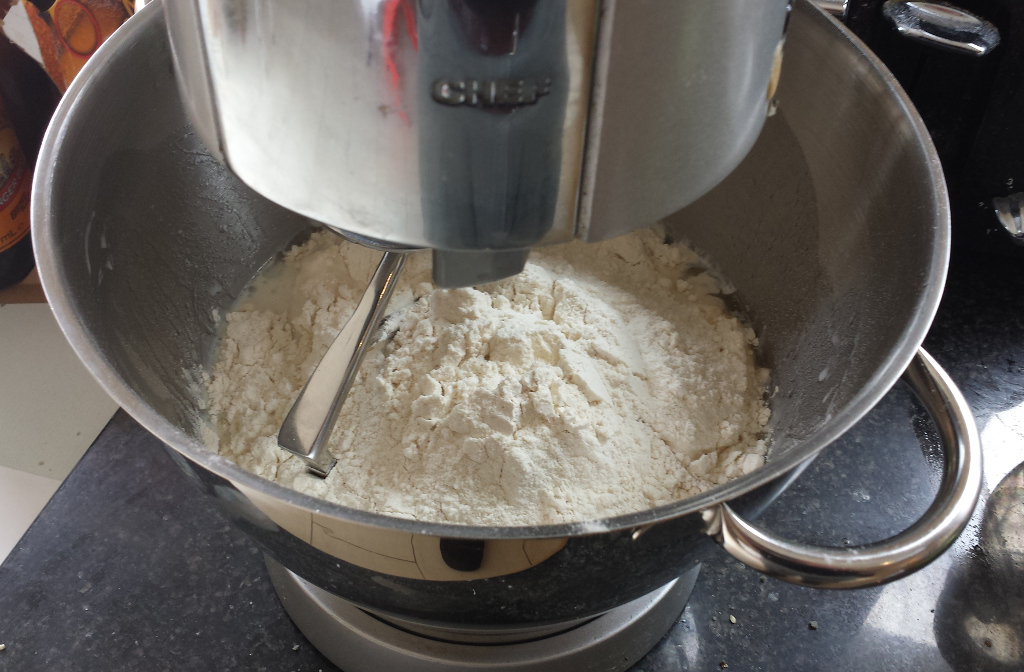
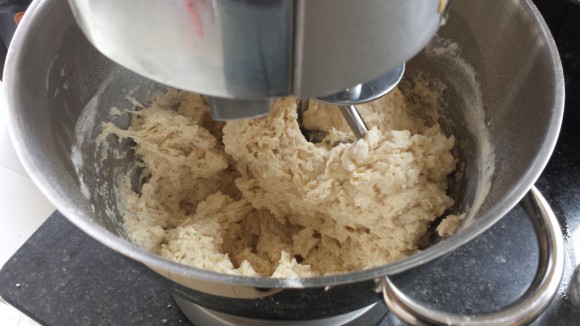 This really is too sticky so far – look at how the dough is sticking to the bowl over there on the left and tearing away in strings. We’re nowhere near okay here, so let’s go ahead and add in the next quarter cup of plain flour.
 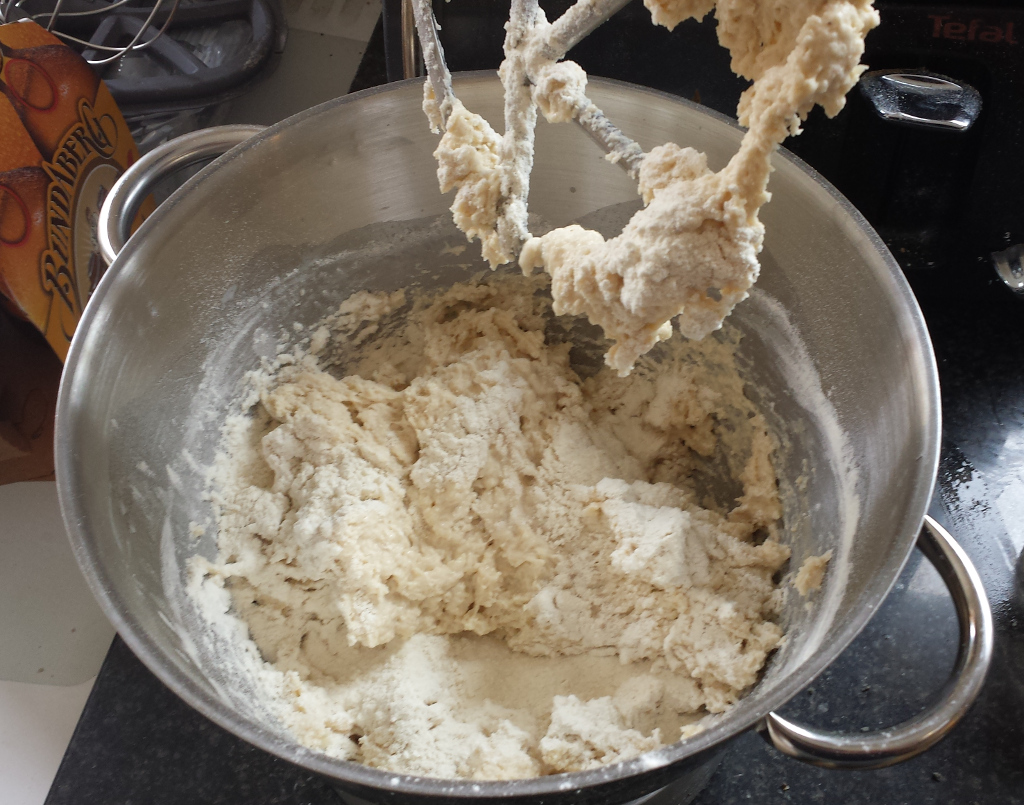 And we mix again…
 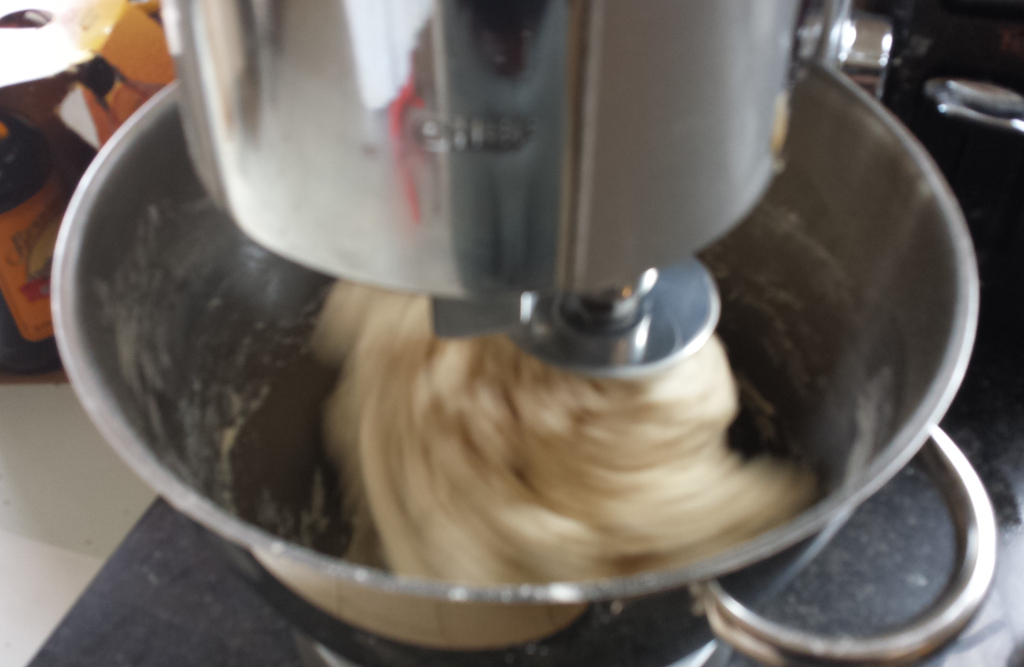 Notice how the dough has all come together in one mass and is pulling away from the sides of the bowl? That’s good, that’s what we want to see. We’re almost at the right consistency now. This is the big thing about making a dough, hence all the photos – get the mix right and the rest is a doddle. So we stop the mixer here and take a peek. Open the mixer, and clean the dough off the paddle with your hands and take a look.
 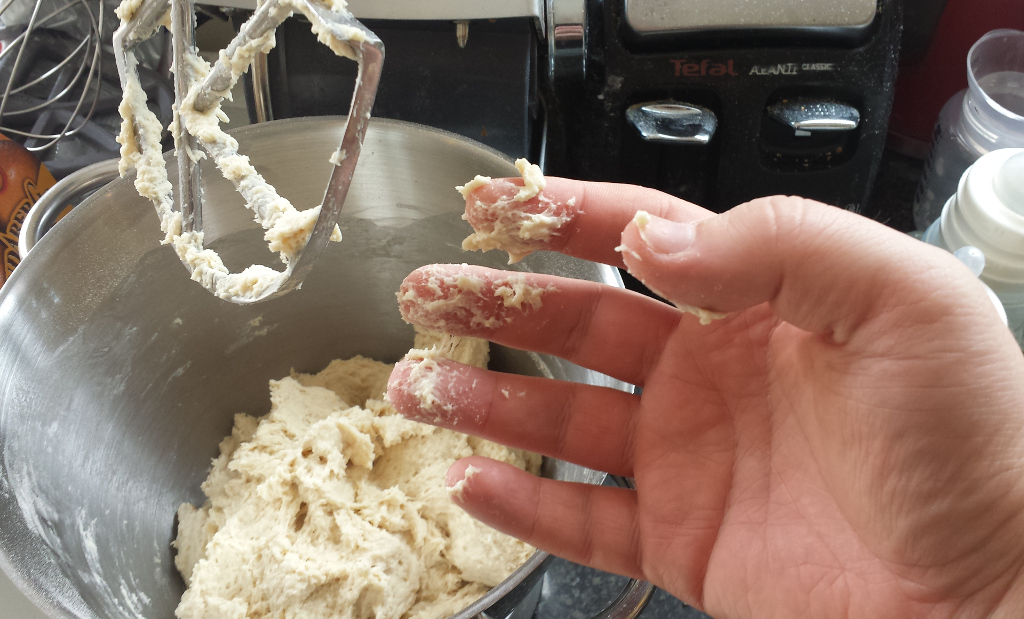 See how it’s still stuck to my fingertips? Means it doesn’t have enough flour yet. How much you need to add depends on the humidity in the kitchen, the flour’s age and how it was stored and so on, so you basicly add in the 2.5 cups at the start and then add in more until the dough’s done. Most of the time, it takes three cups. Sometimes not so much; once or twice it’s needed a little more. Add another quarter cup at this stage, spin the dough for a few seconds until it all comes together again, then stop the mixer again, open it, clean off the paddle and check your fingertips.
 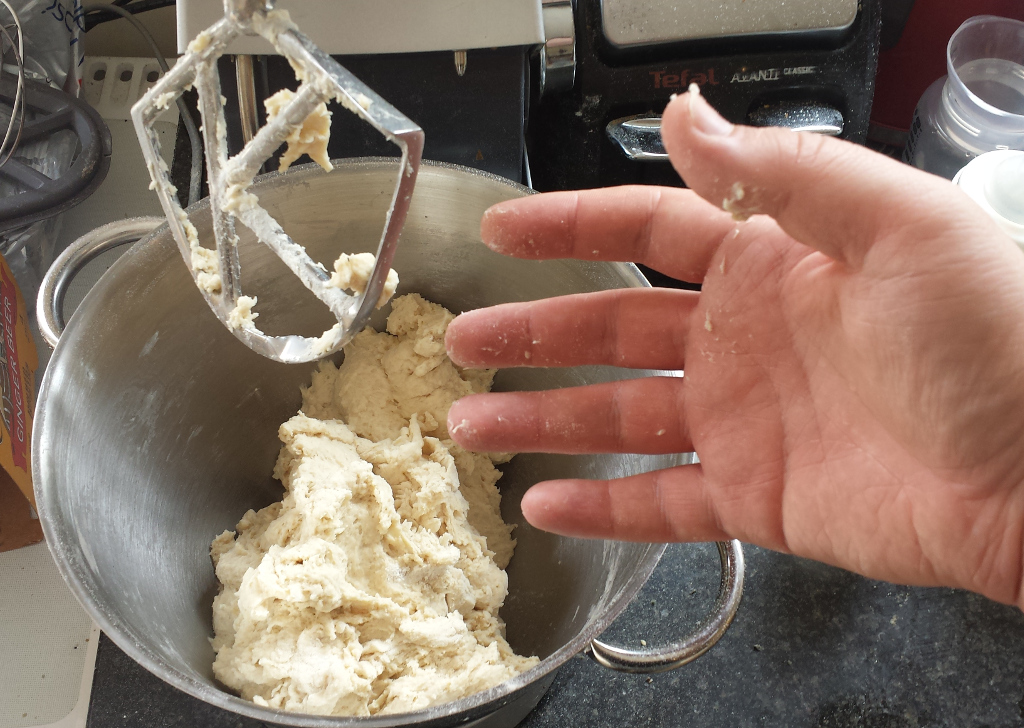 All clean. Okay, we should have about the right amount of flour in there now. Take off that paddle and attach your dough hook.
 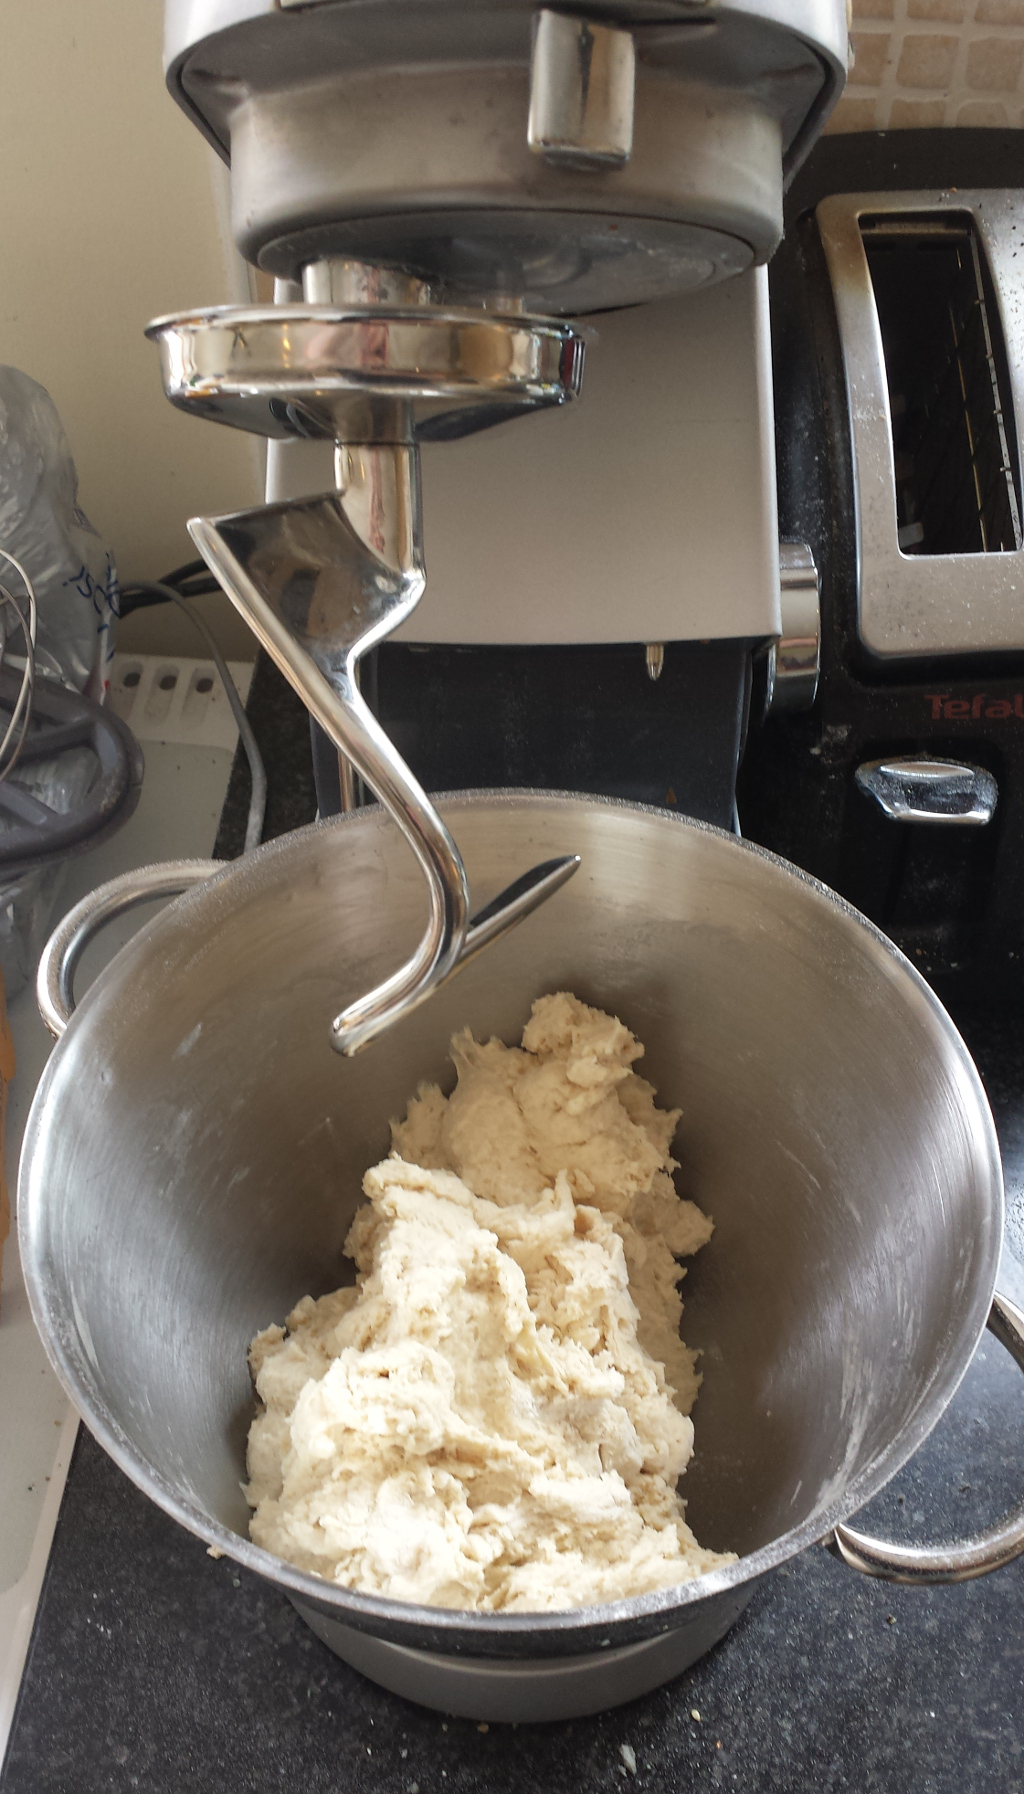 Okay. Now do nothing. Not a thing. Don’t touch it. Go clean up the mess you’ve made so far, go read a book, go have coffee, whatever. This is autolysing, and it’s letting the flour start to absorb the liquid in the dough. It’s a trick taken from making pizza dough, and it gives the final bread’s texture a really nice chew. Come back in ten minutes.
 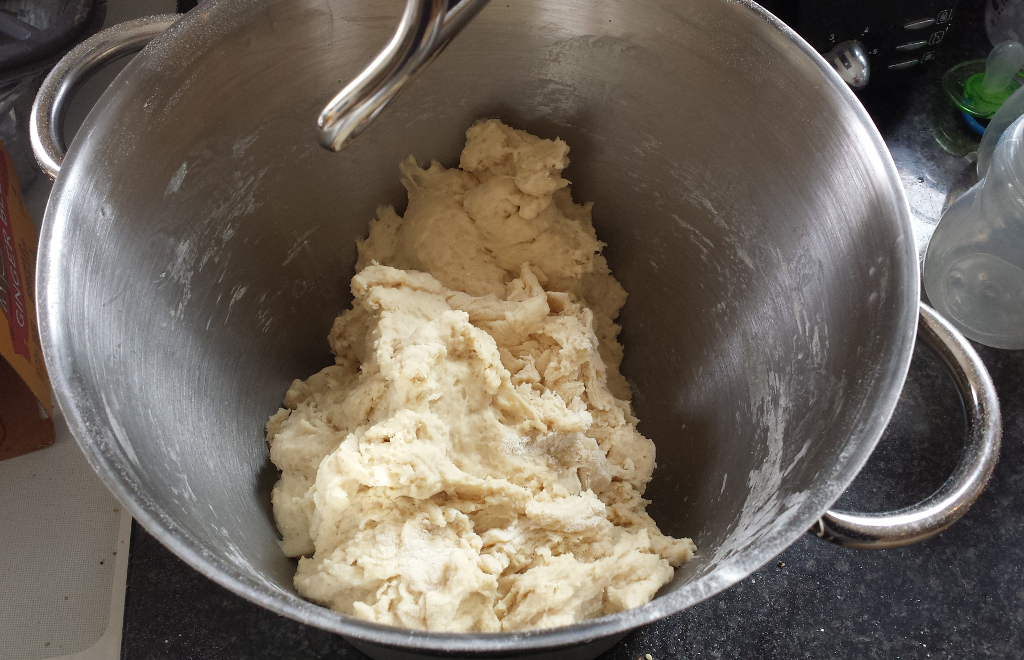 Yeah, it doesn’t look so different on the surface, but if you poked it before and poked it now, you’d notice it wasn’t as sticky now. Okay, time to use the dough hook. Medium speed for about four minutes will do the trick.
 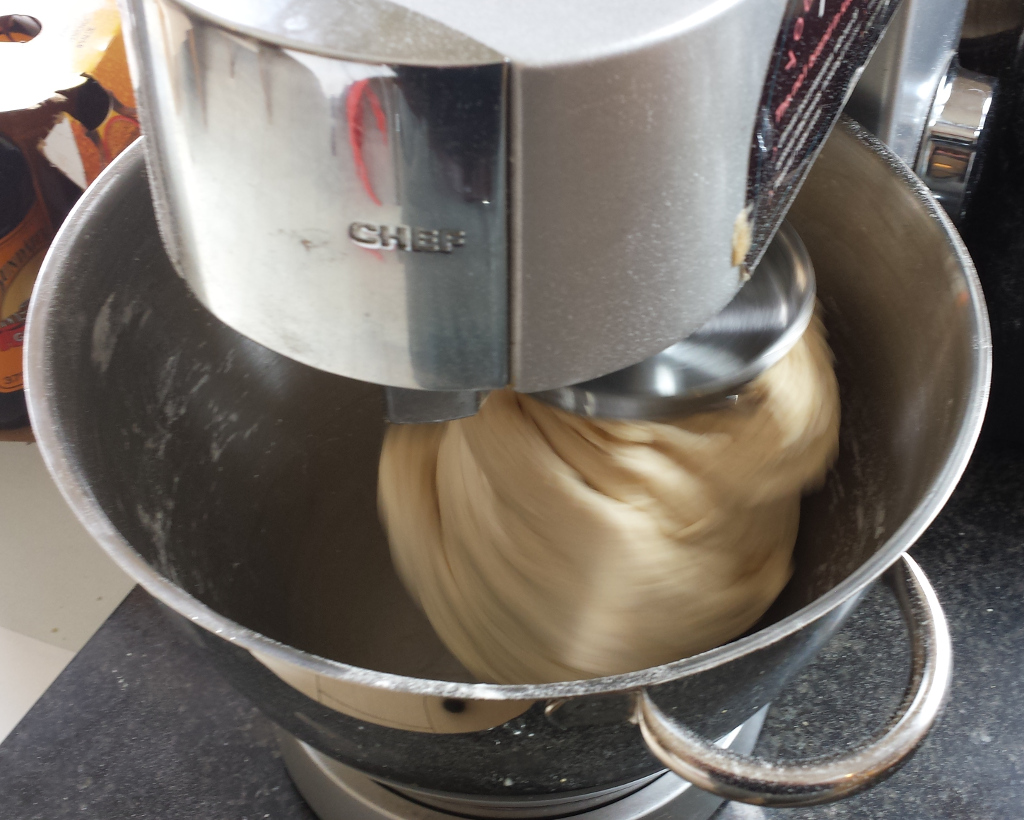 Okay, now remove the dough hook, flour a work surface and turn the dough out onto it.
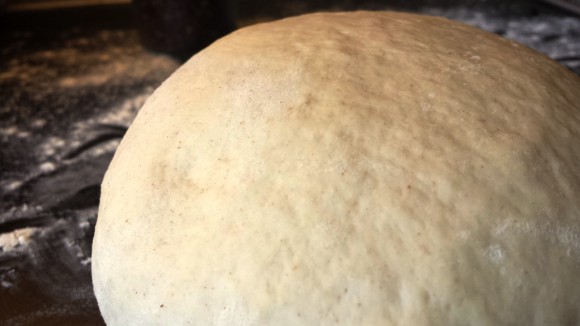
 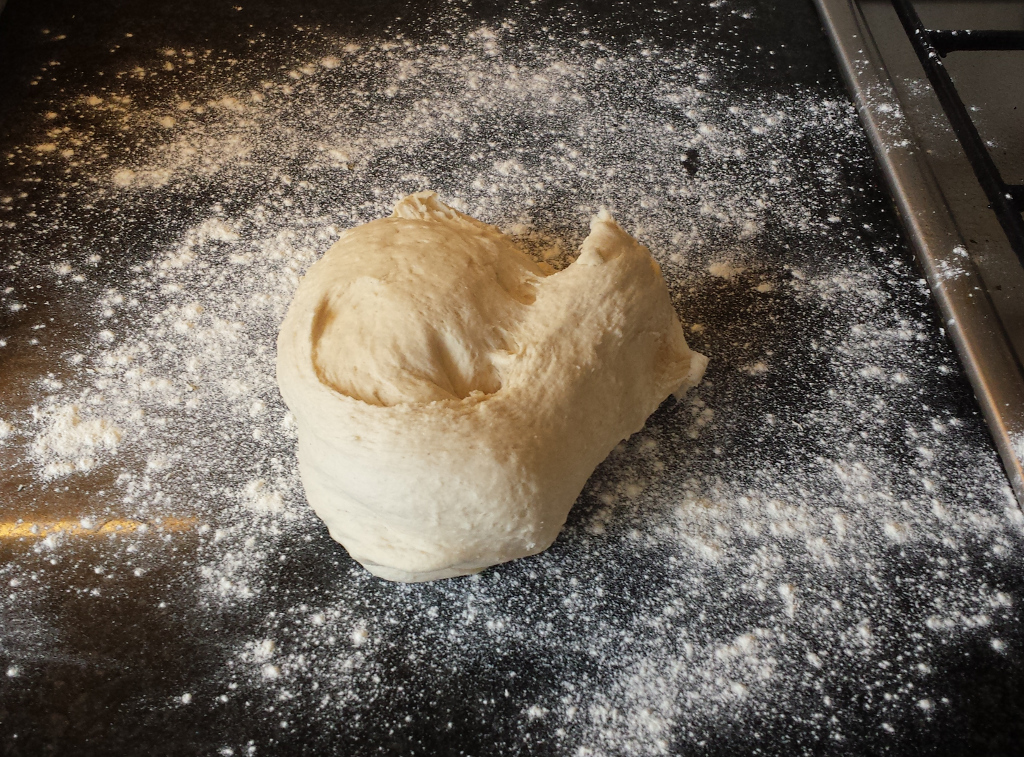 That was meant to be lightly floured but I slipped 😀 Now you want to knead it, folding and spinning it for a minute or so, just until it feels nice and satiny. Like this, only with two hands (I had to hold the camera on my own here!) Once it’s there, you need to shape it into a ball with a nice tight skin, so basicly you turn over the dough so the part you were repeatedly folding into is underneath, and then you sort of scoop and turn the dough – look, it’s easier to show this, honestly: By the way, in my defence, that is not a douchebaggy bling bracelet thing. It’s a medical bracelet (me and penicillin do not get on). Just saying. Because it seriously looks douchy. Anyway… you should end up with a nice doughball with a tight skin.
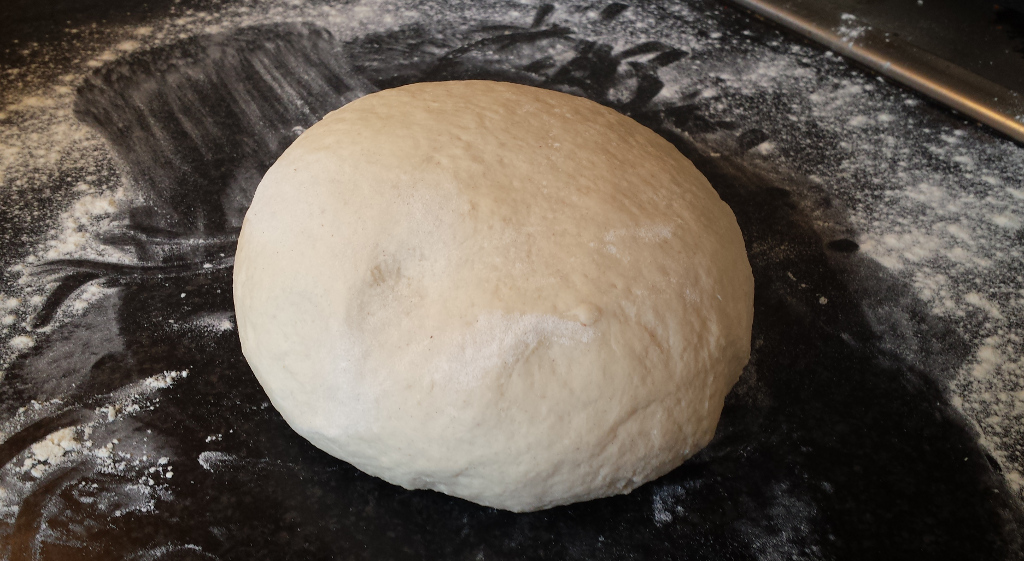
 Wash out the mixer bowl, put the dough back into the mixer bowl, pour a tablespoon or so of vegetable oil over it and toss to coat the dough and the bowl.
 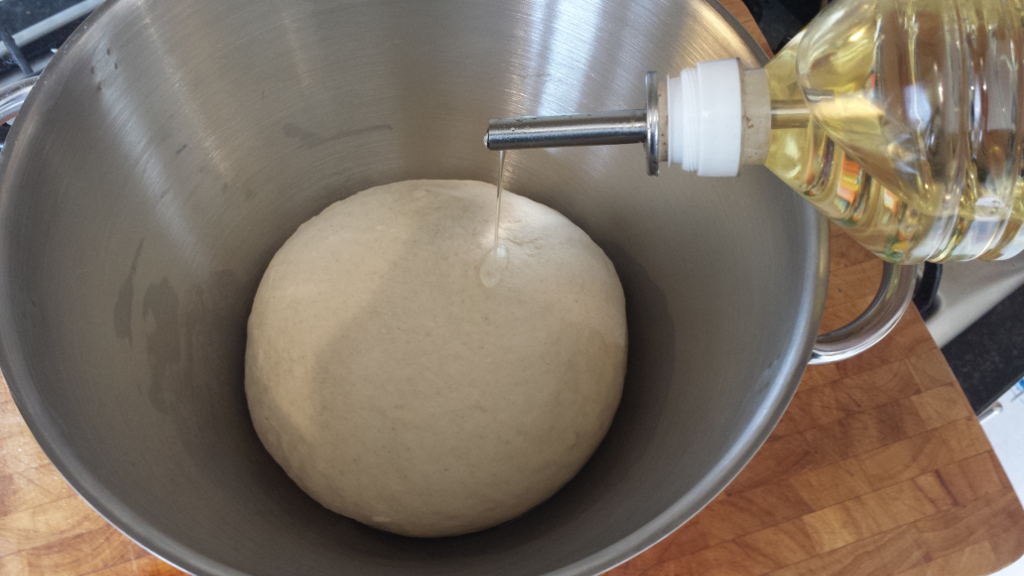 Now make sure the tight skin of the doughball is uppermost and cover it lightly with cling film like so:
 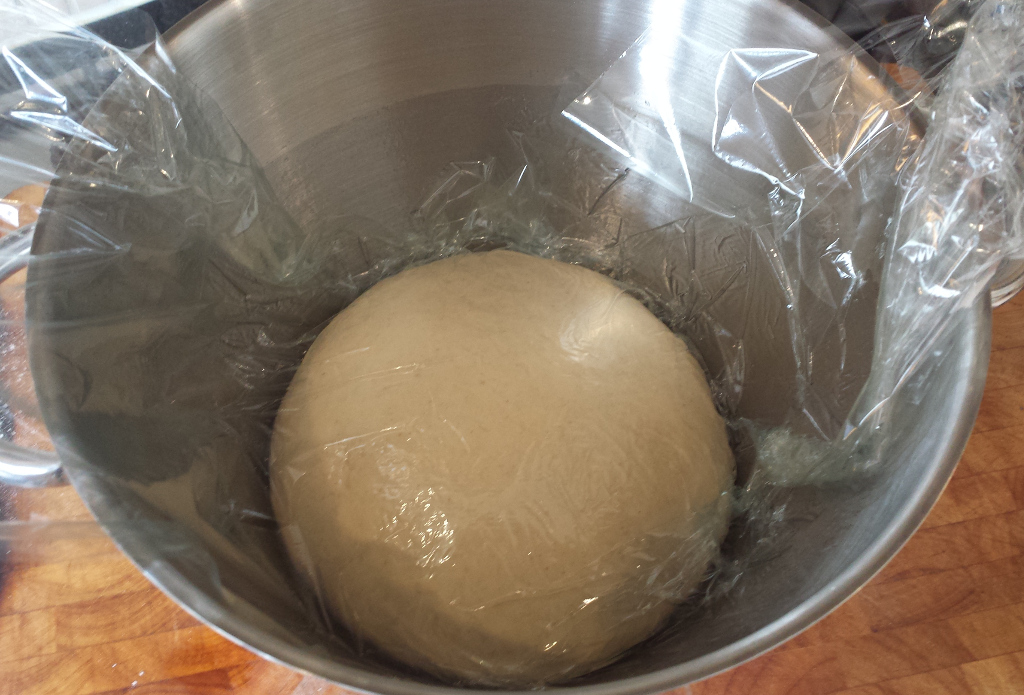 Now wait for at least ninety minutes. I dunno, go read a book or do the shopping or something. After the ninety minutes, you want to see the dough has doubled or more in size.
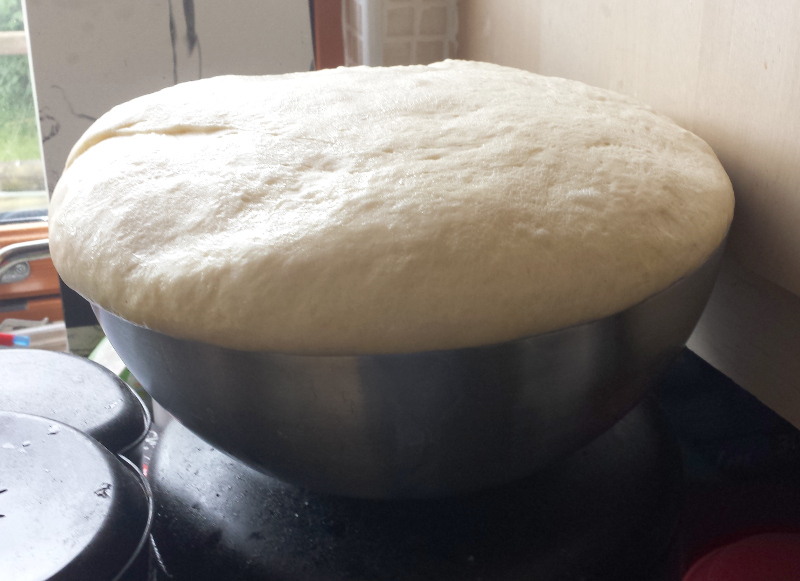
  At this point, I should mention that if you make a double batch of this recipe, you will need a bigger bowl. A much bigger bowl…
At this point comrade, you either bake or you flee.
Turn out the dough onto a work surface (you don’t need to flour it at all, the dough’s covered in oil and that’s more than enough to stop it sticking)  And now comes the stage where the books all say knock it back or punch it down or whatever, and really, that’s not what you’re doing, you’re redistributing all the bubbles so that you have a flat sheet of dough, so take it easy and with a light hand (actually two of them, but one of mine was holding the camera here), turn it into something that looks like foccacia: It doesn’t have to be rectangular I guess, but you do want it all flat and even:
 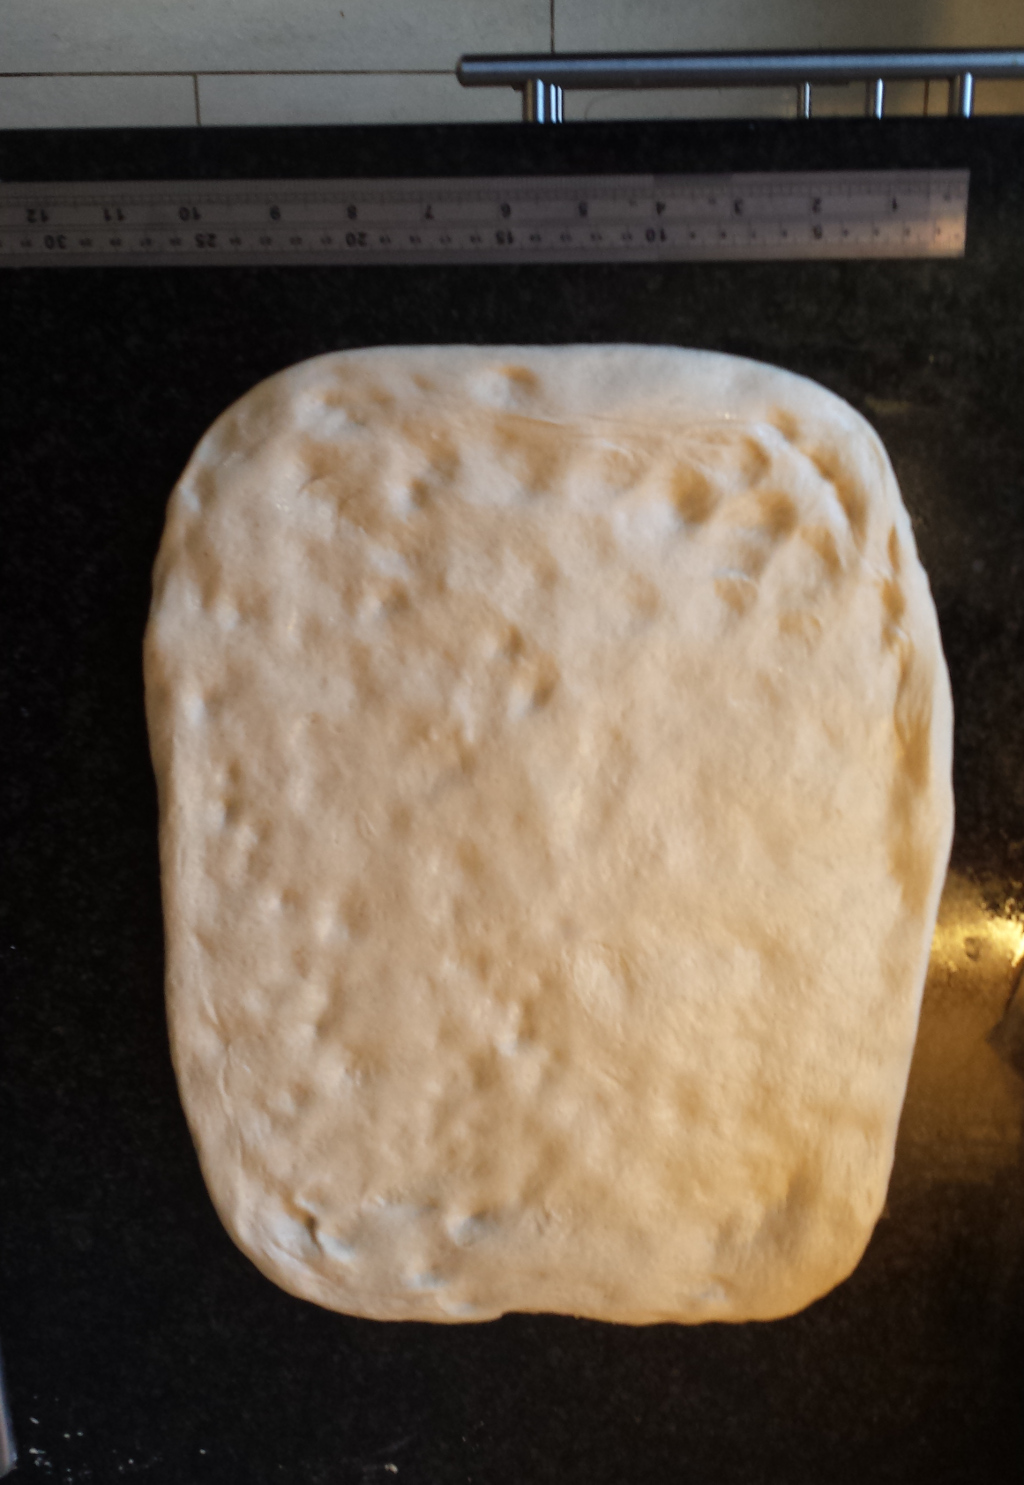 Now you want to portion it. That much dough should be split into 10-12 pieces. They’ll look small, don’t worry about that, they’ll expand during proofing and again during the alkali bath. 8 pieces would be too large, 16 too small. 10-12 are a fairly decent size for rolls and here I’ve gone with 12 (if I was making the traditional shape for pretzels though, I’d go with 8). I find the easiest thing is to use a very long metal ruler I use for pastry and just gauge it by eye and use the ruler as a straight edge to dent the dough:
 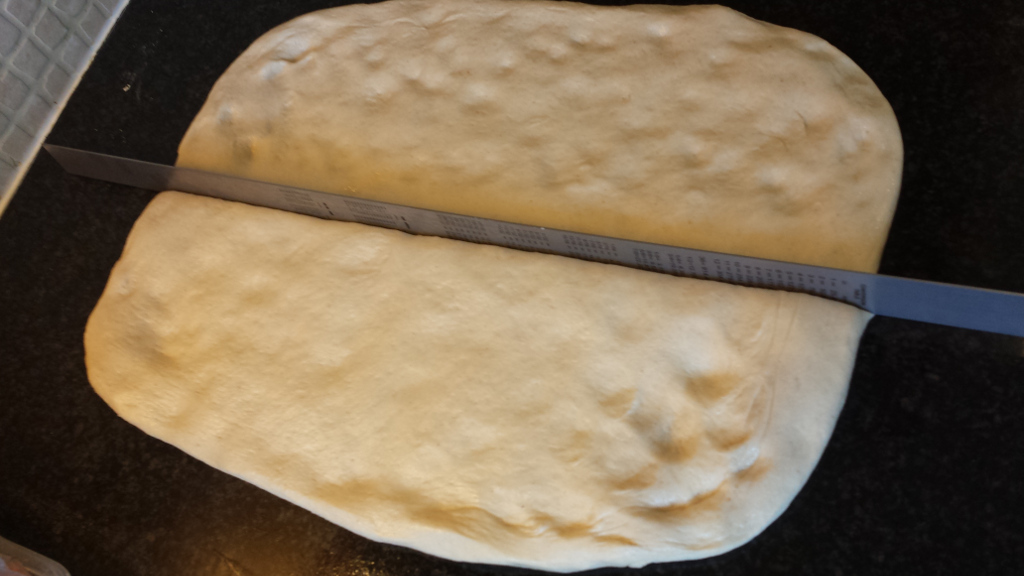 I normally wouldn’t shove it in that deep, but I wanted it to stay upright for the photo. You just want to mark the surface of the dough really, to decide on the portions:
 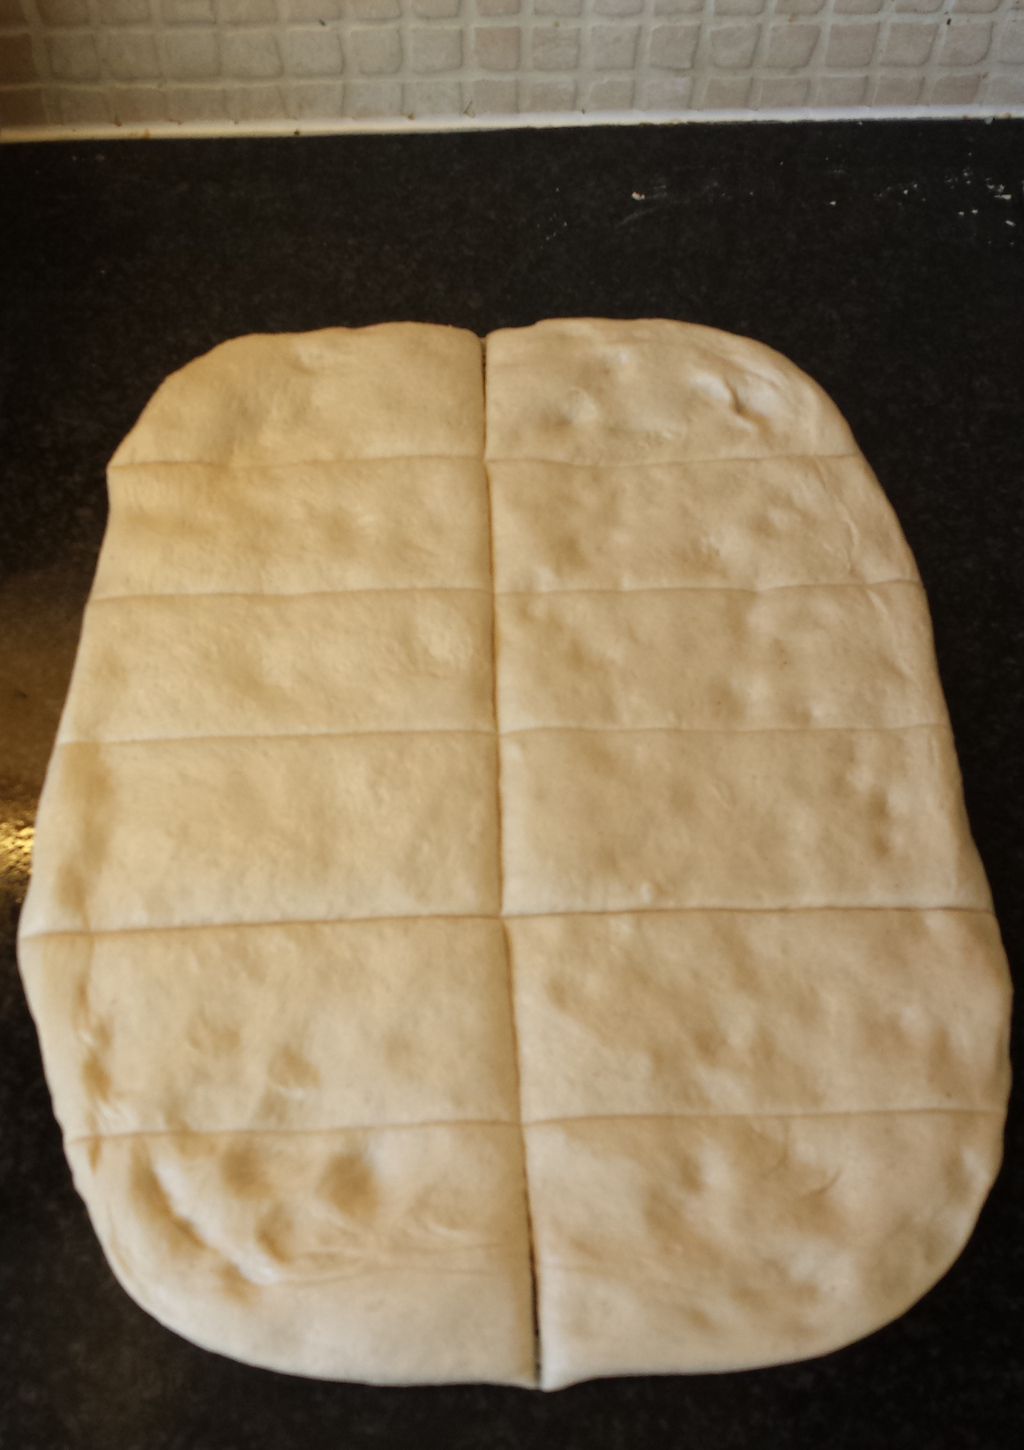 Okay, now what? It’s trusty pizza cutter time!
 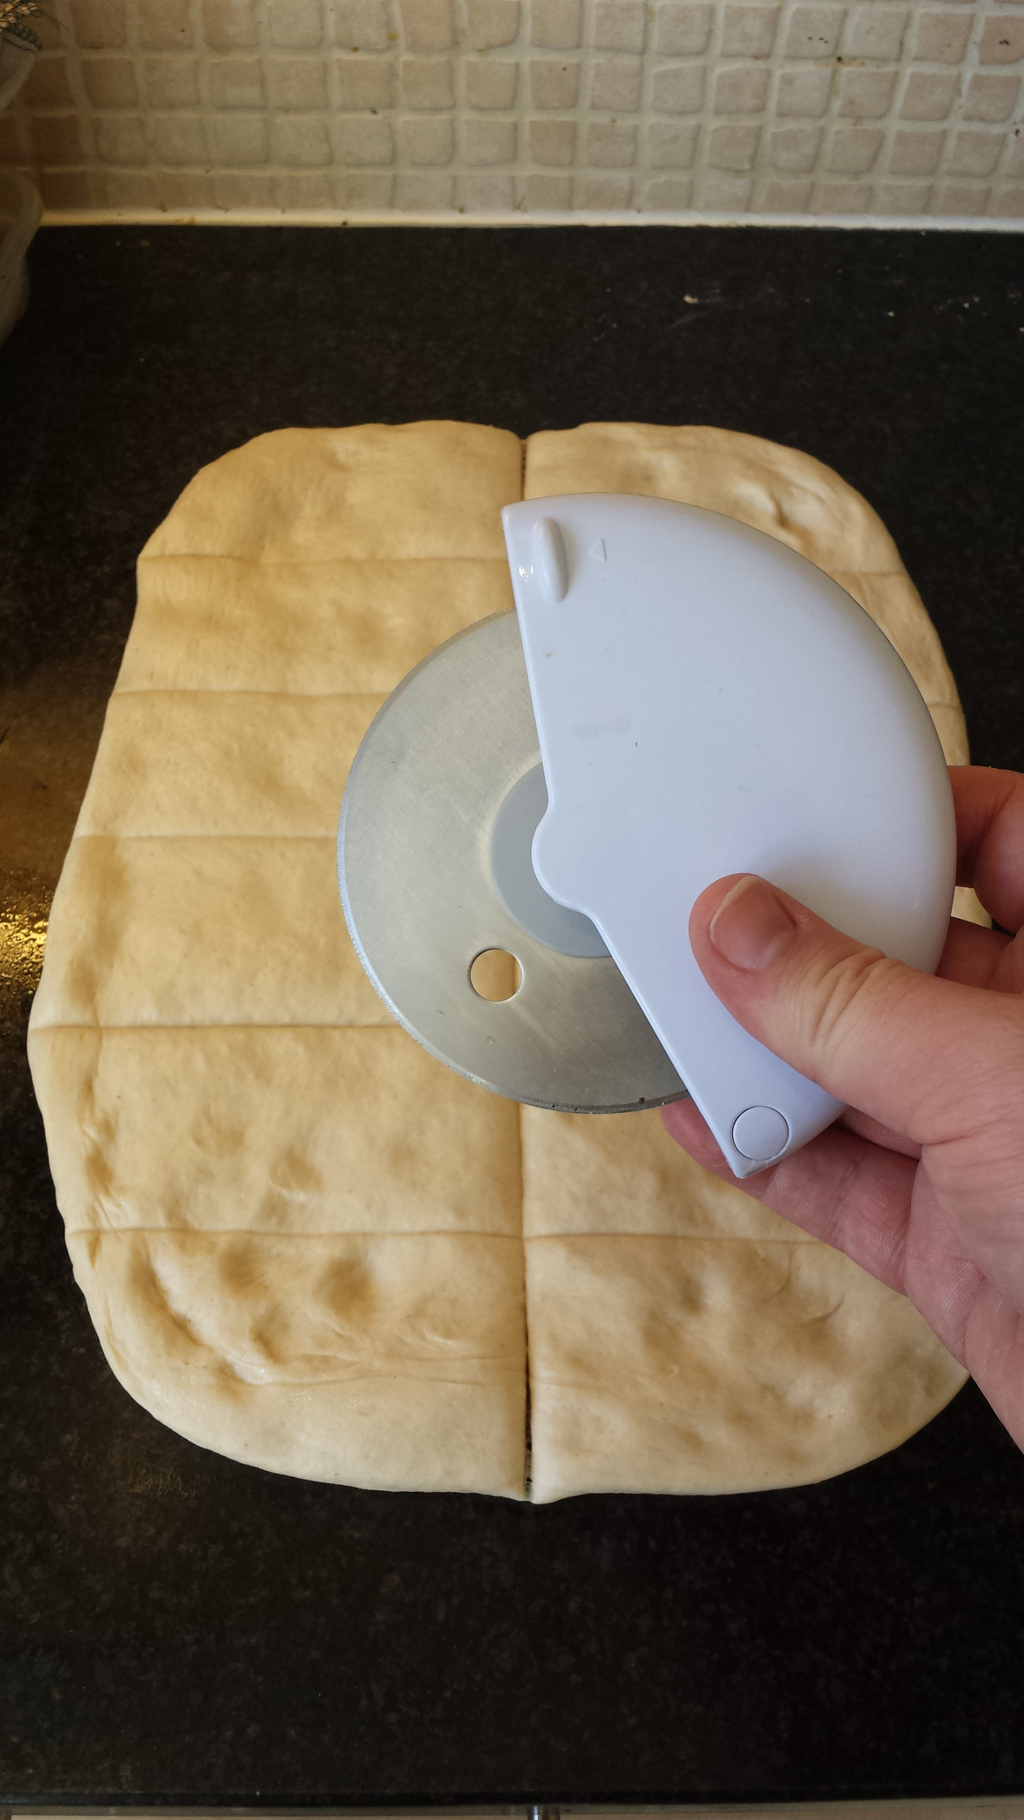 Yeah, you could do this with a knife, but this is easier. Cut along the lines, and seperate out the pieces.
 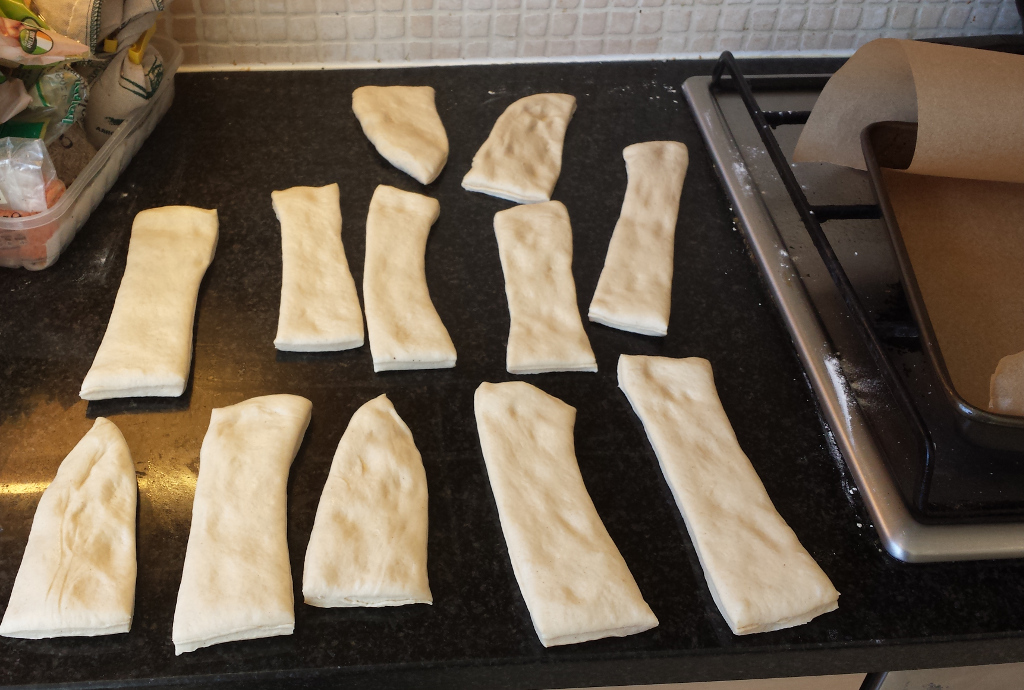 Okay, now to shape. No, you do not just squish them up and roll them into a ball, you’d have no internal structure, no decent crust if you did that. Instead, you pick up each piece, tuck the corners under into the middle, and then the new corners get the same treatment and you kinda shape it like that for a few seconds, then you sortof make an ok symbol with your thumb and forefinger and squeeze the doughball out through that, twist the base to secure it, then drop it on the surface from a few inches up, and then do that doughball scoop-and-twist from before only with a smaller doughball. It’s easy once you pick up the knack and it doesn’t take long to do that. You’ll need two baking trays for this, and you want to line them with parchment paper, but for now just take one of the trays, and line it with twice as much parchment as you need:
 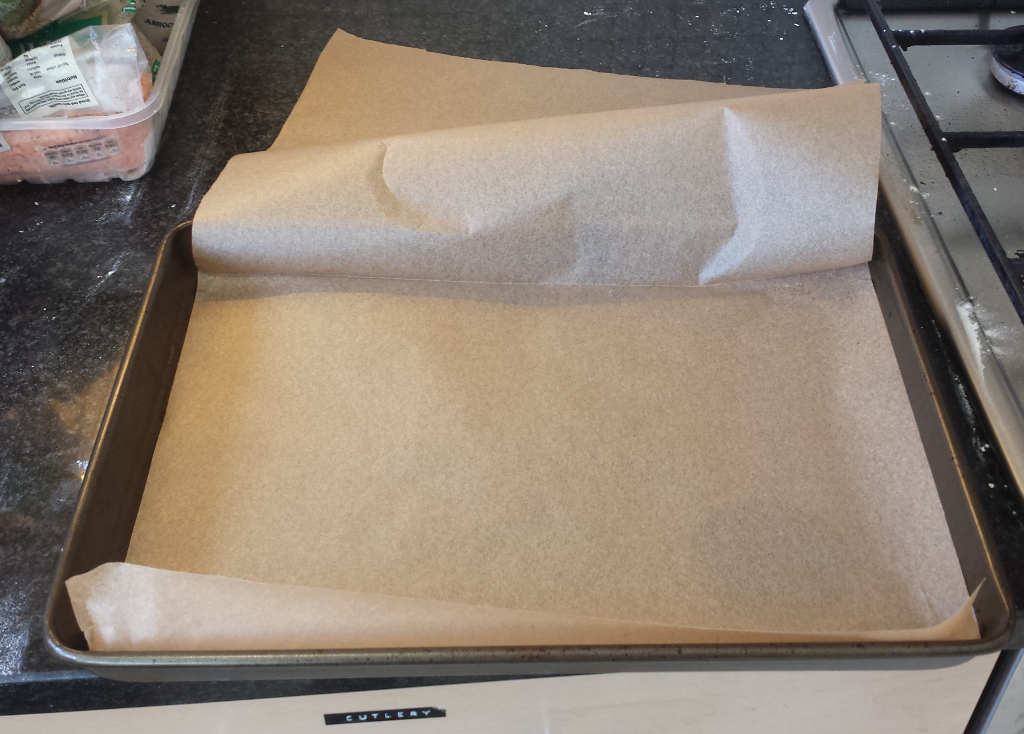 And as you finish each doughball, put it in this tray
 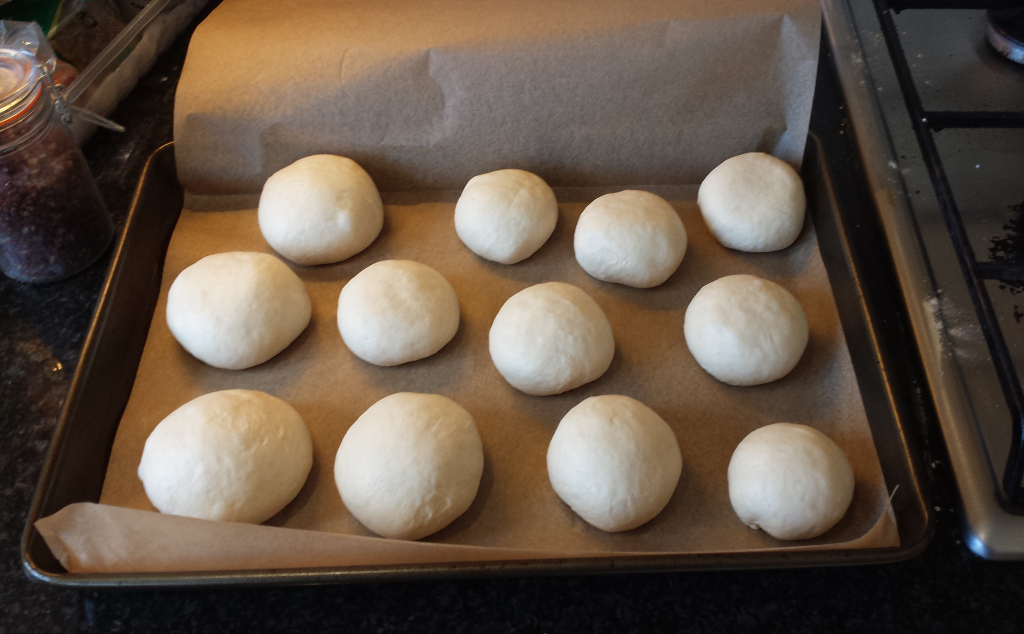 And when you’re done (and yes, some of those are unevenly sized, I’m not perfect), fold over the parchment to cover and leave it sit for 20 minutes or so.
 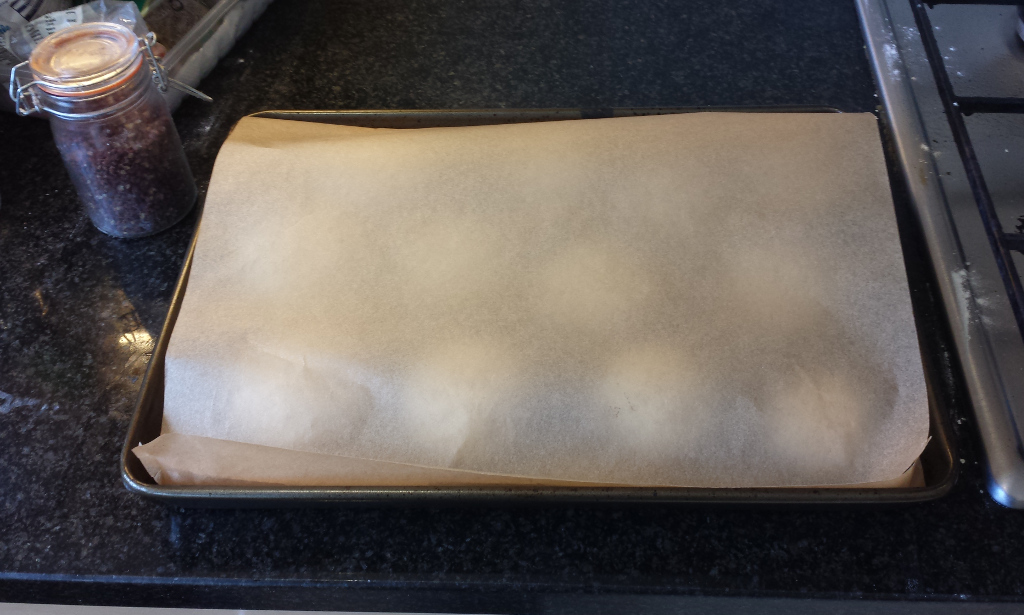 While the doughballs are proofing, bring the water (best to boil it first in the kettle to save time – takes a kettle and a half for me, your milage may vary) and sugar to a boil in a large wide pot (and you’ll want one that’s at least six litres in capacity, because when you add the soda it foams up a lot and will boil over quite readily unless there’s room in the pot).
 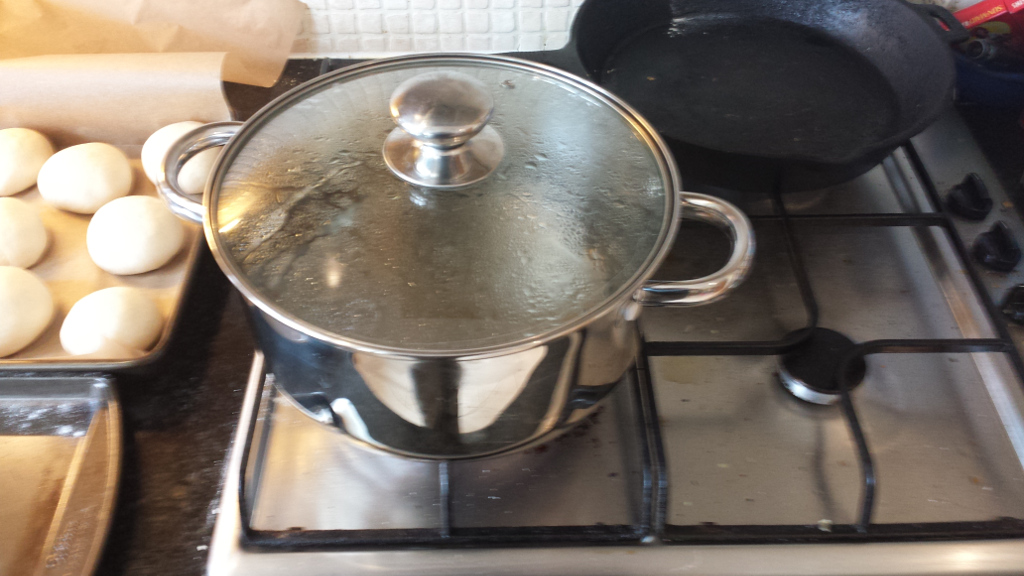 And preheat the oven to 210 degrees C (about 425 F) with two racks in there with room between them as well. When the doughballs have proofed, add the baking soda to the boiling water.
 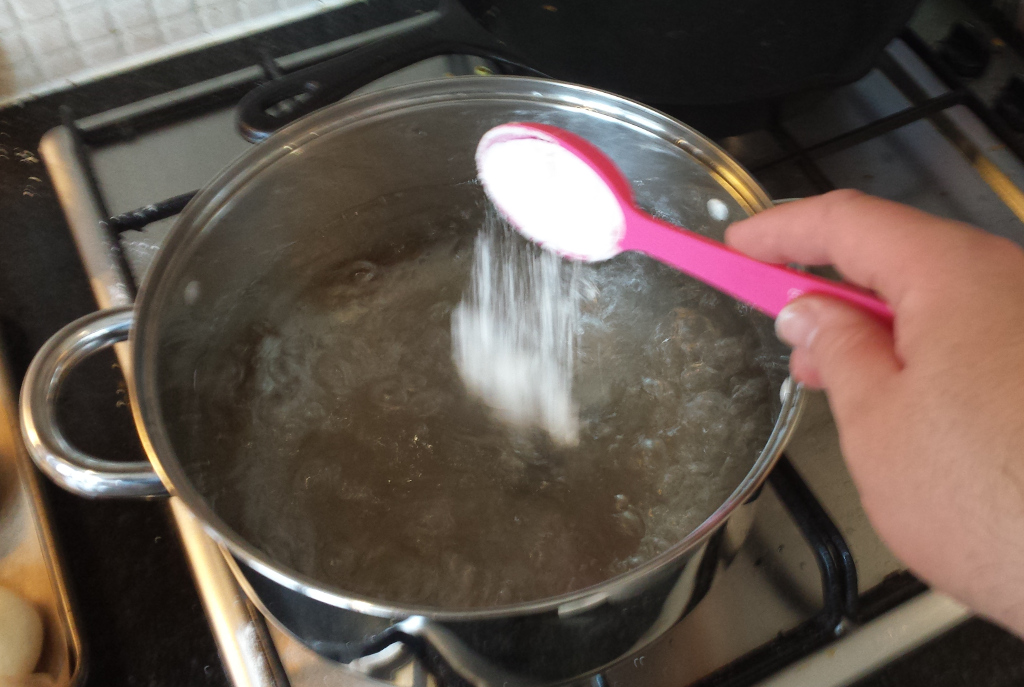 Once the foaming has died down, take each doughball and drop it in the alkali bath and let it boil for between 30 and 60 seconds (the longer you boil, the chewier the roll).
 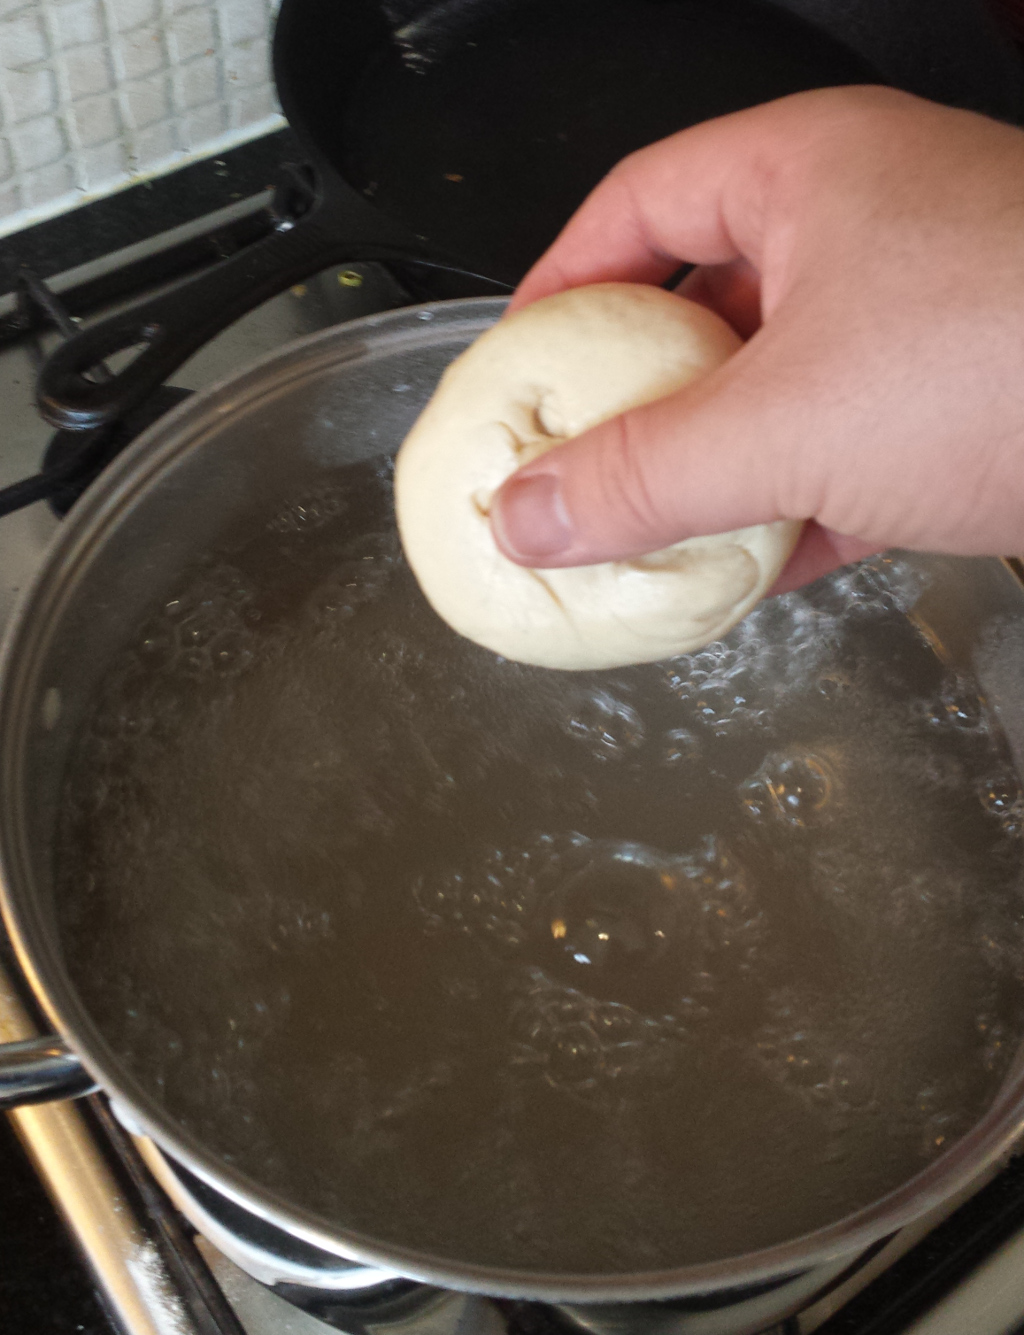 Work with two to three doughballs at a time in the bath, any more is awkward – they puff up quite a bit.
 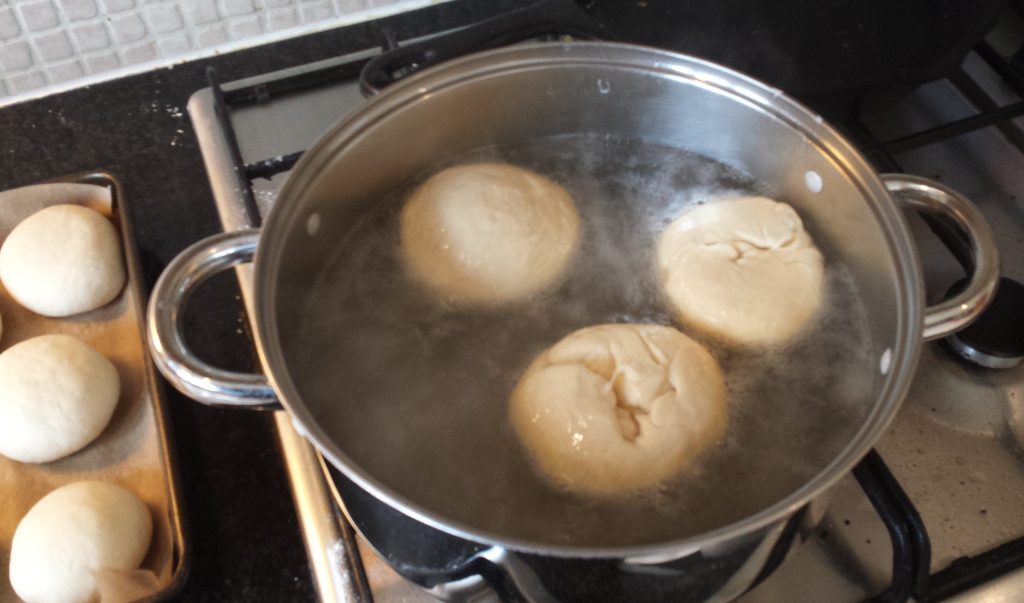 After the 30-60 seconds, use a slotted spoon to flip the rolls over (they’ll float stably in the bath) and give them the same time on the other side.
 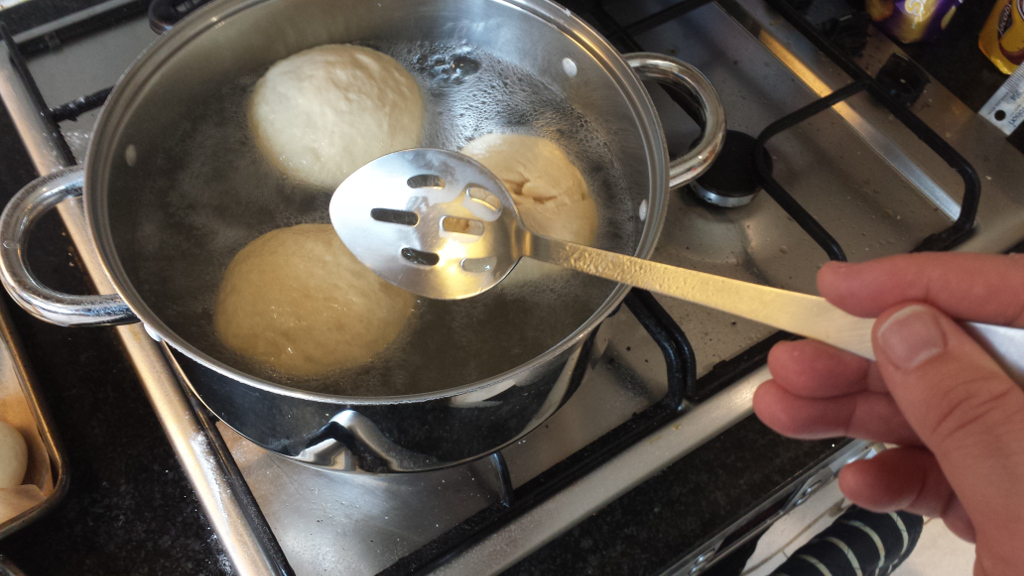 When done, take out of the bath with the slotted spoon, leave drain into the bath and then put them back on the parchment in the baking trays.
 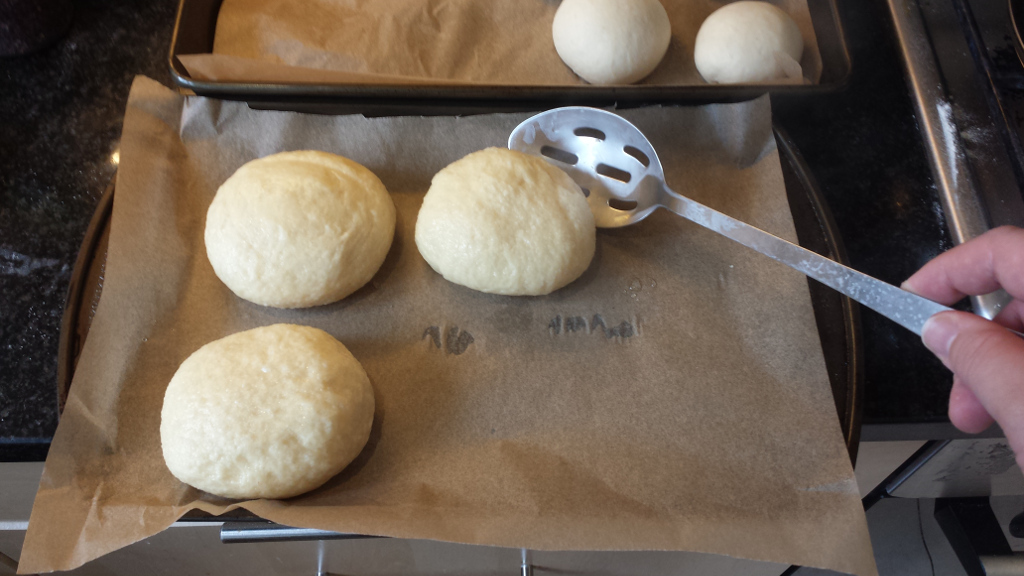 The skin looks a bit weird, chill out, that’s fine, it’s just the effect of the bath.
 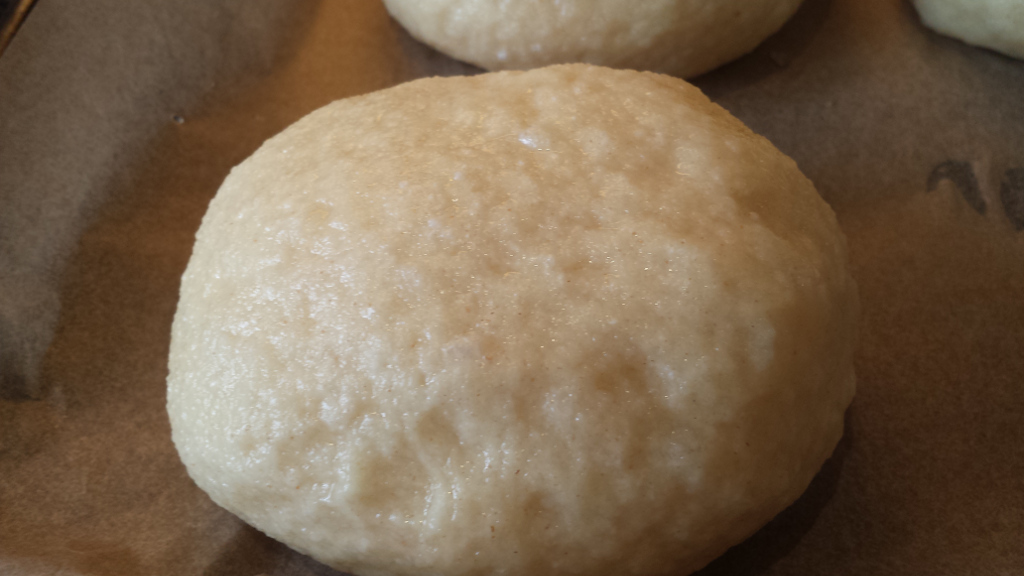 Keep calm and sprinkle the batch with the topping of your choice, if you’re using one (I prefer sesame seeds). You could put the topping in a bowl and toss the doughball with them, that works too and you get a very dense coverage; it’s a personal preference thing.
 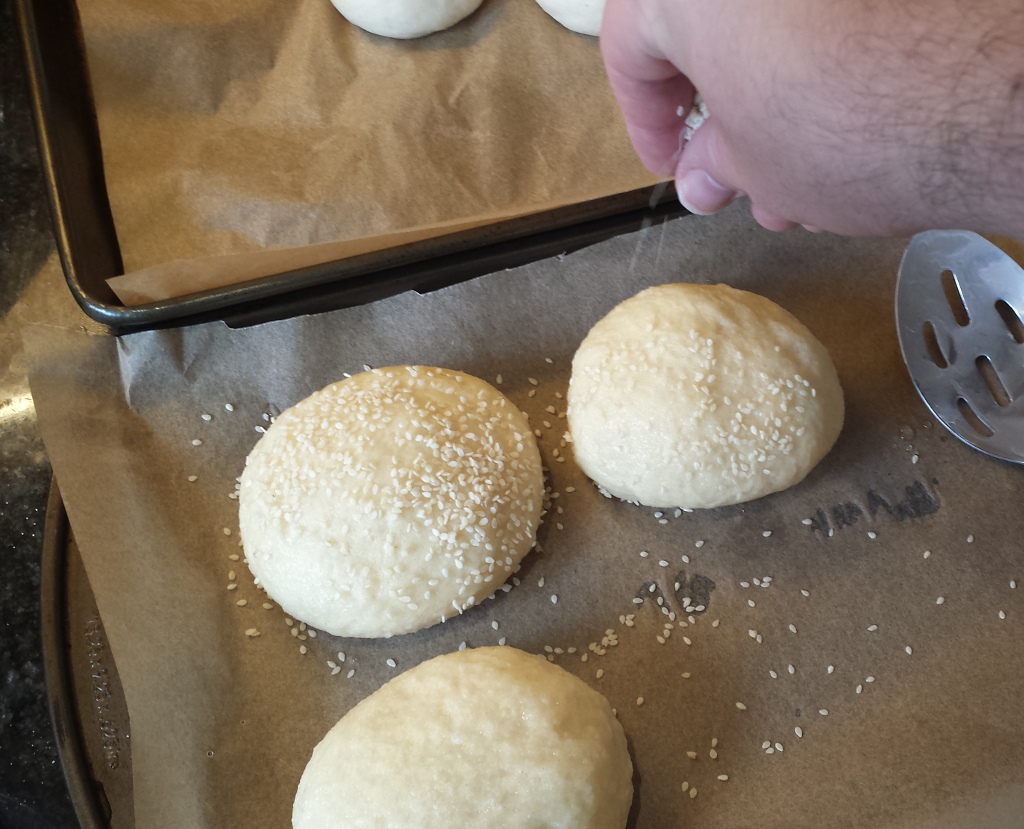 You’ll notice that I’ve taken that second baking tray, cut the excess parchment off the first tray and lined the second one with it.
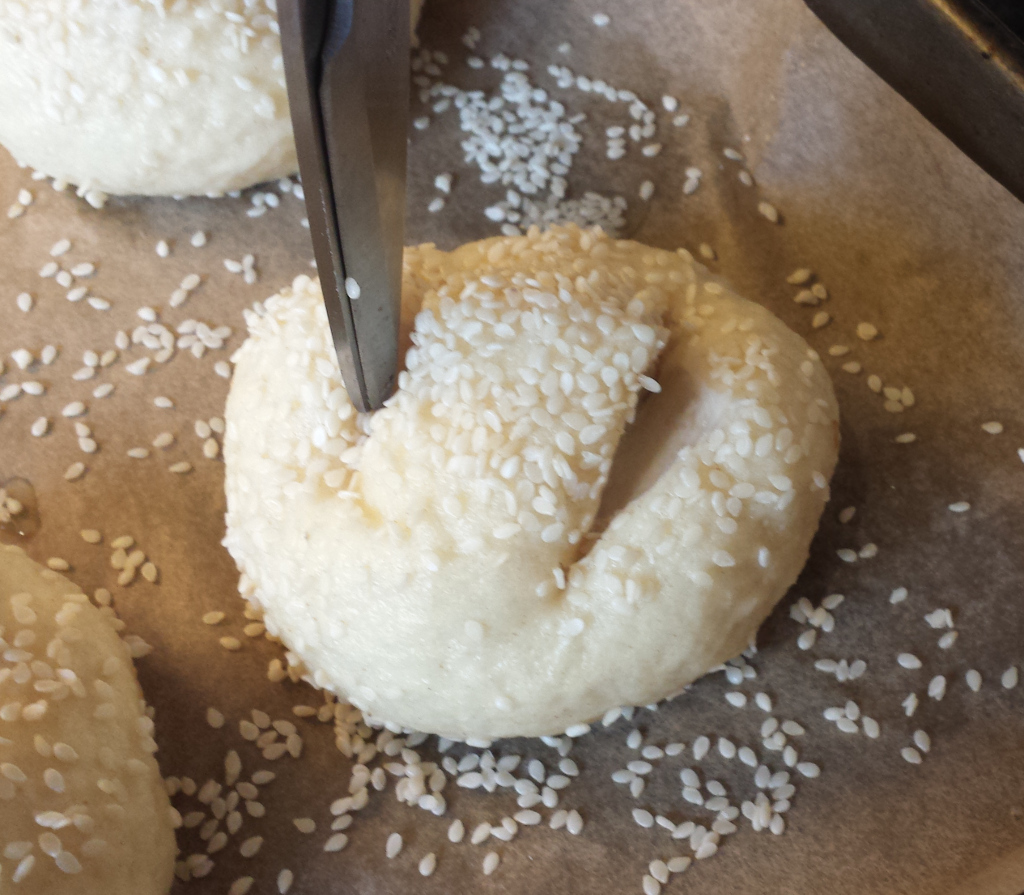
 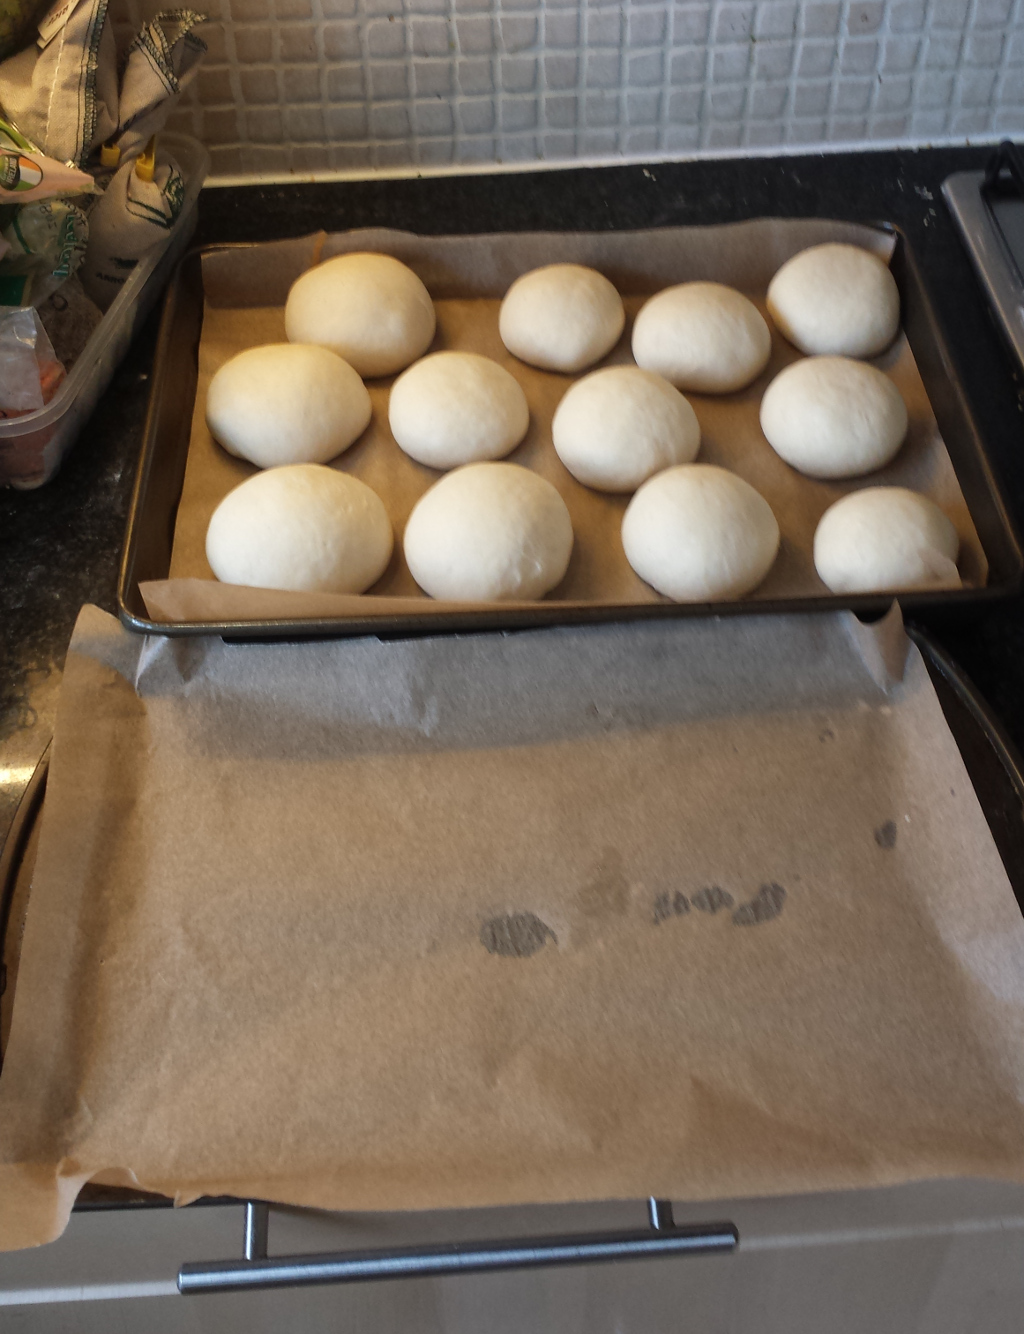 Once all the doughballs are bathed and sprinkled with a topping (and evenly divide them between the two trays by the way), you need to cut them before baking. Use your sharpest knife or razor, and slice two centimetre-deep cuts into the top of each doughball in the shape of a cross.
  You will generally find that the first cut’s easy and the second cut then lifts up the skin on the doughball and gets messy. That’s okay, that’s fine, it’ll bake out. You can try a different cut – two parallel slashes work well:
 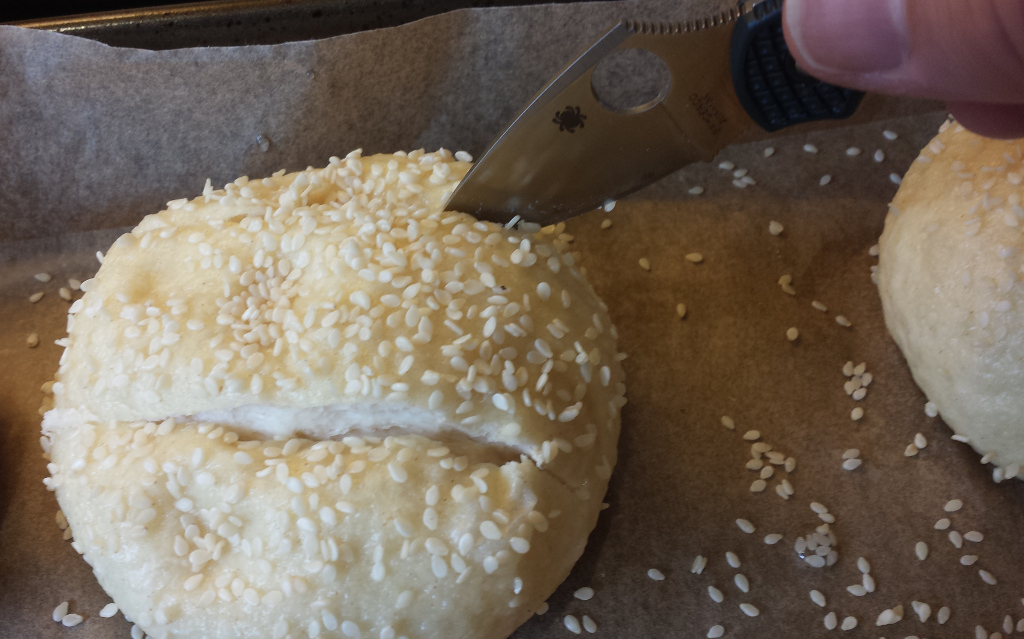 Yes, that’s a pocket knife. It’s the sharpest one I own, okay? A Spyderco Dragonfly 2 in ZDP-189 with FRN handles, if you must know. Yes, it’s perfectly clean, what do you take me for? Honestly, I can’t stress this enough, you have to use a sharp knife or razor here. A scissors just won’t do as good a job. Here, I’ll show you:
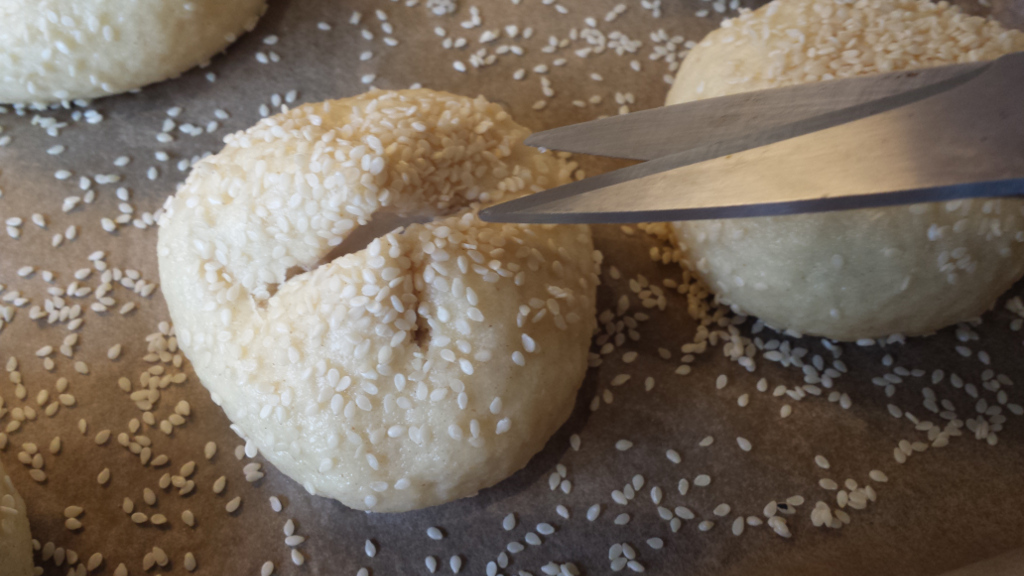
 We’ll compare after baking. The dough will look wrinkly plain weird and when you cut into it by the way, you’ll see the doughballs all have a gelatine-like skin (that’s the alkali bath for you, and it’s a good thing, don’t worry about it). Now, into the oven. We start by baking for 10 minutes at 210C.
 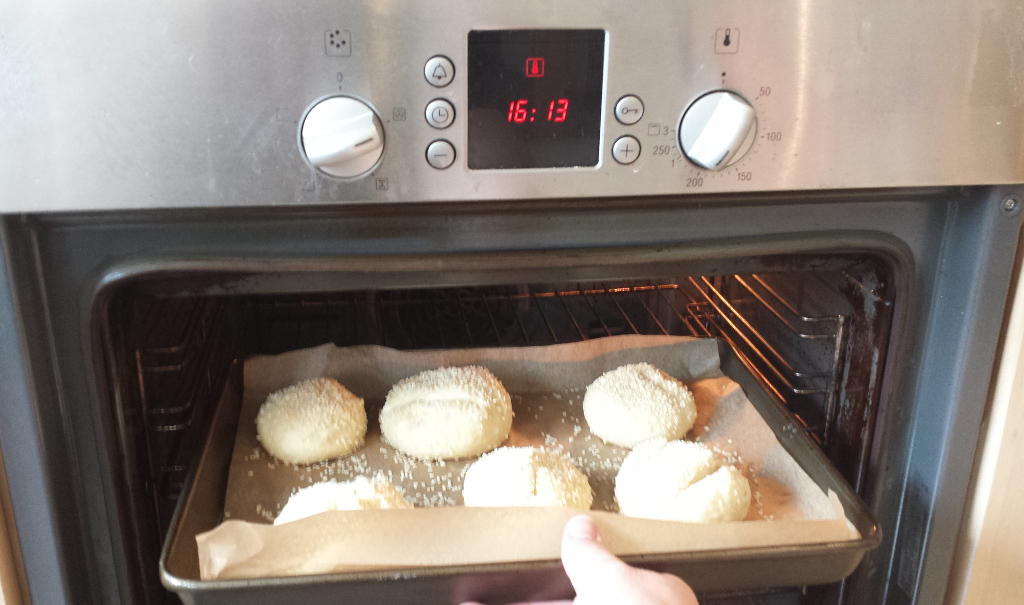 Then we spin the pans (rotate each pan through 180 degrees and move it to the other rack) and bake for another 10 minutes or until the rolls are a lovely shade of mahogany.
  Then de-pan them and leave to cool on a rack for at least five minutes.
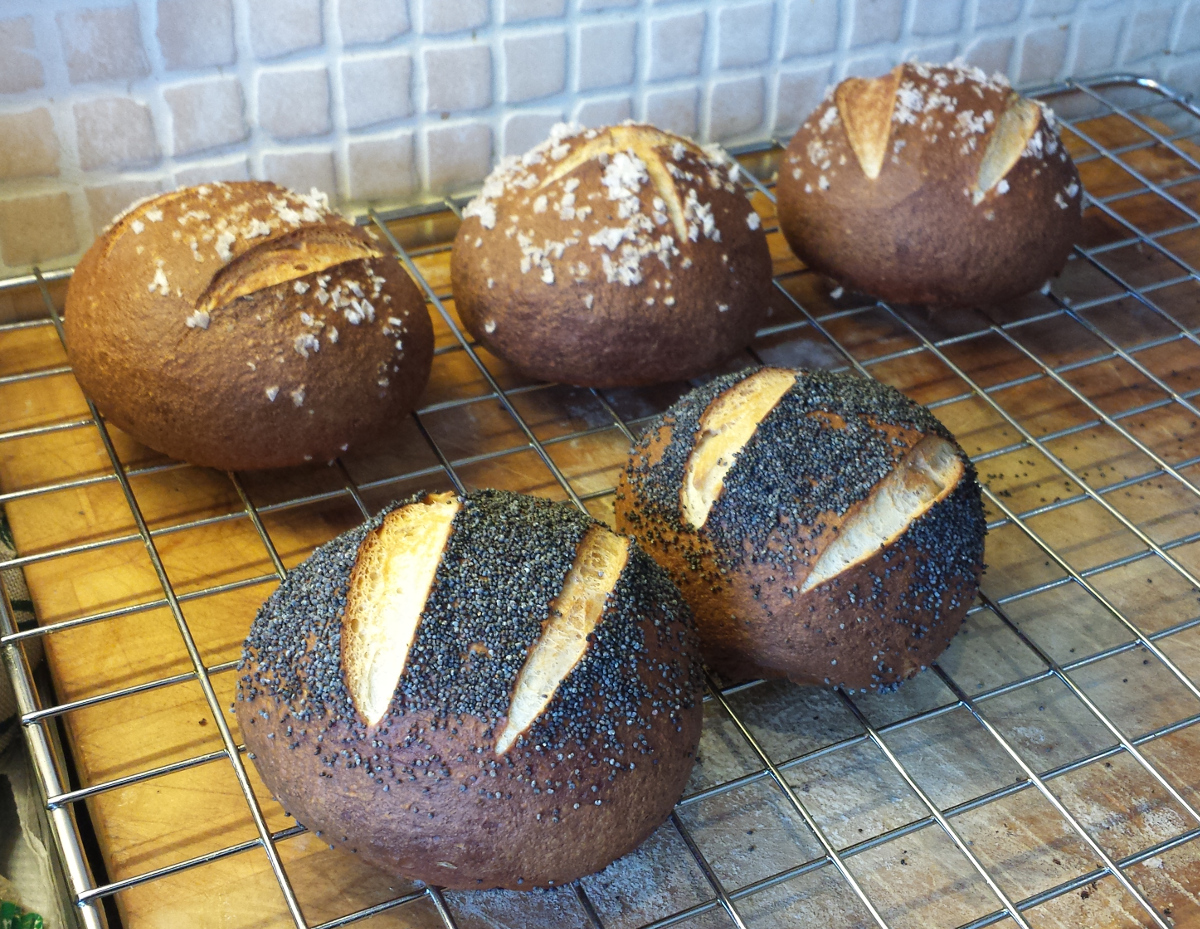
  Serve warm.
 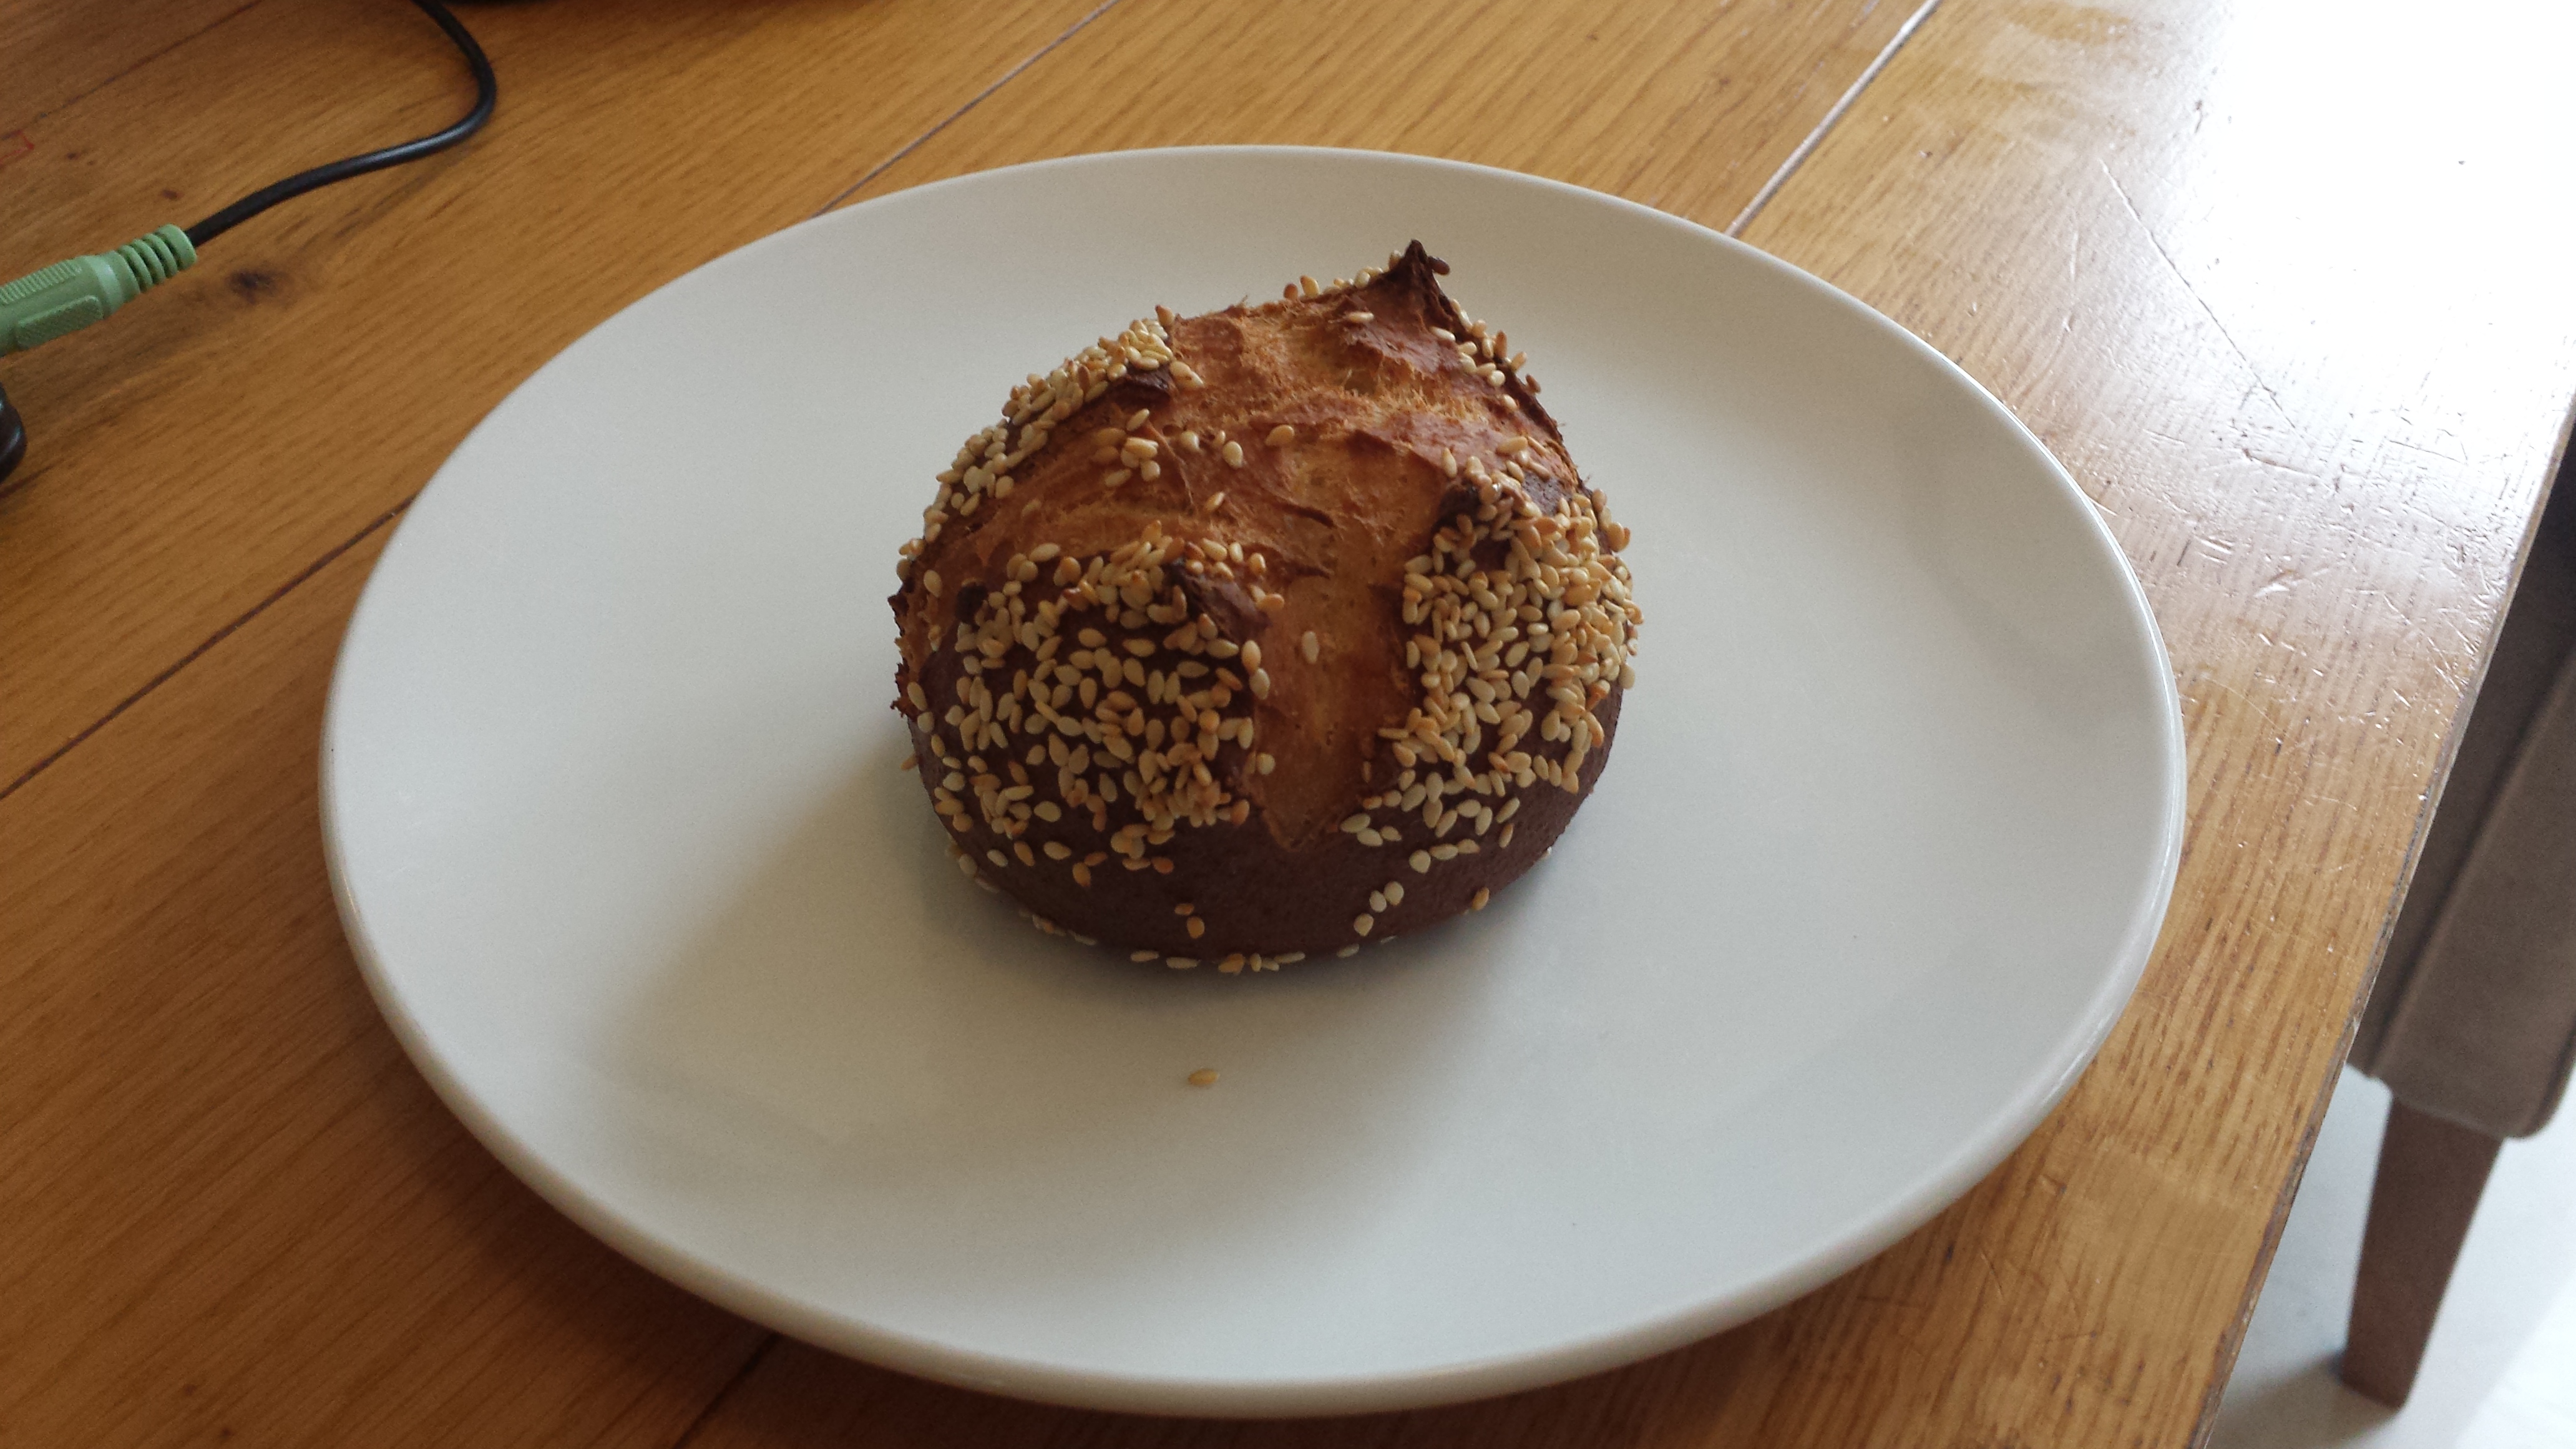 These rolls won’t last long, I’m afraid, but they taste good enough to make up for it. However, in case twelve pretzels in one sitting strikes you as excessive, wait until they’re completely cold, then bag them and freeze them.
 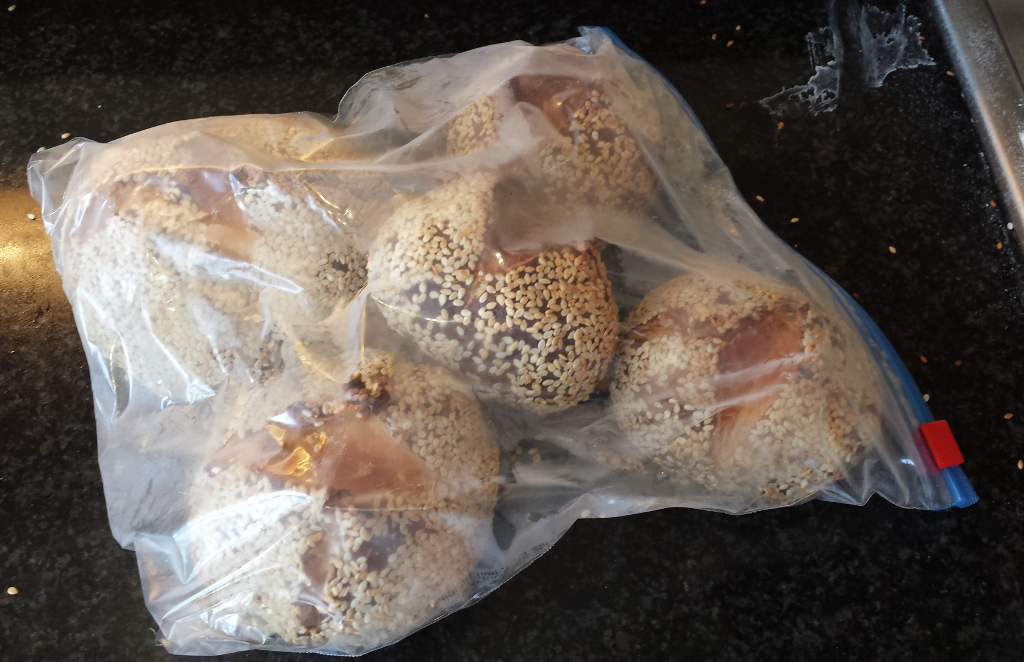 They should keep for up to a month, just pull them from the freezer and drop them into a 150C oven for ten to twelve minutes to reheat. Now, about that scissors -v- knife discussion? Here’s the ones with the cross cut, knife on the left, scissors on the right:
 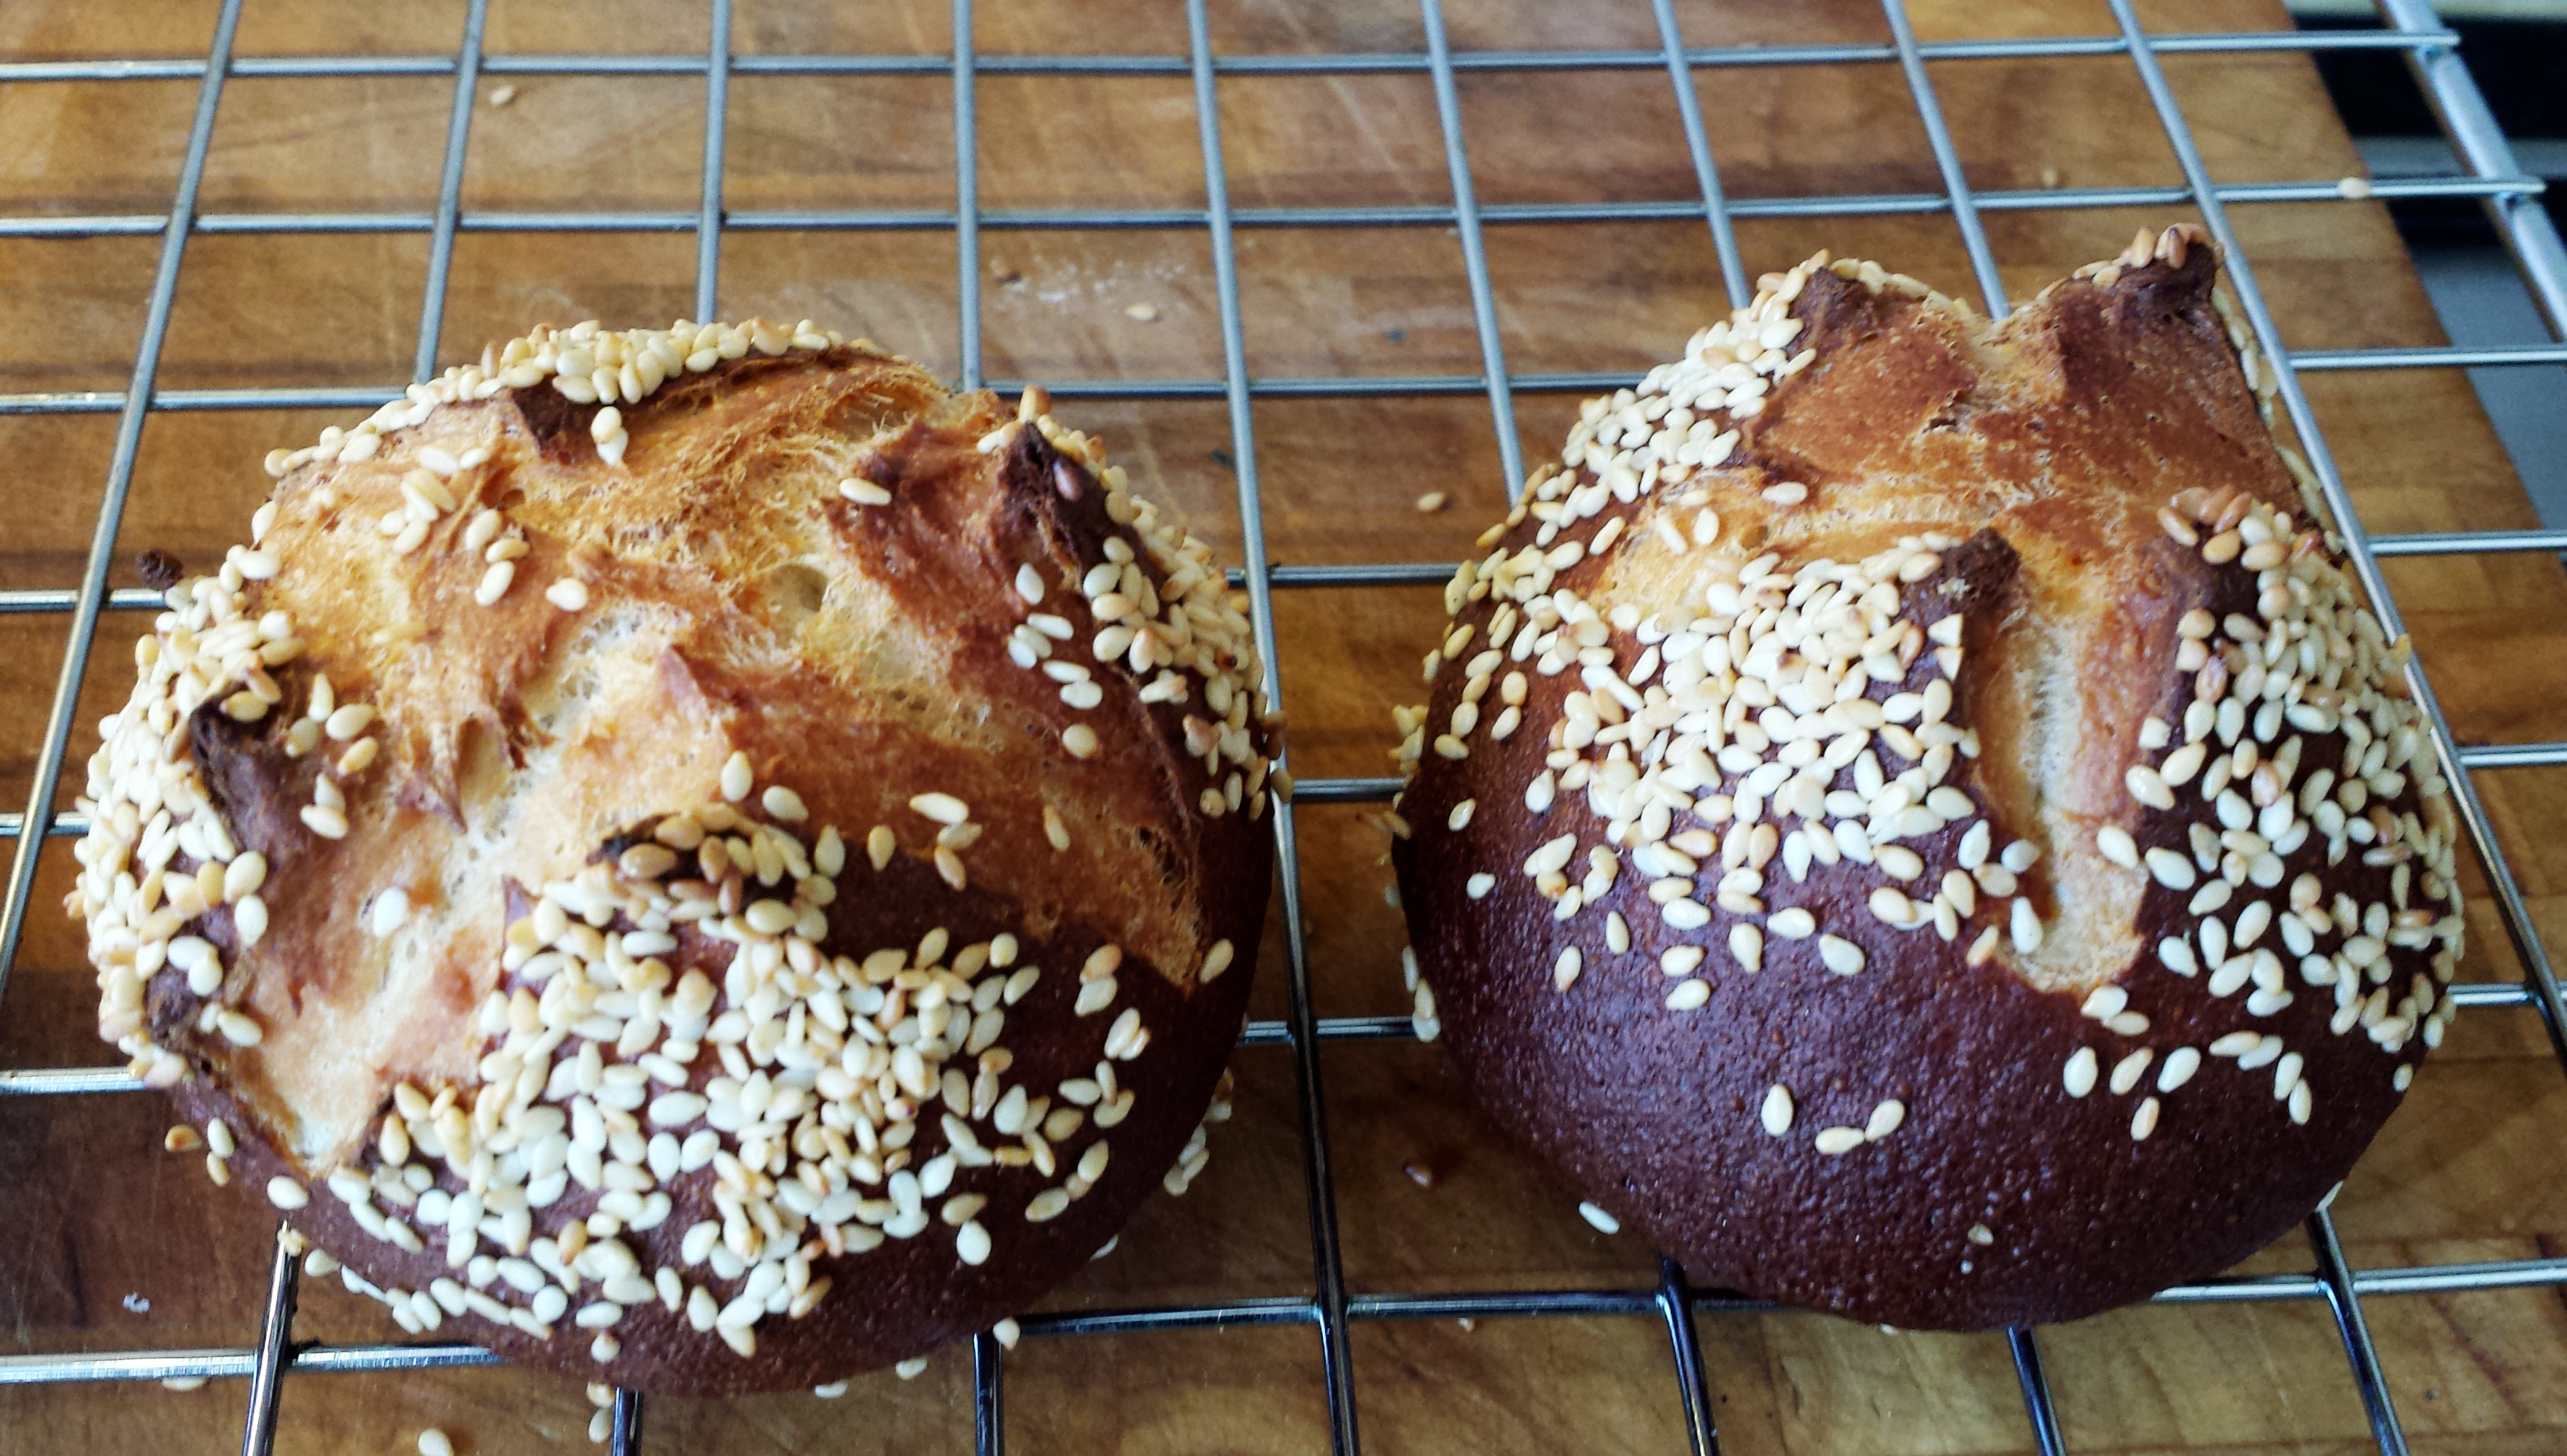 And the parallel cuts, again knife on the left, scissors on the right.
 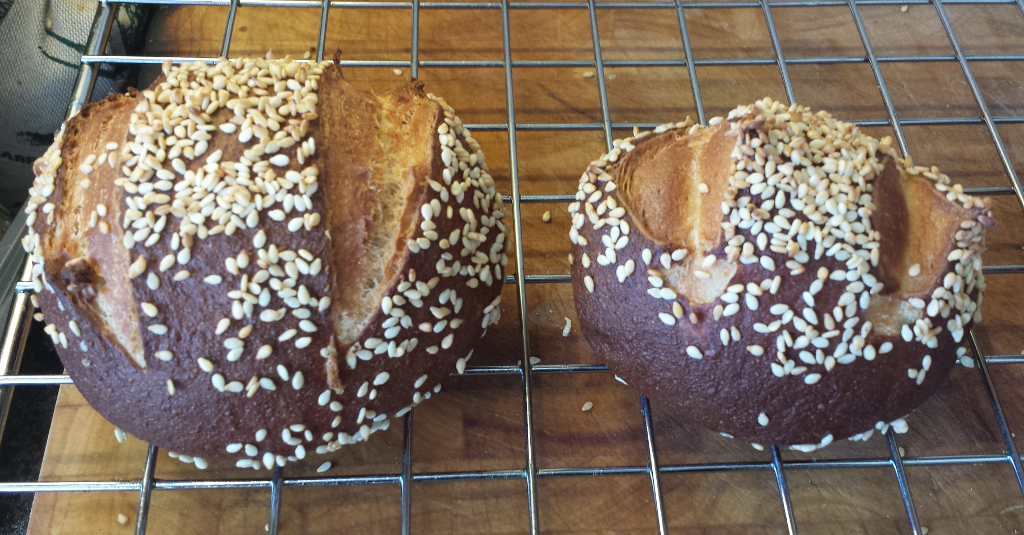 As you can see, better results in both cases – the scissors cuts almost healed, while the knife cuts left the dough expand and the crumb texture is much lighter and airier as a result. How’s the taste? You decide 😀
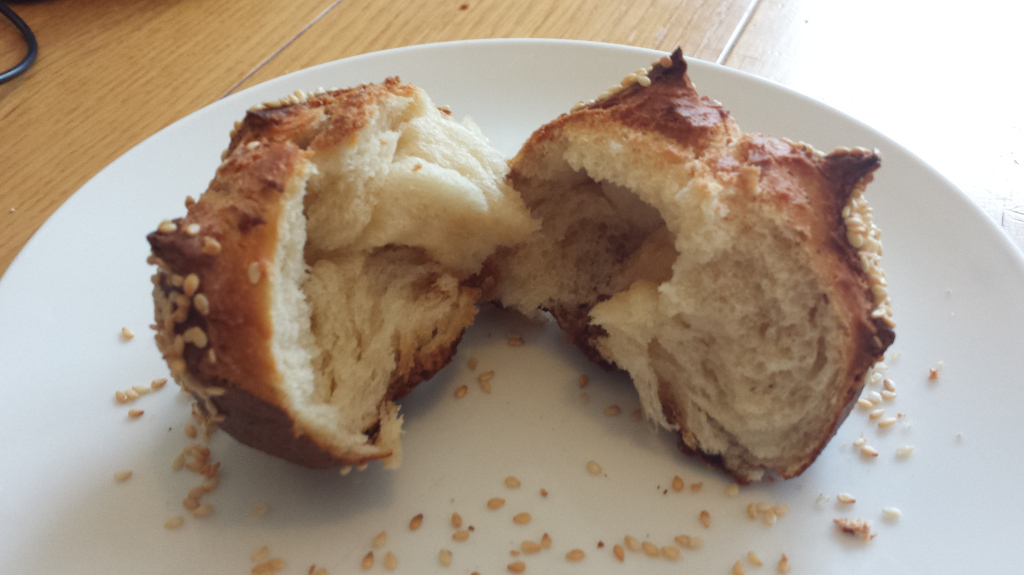
Tags: recipe
Looking forward to trying these. Also – Alton Brown is the man!