12
Apr 21

Neoplastic fun

A while ago, Stewart Furini was playing around with colouring a wooden bowl in a neoplastic fashion (think Mondrain) using paints and stains. It looked like fun so I thought I’d give it a try.

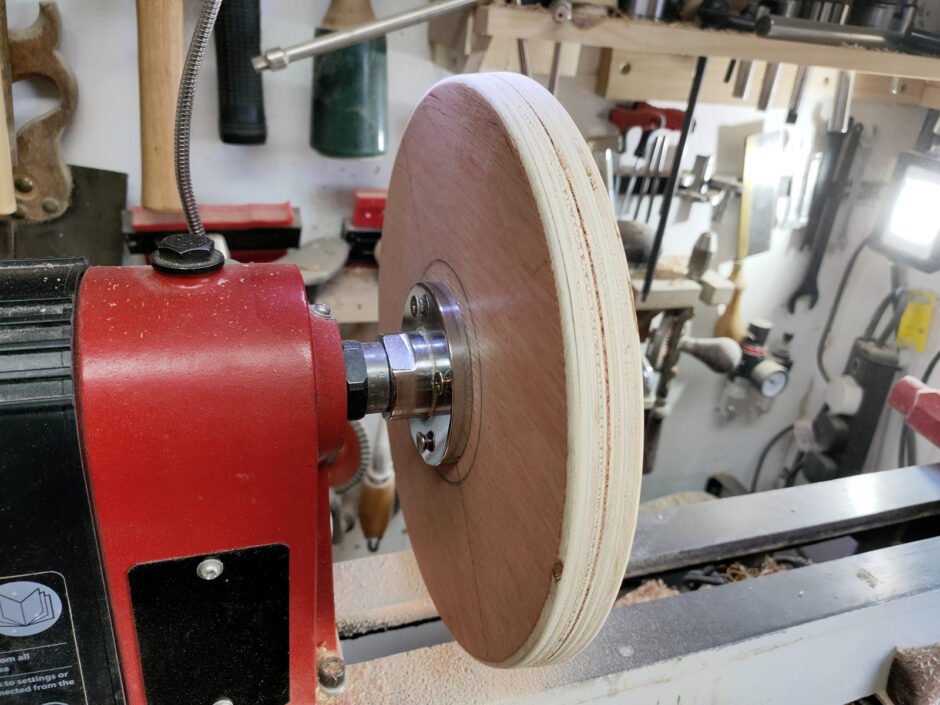
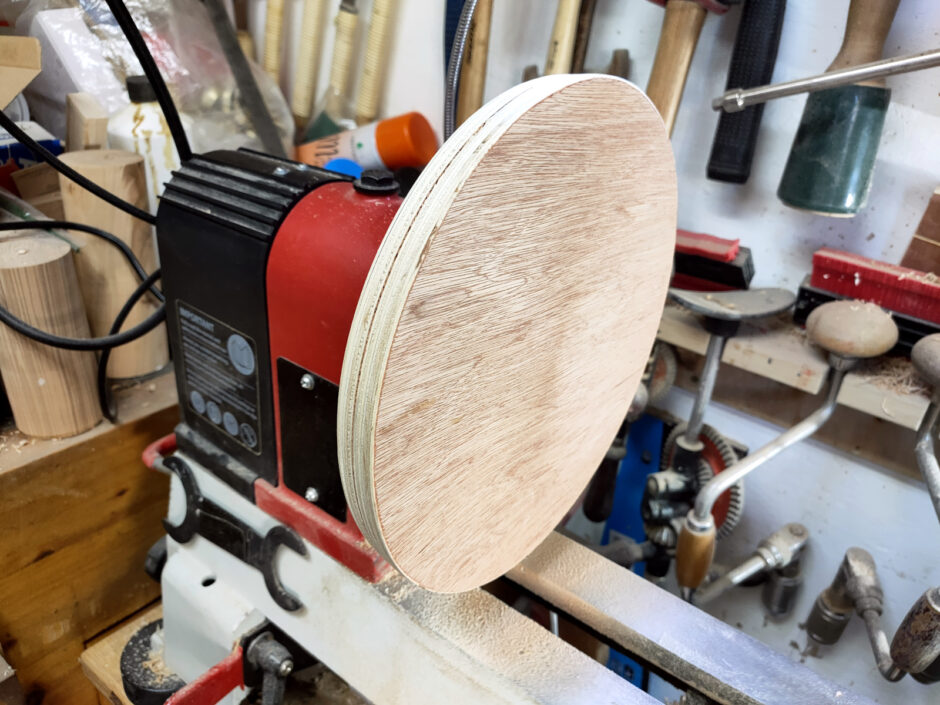
Turns out, it’s a little harder than it looks. I started with a miniature bowl blank because it was the first thing to hand.

Very simple shape (the idea was to part off at that thin line about an inch in from the chuck jaws so the proportions of the final cup wouldn’t be horrible). The colouring should be simple – airbrush with the lightest colour, then mask off squares with masking tape and airbrush successively darker hues and finish off with black lines on top (you’d do it the other way round with paints, in the same way that the order you paint with oils is the opposite order to that for watercolours). And obviously, because we’re not limited to the three primary colours this isn’t really neoplasticism, but roll with it, I’m just having fun 🙂

Two quick problems – firstly on such a small piece the curvature on the surface is fairly tight and you might not know this but 2D geometry on a curved surface is non-euclidean (eg. the three angles in a triangle on such a surface do not add up to 180° but to more than that) – which means that masking off perfect squares gets a little weird when the square is large compared to the radius of curvature. But okay, I can just squint and ignore that.

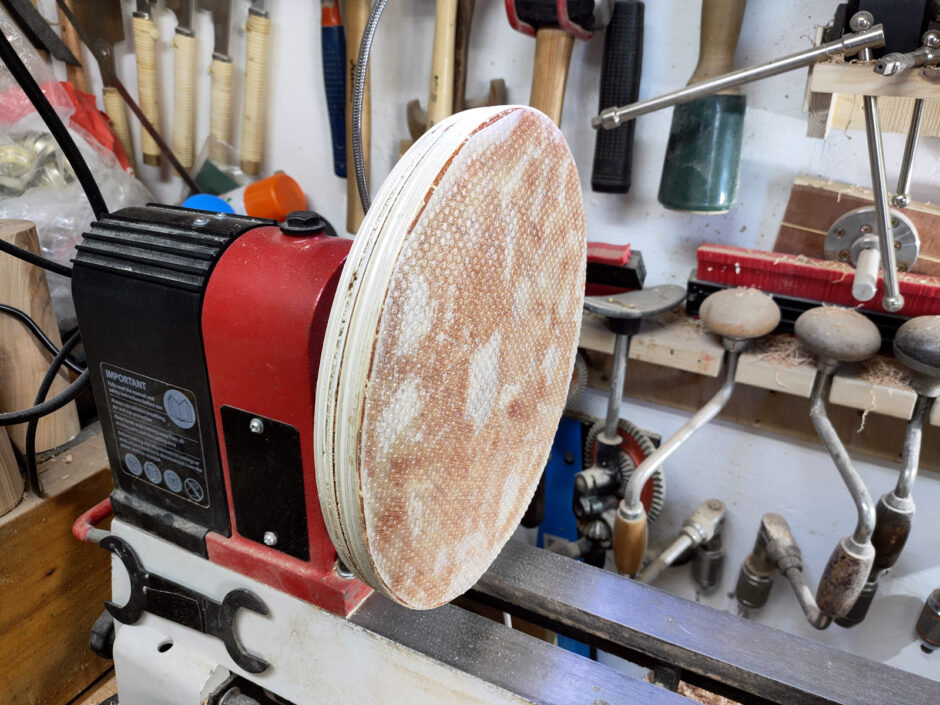
The second problem was a doozy. Turns out, masking off spirit stain on a surface with cheap lidl masking tape is a non-runner. Does not work at all, and the darker stains for some reason show that up the most.

Bleuch. But I had some fancy frog tape, which is supposed to be the best thing ever for masking for painting.

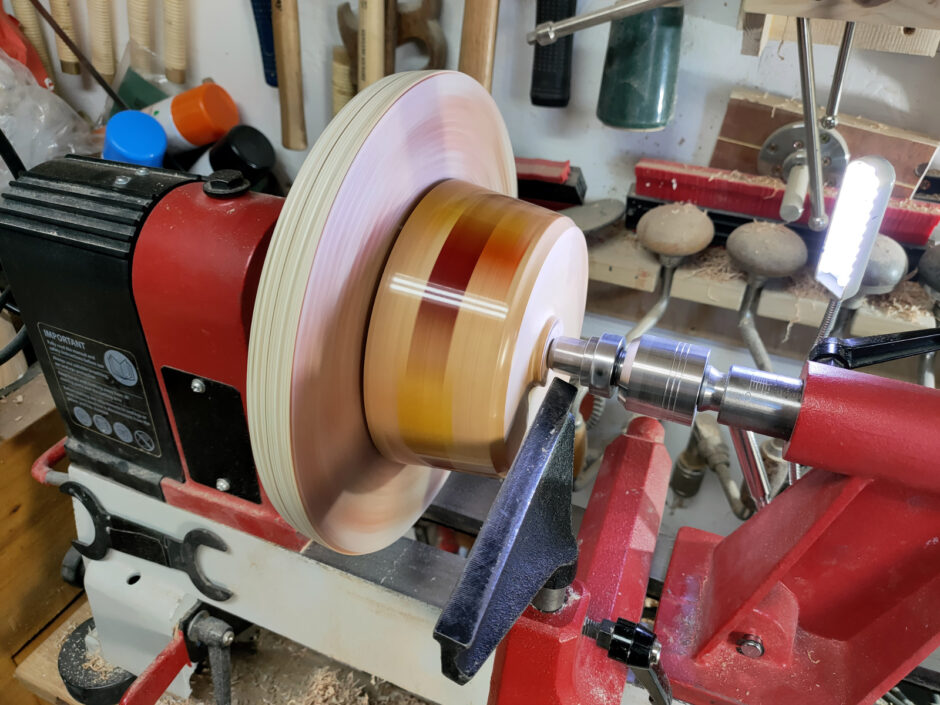
Nope. Still no dice. I actually gave up on this blank at this point and just sprayed it with ebonising lacuqer and thought I’d just make a little cup from it with the red/black urushi colouring scheme and come back to the neoplastic colouring later on.

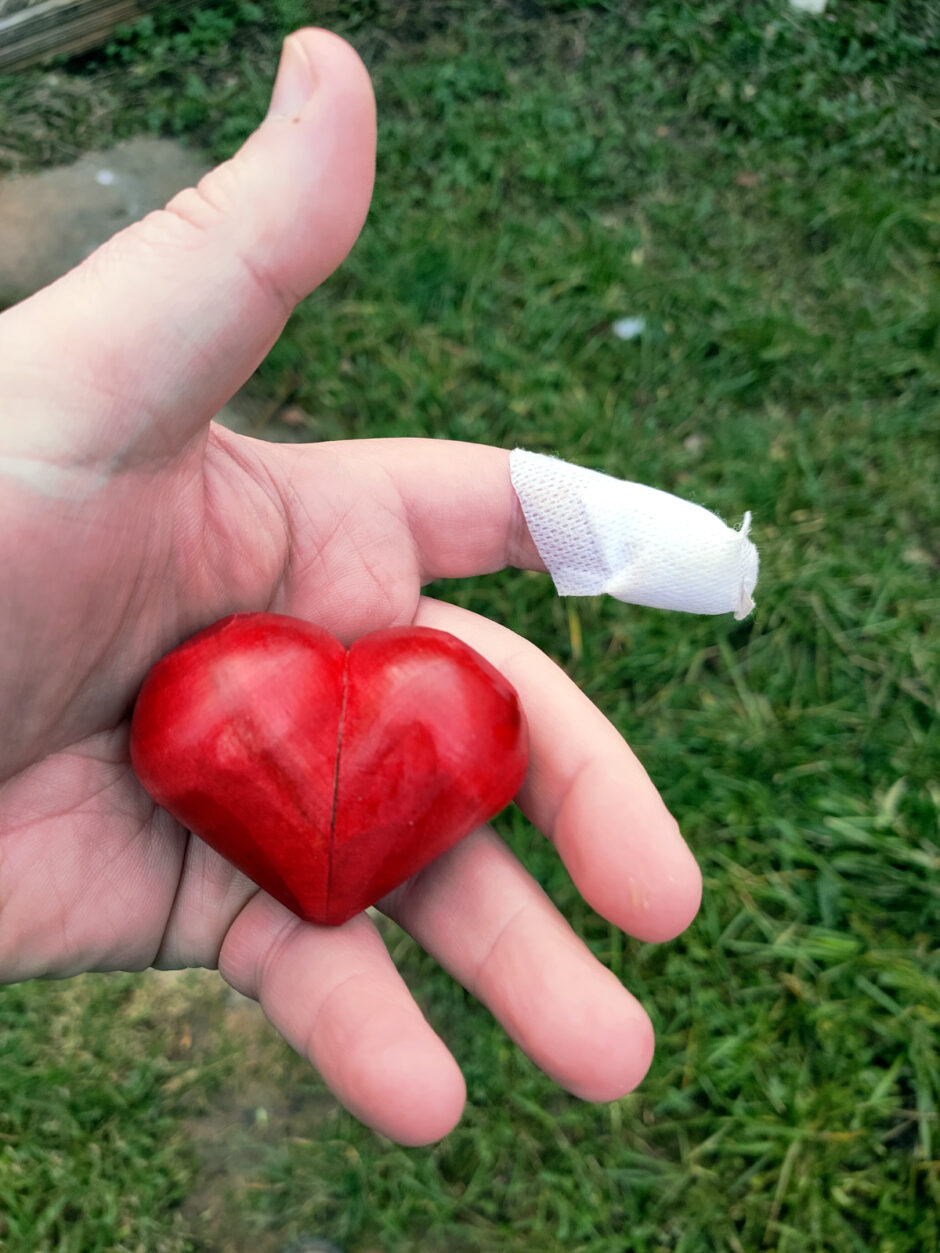
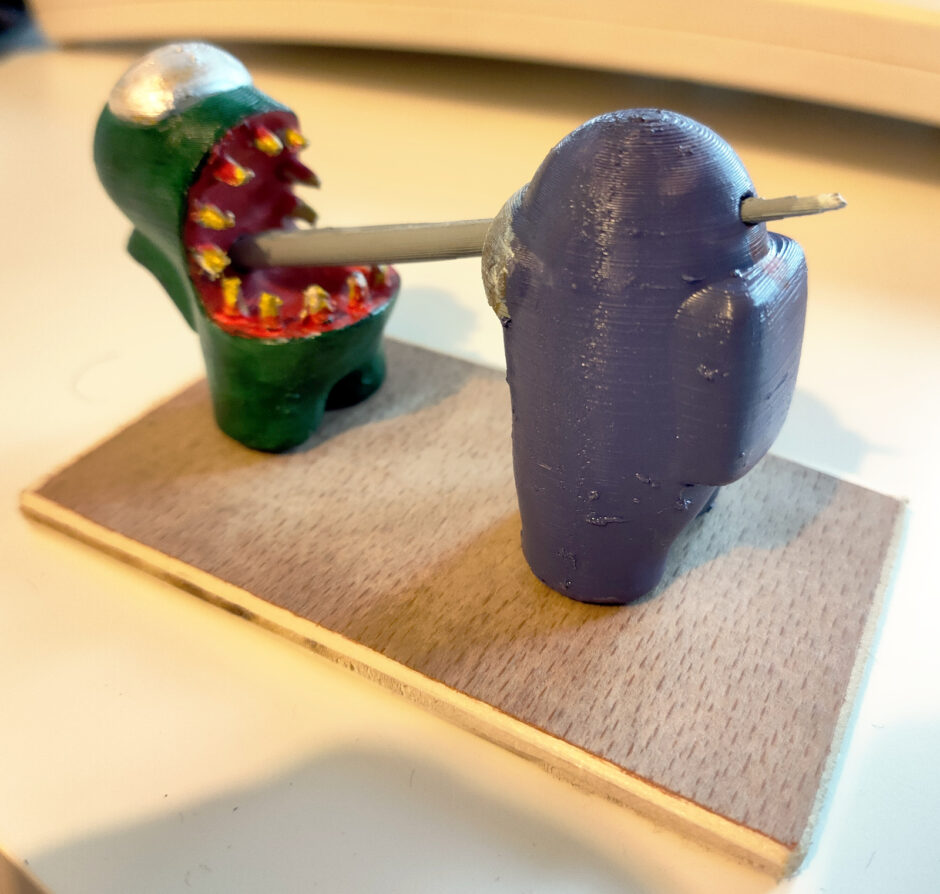
Yikes. Good news is, the faceplate still works. I still haven’t found the missing third of the piece though, it rattled off my head and went flying somewhere in the shed and has resisted attempts to be found since.

So if the small piece bounces off your head, the first thing to do is try again with something much heavier 😀

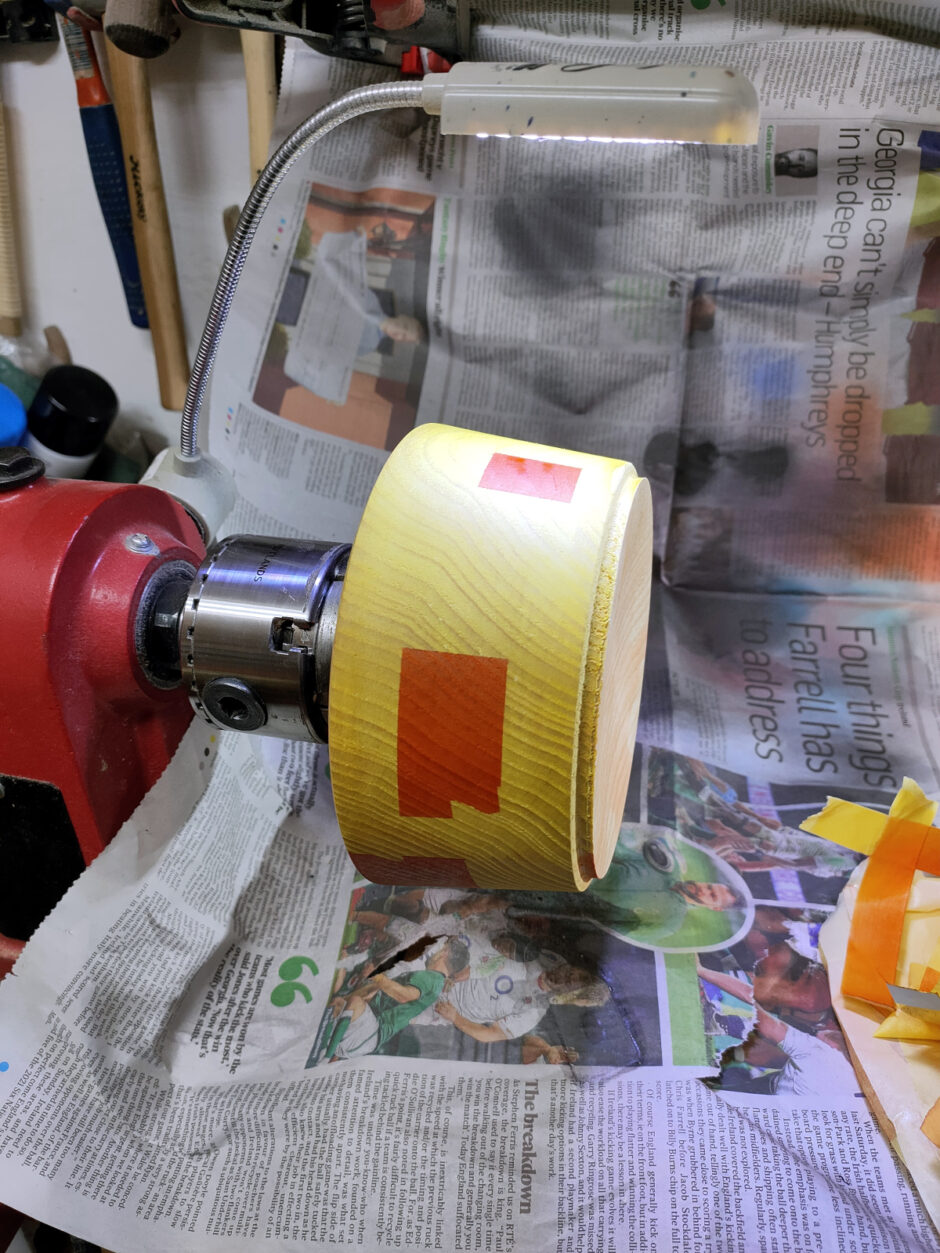
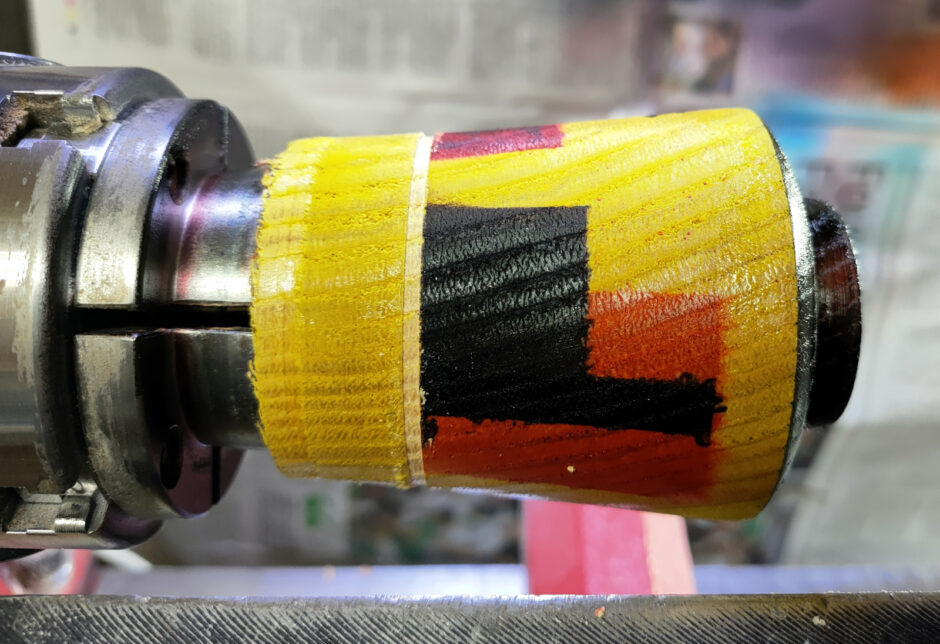
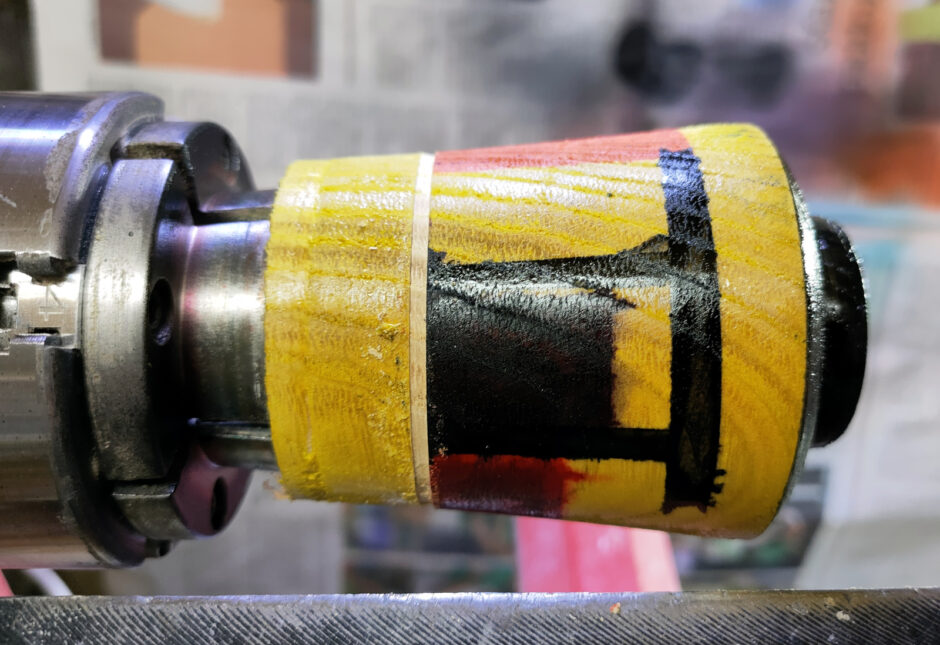
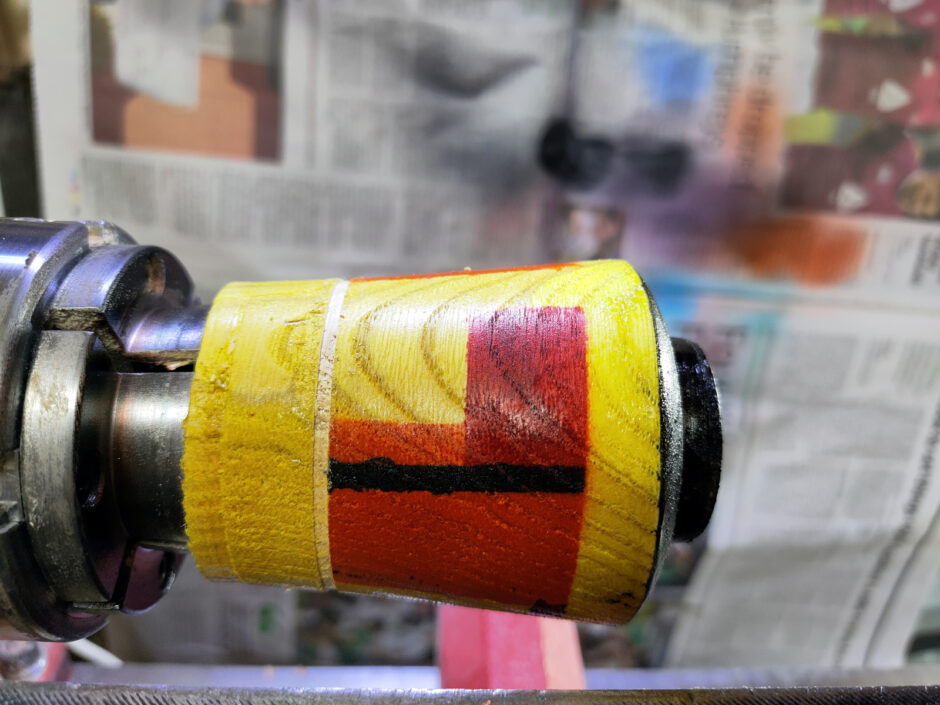
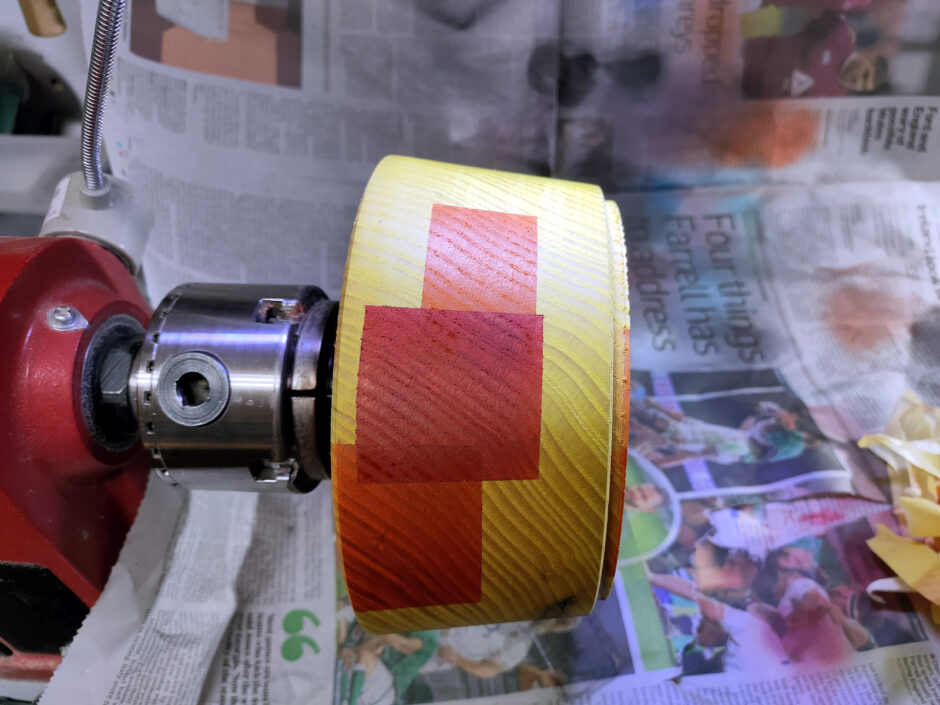
And this time I had much better luck, because I gave up on the tapes designed for masking when painting houses and switched instead to tape designed for masking when doing small scale modelling (you know, airfix kits and the like). Meet Tamiya tape:

Stocked in any model making shop near you. I couldn’t recommend it for housepainting unless you’re a millionaire, but for this sort of thing, it’s just astonishingly good.

Unfortunately, it isn’t perfect and there are things you have to do when using it.

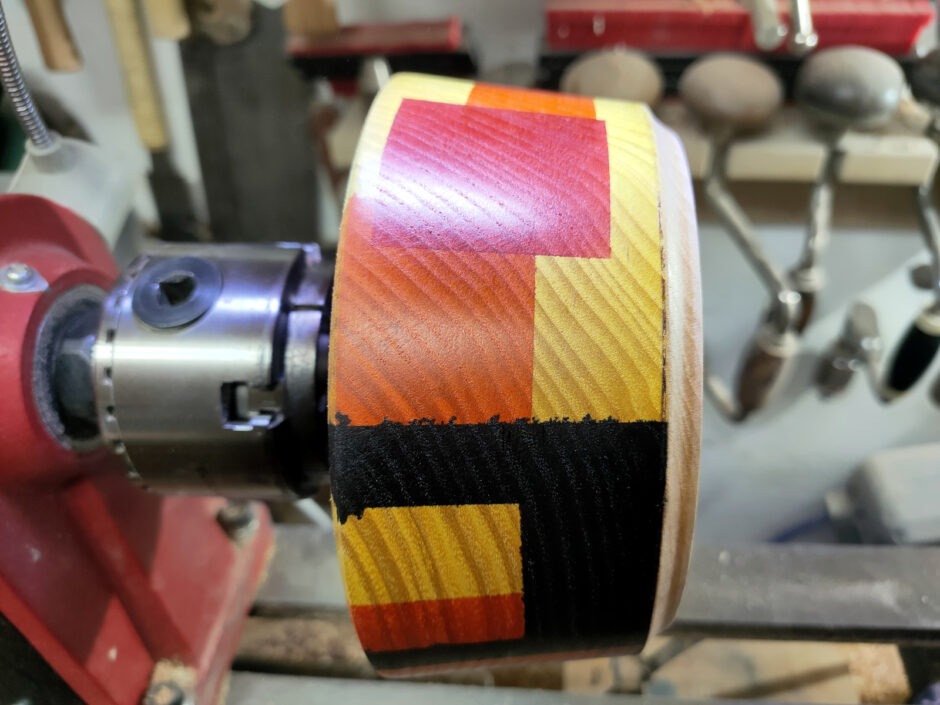
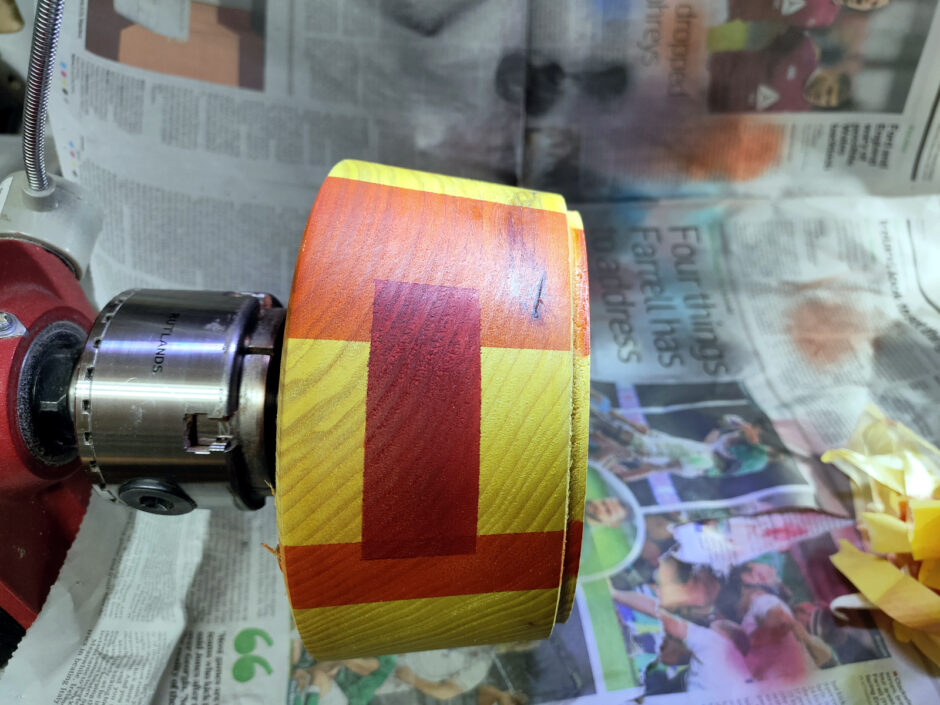
So first off, whatever was in the black chestnut spirit stain, it just ignores tape entirely. No matter the tape, no matter how I burnished it, it wasn’t staying in its lane for anything. So I just didn’t use it after this (I turned off the surface on this bowl about four times trying to get it right).

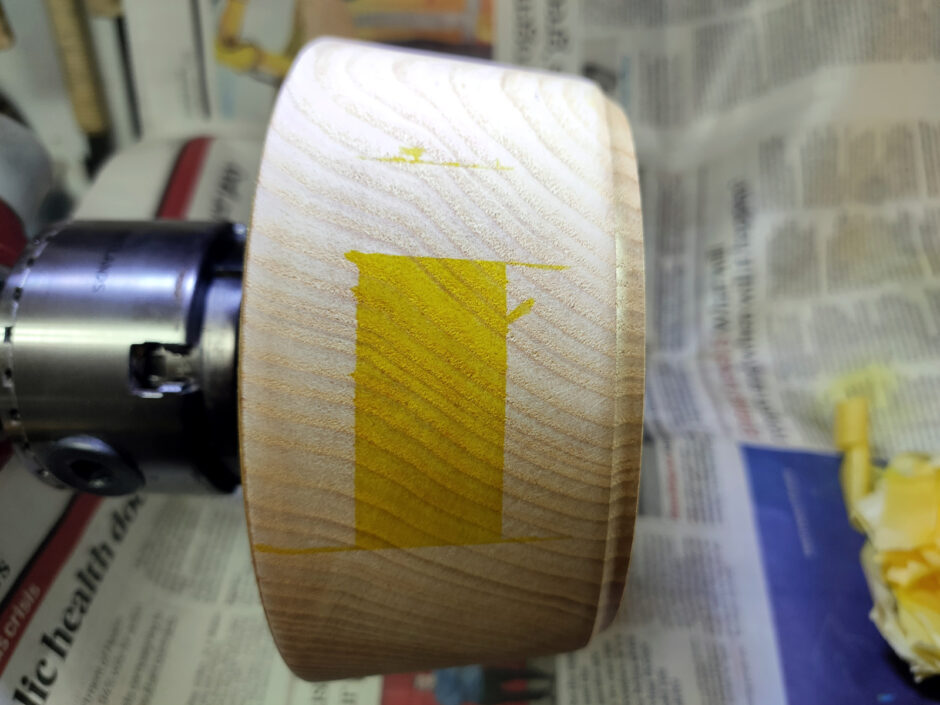
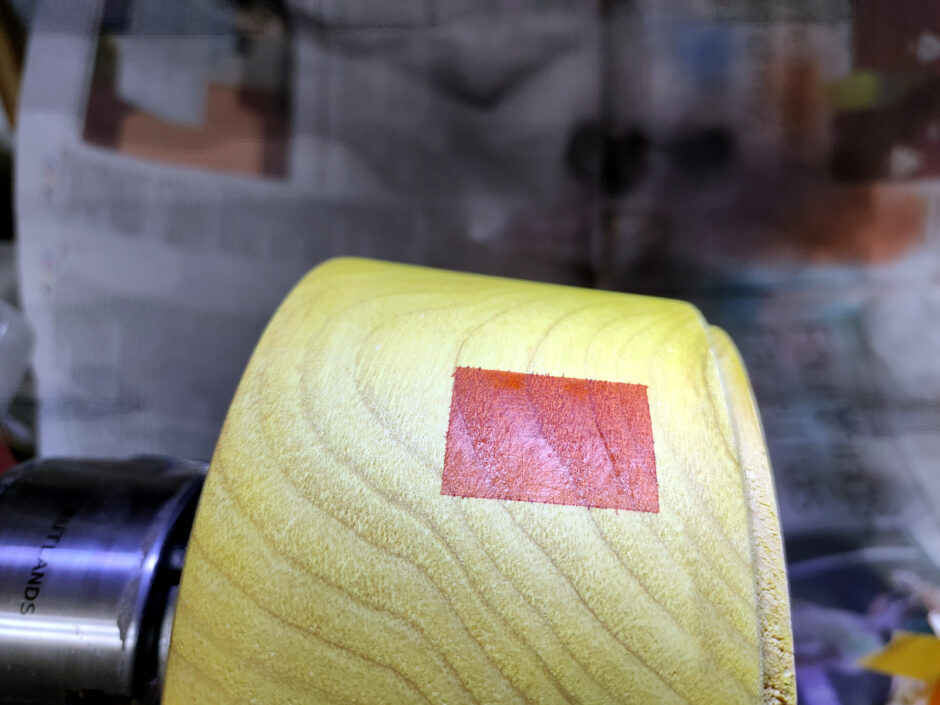
Also, if you’re masking off a square with the tape, you’ll have vertical sides and horizontal sides and one of those is going to be going down over the other. You have to burnish both sides heavily, but you have to pay special attention to the point where the top layer of tape meets the bottom layer of paint. You have to burnish that like it owed you money, because if you don’t, you leave a very small gap where the horizontal line meets the vertical line and the tape has to rise up off the wood to layer over the vertical line’s tape; and the spirit stain will wick into that gap through capillary action and spread waaaaay further than it has any right to and you’ll have to turn off the surface of the bowl and start over again.

And do I even need to mention that you have to airbrush from a ways back, use light coats and take time to build up the colour you want because if you get too close to the surface the air will blow the stain into any little gap to get out from the tape otherwise?

However, with enough time spent burnishing, and some care airbrushing you can get nice results.

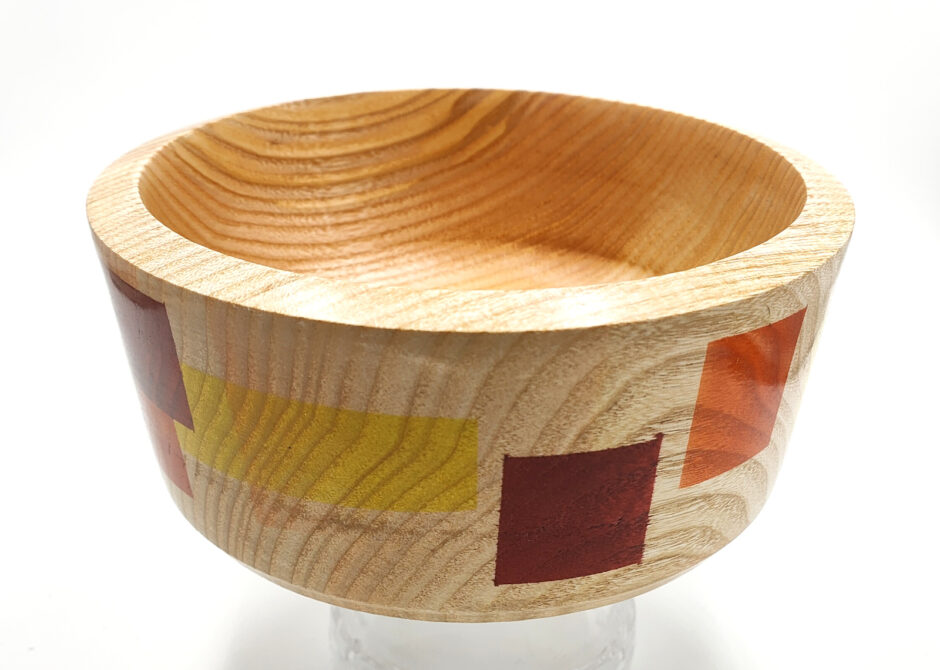
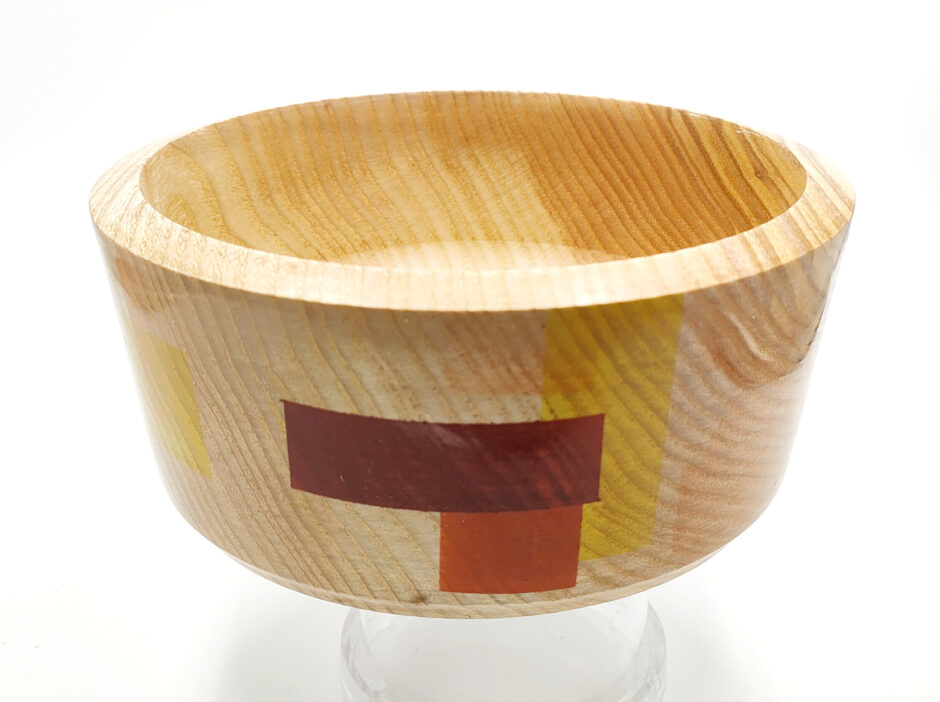
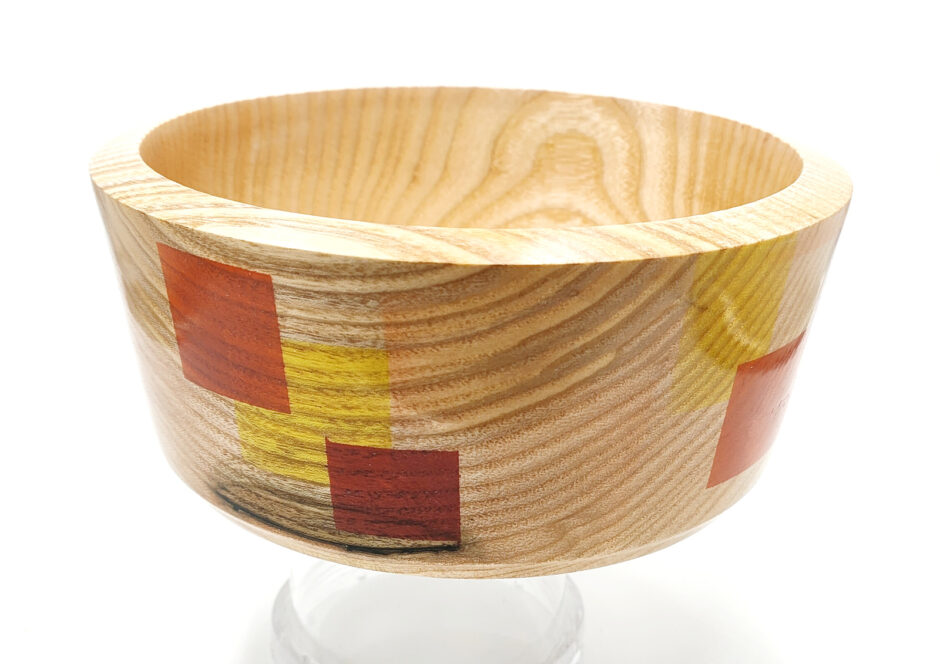
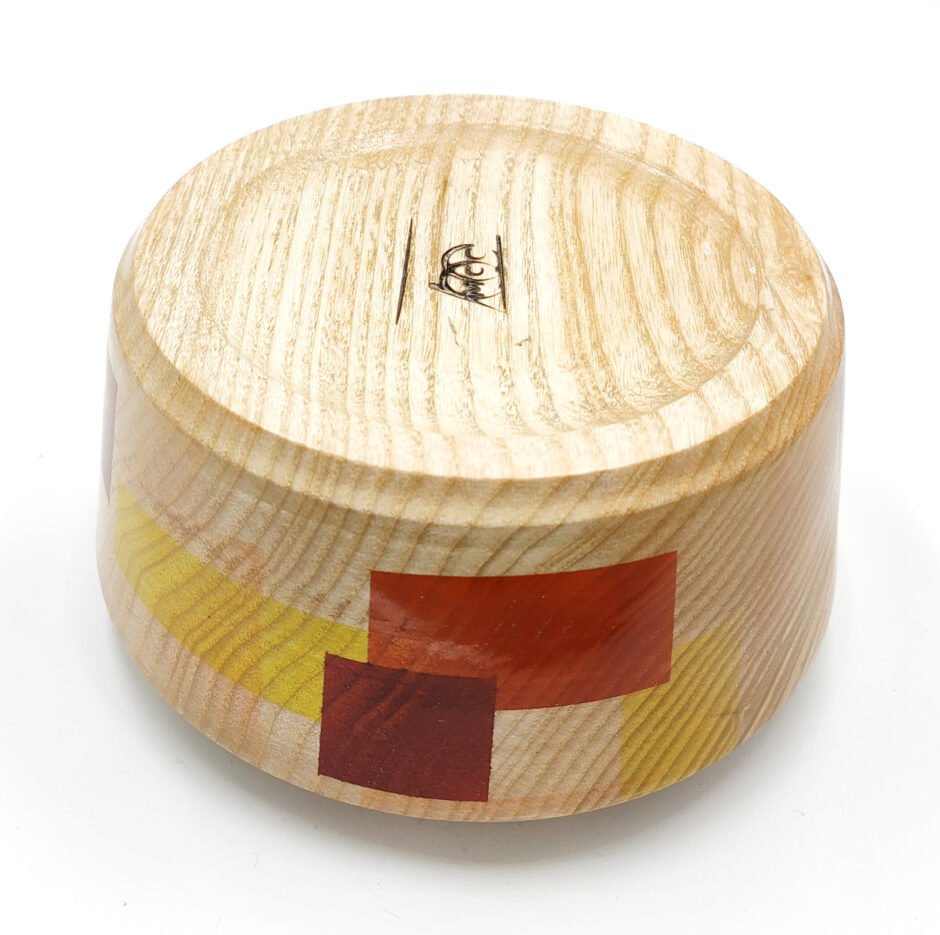
It’s still not perfect, but I like the effect. I might come back and use it for something else in the future. I also liked the simple shape and the foot that I got on this bowl, I must try to do that again but better.


11
Apr 21

Mothers Day flowers

Well, if you buy flowers they’re all nice and well but they die after a while, so I thought it’d be nice to make ones that don’t.

Miniature (2″ diameter I think) spalted beech bowl blank turned to a bud vase (I know some people call them weed pots, they have no imagination), then textured using a dremel and a few saburrtooth rasps as well as the standard metal burr you can get for dremels, then stained inside the textured parts with an airbrush, sanded the outside to clean off the stain from the surface and then did a graduated blue/green stain to get a kind of underwatery vibe on the vase.

The flowers are made from sycamore spindles, turn down the diameter to an inch or so and then push back the grain with the heel of the skew to form them, then airbrushed with more stain (this is where having a small army of airbrushes comes in handy) and after parting off, drill a 2mm hole in the back of the flower and insert some florist’s wire and CA glue to hold it all in place. I had two kinds of florists wire, the thicker kind is just pure aluminimum I think and is nice to work with, the thinner stuff is I think more intended to wrap around stems and is a bit more fiddly for this but it should be useful for other things as well, like making loops to hang decorations from.

Turned out nice in the end.


10
Apr 21

Back to the shed

So technically, I’ve been back in the shed for a little while now and have just not been typing up blog posts as often. The finger has healed up well, though I did have to retrain my phone’s fingerprint sensor and I’ll have a nice scar because bandsaw cuts aren’t like knife cuts in that they remove material instead of just slicing it. Incidentally, I did finally finish up what I was doing when I had the whoopsie:

Oh well. During the downtime, I was looking at what to do about my broken air compressor. The company I bought it from has decided going radio silent is a very effective approach to my queries as I can’t drive there and walk in and ask them to honour their warranty, so for the moment the options were repair an air compressor myself with no real knowledge of how to do that (oooh, pressure vessels, what could possibly go wrong?) or to go buy a new one.

Meet my new air compressor. HBM machines are in the Netherlands (near Gouda) and managed to ship it to Ireland with no muss or fuss, and the thing is nearly silent. Compared to the Draper air compressor (the broken one) the Lidl compressor I got years ago is rather quiet – the Draper is somewhere around 90dB and the lidl somewhere around 80 (and dB being a log scale, that means the lidl is like, nearly half the volume). This new HBM one claims it’s 58dB.

And I believe it. It’s astonishingly quiet. And it cost the same as the Draper. The problem is, it’s a 3L tank and it’s designed for airbrushing (hence the regulator/moisture trap and smaller fittings). That’s cool, as it’s so quiet I could now use it in the house for modelmaking and in the shed for wood colouring until I figure out what to do with the Draper or just buy another 6L compressor for the shed for nailguns and such – though if I buy another one, it’ll be HBM as well, they’re just astonishingly quiet and cheap at that size range.

Still need more work on those, so having a usable-in-the-house compressor would be nice.

Once I got back into the shed, I started in on the little shop jobs that had been waiting to get done. So, first off, this has been sitting in a box since my birthday unused because, well, it’s in a box out of sight and therefore out of mind and that’s very very annoying for a very useful and spendy tool…

I want that up on the wall, and I’d been thinking about where. Putting it where the T5 is wouldn’t work – it’s longer and shaped differently and it just wouldn’t be easy to get it fitted. But the Record #050 combination plane that I have, well, I don’t use it very much at all since I started getting old wooden hollows and rounds. That seems to be a thing with combination planes – they were designed to replace hollows and rounds but they fell into the “jack of all trades master of none” syndrome. So my #050 is just gathering dust (the plough planes on the other hand, are absolute workhorses of things). So that’s where the Veritas is going to go.

So flush-cut saw and chisels to remove those dowels, the scratch stock got moved as well (that’s the Lie Nielsen scratch stock – it’s rather a nice design, based off an old stanley, and it wasn’t even spendy which is odd for Lie Nielsen).

Then a toe block, a side block, a little cover to help hold the toe in place… except unlike all the other planes, this is technically a nose block because the blade’s pointing downwards rather than upwards – I would prefer it the other way round but the blade would then be out in the air so I’d need a taller side block to keep me safe from accidentally planing my own fingers whereas here the side of the tool board hides the sharp edge of the blade.

The idea was that there’d be a covering board at the top as well like there is with the other planes, but the design of the plane is just awkward because it’s like a piece of angle iron instead of being like a piece of flat plate. So instead there’s a toggle clamp holding it in place. It’s a bit on the heath robinson side but so far it’s worked quite well.

Okay, so that was one job down, and numbers two and three are there on the bench – first off, one of the two chucks I have was giving me grief and I thought it was down to something in the scroll gear being worn or chipped and I could fix it with some filing – so I stripped it down totally, pulled the scroll gear and nope, nothing chipped or broken. I deburred any burred edges, repainted everything in moly grease and reassembled and nope, still has the issue. Every few turns of the chuck key, the mechanism jams. It turns out that the central bore of the scroll gear is not tight enough to the central core of the chuck so every few turns, you can push the scroll gear off-axis enough to jam it up. Rotating the chuck 180° on the lathe by hand and then continuing to turn from the other chuck hex port will usually unjam it. It’s irksome, but that’s what you get when you buy ex-demo stock I guess.

So after that – and I didn’t take photos and you’ll know why I didn’t touch my phone while using moly grease if you’ve ever used moly grease – it was time to tidy up the airbrushes.

Just some bits of plywood, glued and with two or three panel pins holding them together while the glue cured. There are chest latches on the ends because I want this to attach to the shelves but also be able to be taken off and put on the bench when I’m using them.

The holes were a holesaw in the drill press and then the bobbin sander, and the ledge under the holes is only half as wide as the top bit so that you can get a finger under the glass vials in case they got stuck or something:

You might be able to just make out there that you can get a finger under the glass jar of the airbrush. And it’s also stable when loaded and on the bench.

Attaches to the shelf, with all the brushes turned sideways to avoid catching on my pockets as I walk around in the shed (“around” he says, when the only way to walk around in the shed is to literally spin around on the spot).

And you can see that the front edge of the finishes shelf acts to support the weight of the airbrushes while the chest latches hold it in place (and the finishes shelf itself also unlatches from the dust collection cart for when I’m emptying the extractor).

Last thing for this post – two 260mm squares of 12mm plywood glued together, then cut into a rough 250mm circle on the bandsaw after the glue cured, screwed the faceplate to it (because I don’t use the faceplate much anymore now that I have the faceplate rings), turned it and sanded it to nicely smooth…

And then contact adhesive to fix some plastic sheeting to the face of that (the non-slip stuff that you get for lining shelves – I wanted router matting but couldn’t find any for less than a hundred quid including P&P!).

Doesn’t look great but works well – it just has to be a conformable surface that wouldn’t damage the rim of a bowl. To use it you take a bowl that’s almost done but still needs work on the foot, pin it to the plate with the tailstock and that’s enough of a hold to work on it.

I’ll cover that bowl later, there’s a story to that one, but I’ve used this once or twice now and it’s worked quite well. Colwin Wey uses them a lot instead of cole jaws and they’re waaaay more convenient (he calles them push plates, I don’t know if there’s another name for them):

There’s been a few small projects since this, I must write them up as well.