So the first of the fancy pens is going to be a pencil 🙂 Not the normal mechanical 0.7mm lead pencil but a clutch pencil (or I’ve heard them called lead holders as well). 5.6mm lead, so a bit beefy, and more intended for sketching than for handwriting. So I can actually use this for the shed sketchbook as well, for sketching out ideas for turning, which don’t seem to get as many dimensions as the woodworking stuff, mainly because most of the time the exact line of a piece is whatever random shape I wound up getting when I stuck the tool into the spinning thing on the lathe what the wood said it should be. 😛
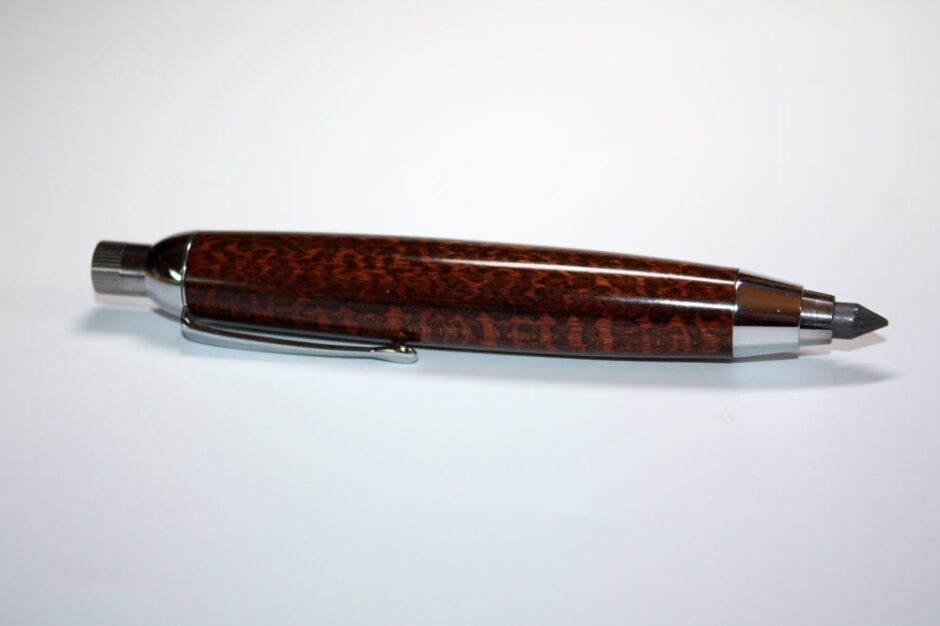
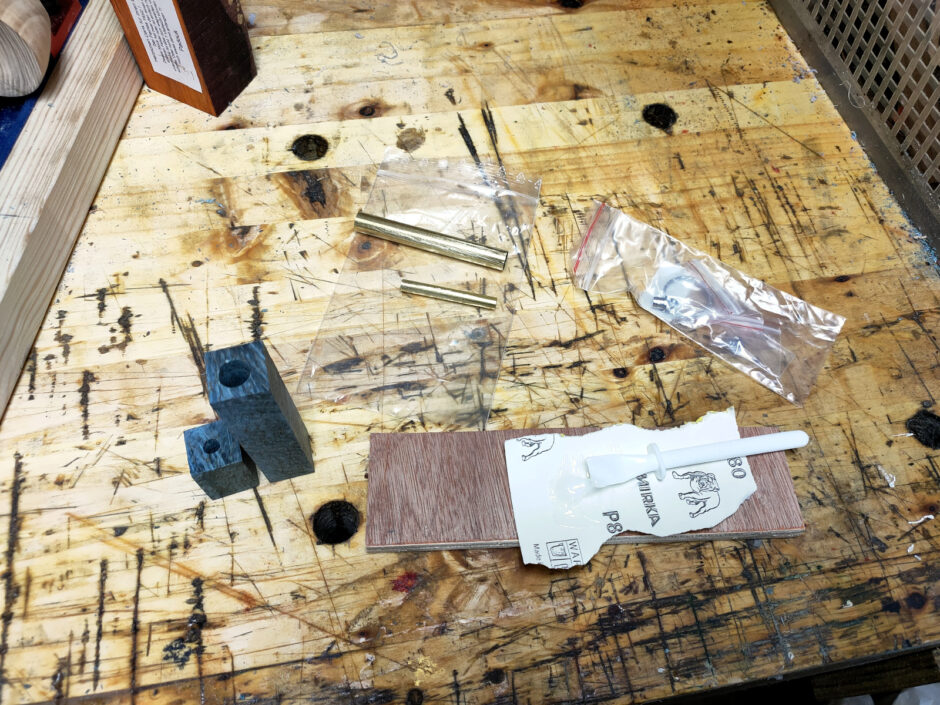
This is the kit I’m using, and that picture is what Feinesholz says it should look like when you’re done, if you didn’t cock it up 🙂 It’s not hugely spendy (I mean, it’s more than the basic slimline 7mm pen kit which is about the cheapest standard kit I know of, but compared to fancy fountain pens, it’s less than half their price tag). But the first one’s always more expensive because of the tooling – special drill bit (11.9mm? Why did nobody just use 12mm for feck’s sakes? How is that harder than this 30/64ths nonsense?) and bushings to let you mount the barrel on the mandrel. Throw in a spendy blank and this is probably the most expensive pencil I’ll own once its done 🙂
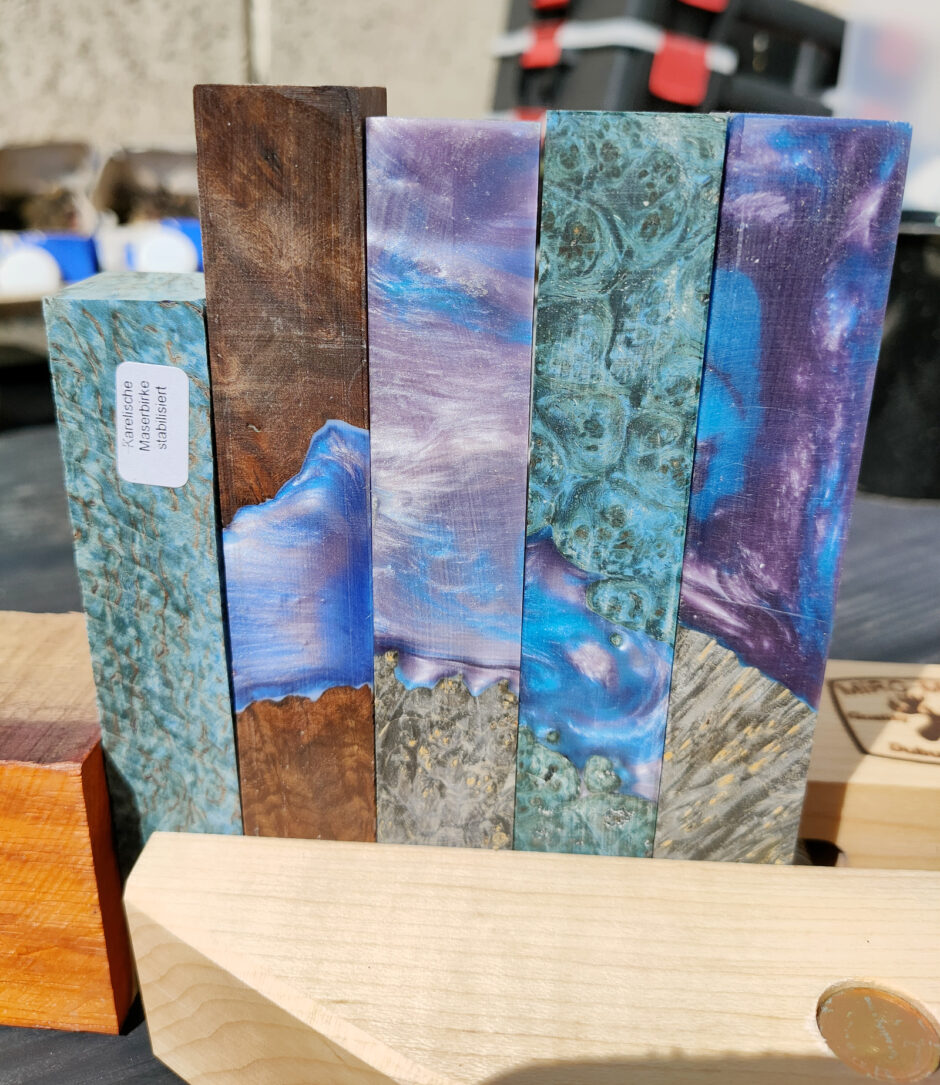
Speaking of pen blanks, it’ll be this one on the far left here, the shorter turquoise looking one. It’s from a species of white birch called Karelian birch which grows in a small area between Finland and Russia (called Karelia, obviously). It gets called Masur birch a lot as well, but masur is the actual grain and figure, rather than the species (and of course the species name is different again because botanists are worse than mathematicians for naming things – Betula pendula var. Carelica for anyone who speaks botanist). This particular blank has been stabilised with acrylic (specifically with plexiglass) that was dyed blue, hence the colour. Karelian birch is famous as a decorative wood – it even got used for a Faberge egg – to the point where it was almost clearcut into extinction and now it’s planting and harvesting is very controlled (though oddly, it doesn’t seem to be CITES listed). So, y’know, no pressure…
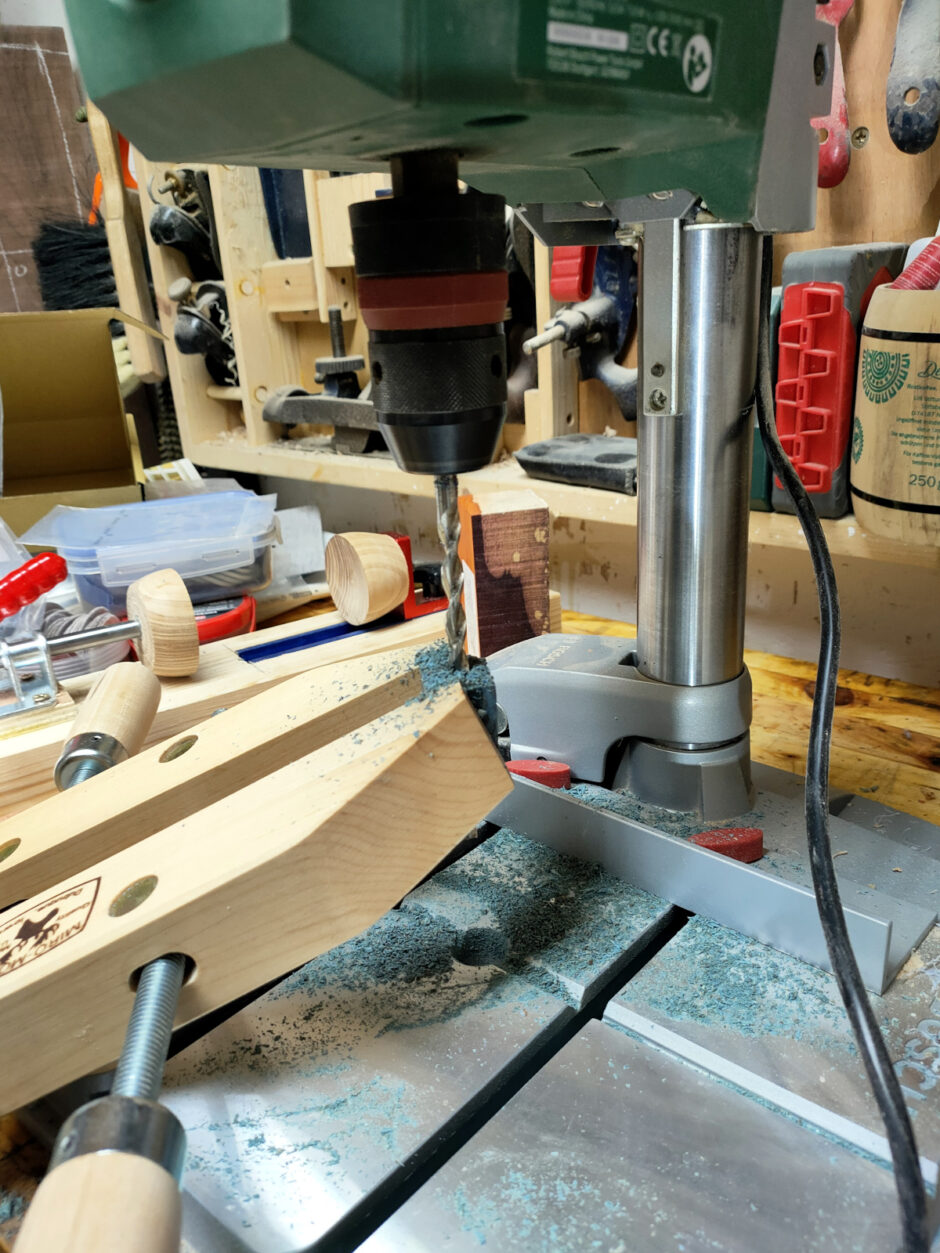
First job was to cut the blank to just over the size of the single brass tube and then drill through the center with an 11.9mm drill bit. That went okay with the main part. I also wanted to turn the offcut into a matching keyring rather than burn it, and of course I blinked and it tried to climb into the drill body, but I was able to stop it in time. Fun cleanup by the way, there’s blue dust everywhere.
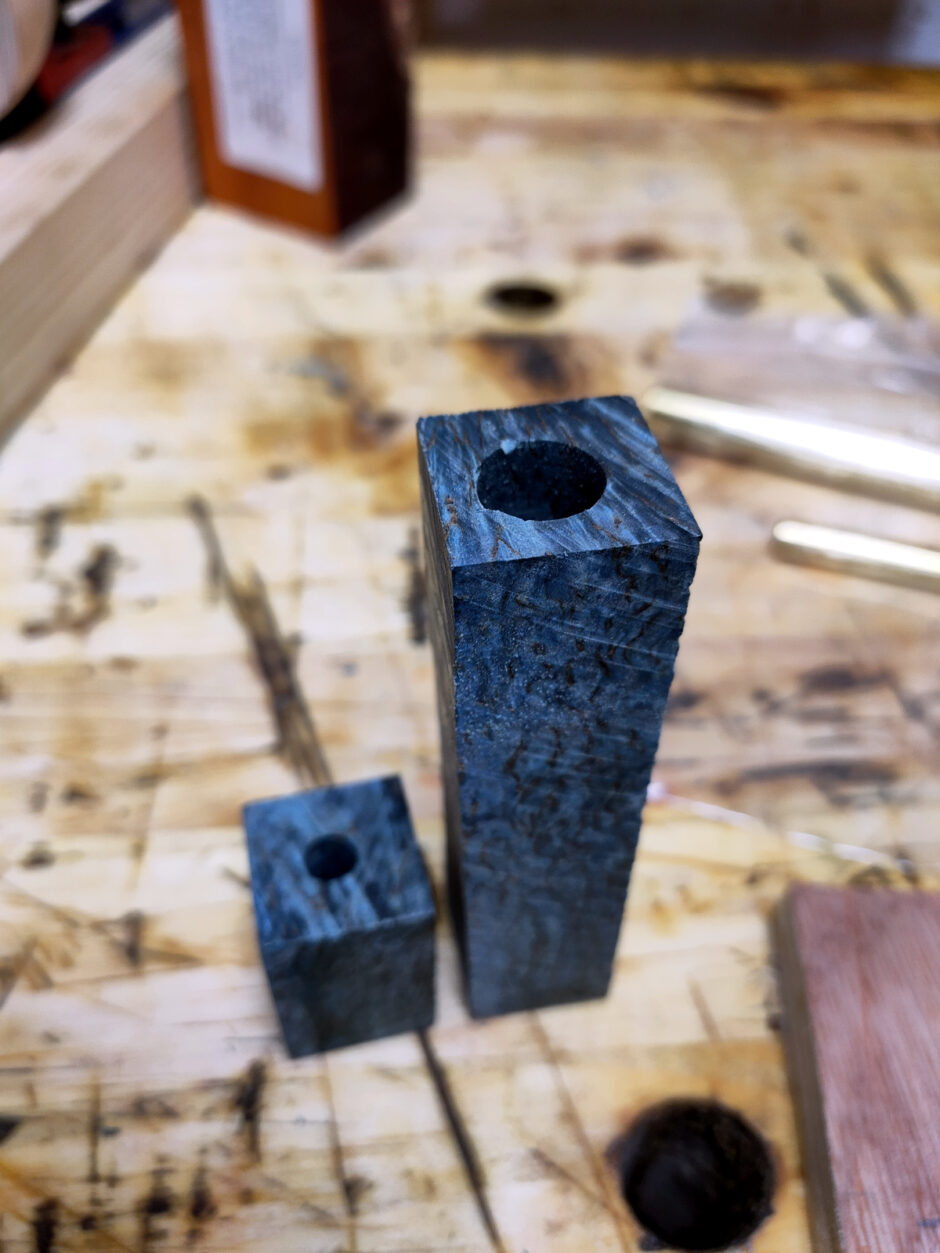
Slightly off-center, but not enough to cause issues. Next up, sandpaper the outside of the brass tubes, mix some epoxy and epoxy the tubes in place.

And that went well enough. There’s almost half the tube left sticking out from the keyring, I’ll save that offcut, it’ll do for tree ornament turning later.
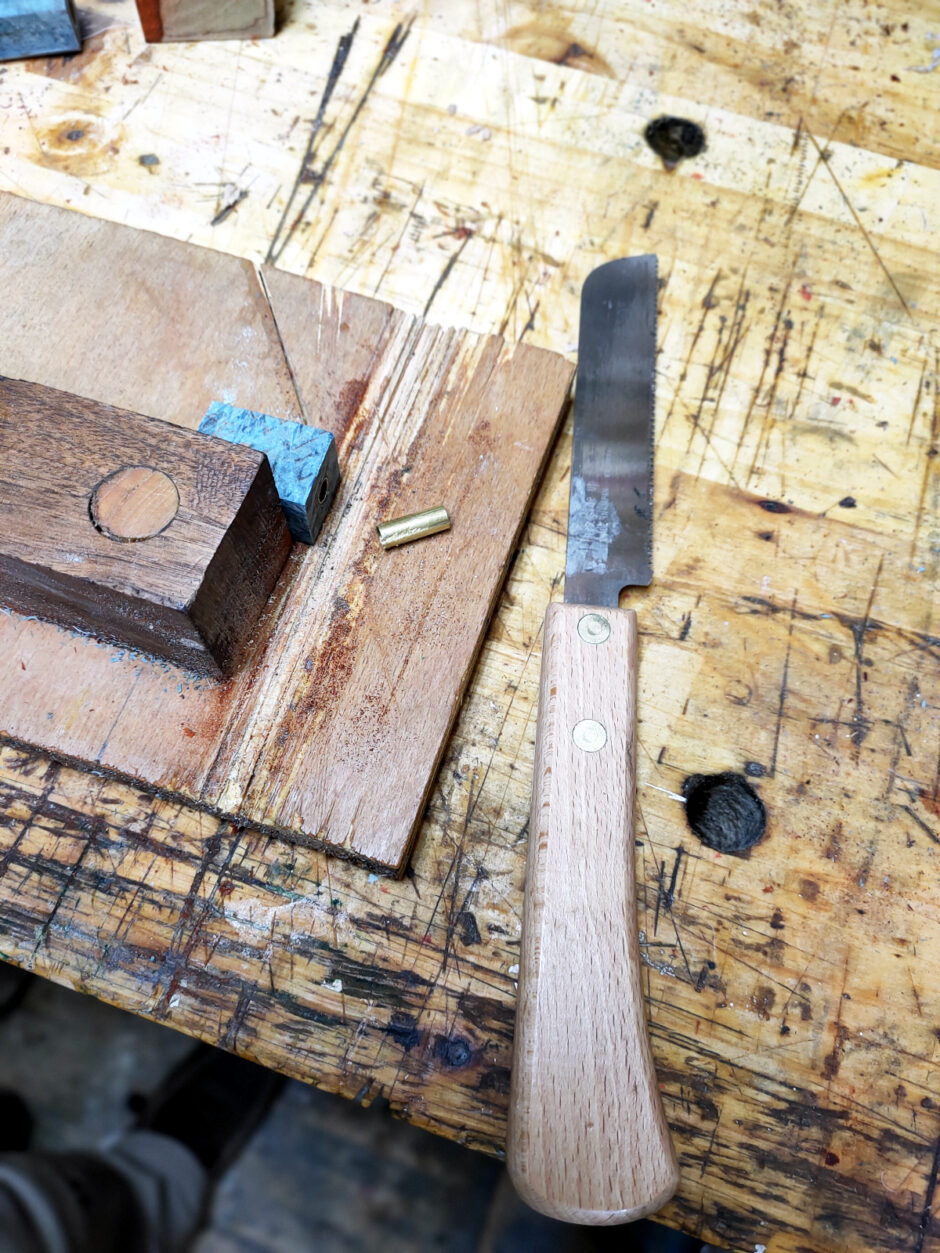
And yes, you can cut brass with ordinary woodworking saws and tools, it’s a lovely material to work with.
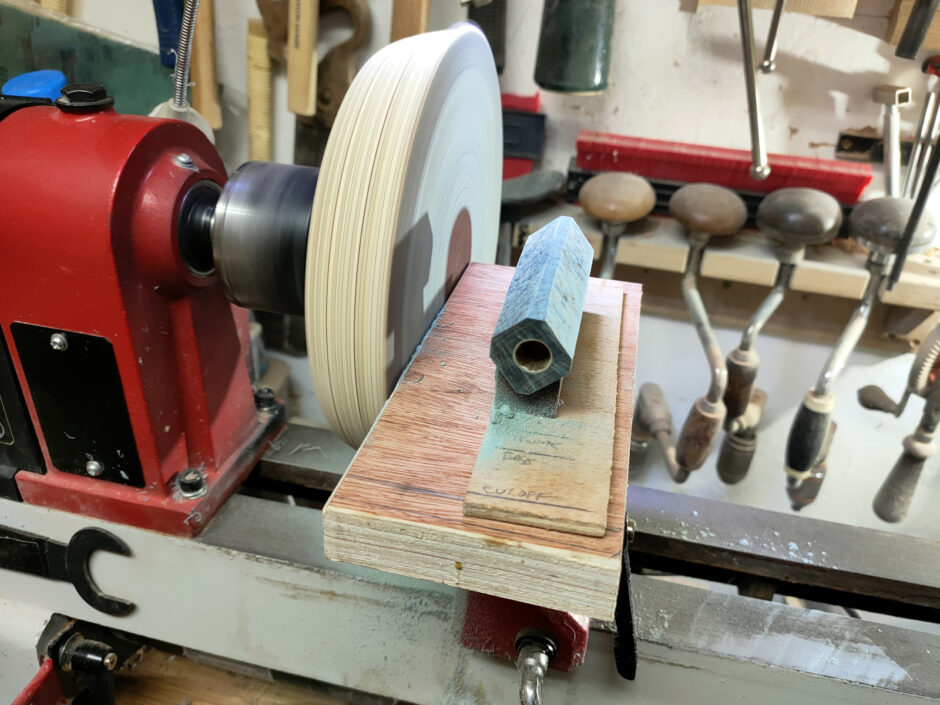
I don’t have a barrel trimmer in the right size for a 12mm tube (that’s on the list, sometime after the next paycheque) so to get the ends trimmed square to the tube, I resort to sanding:
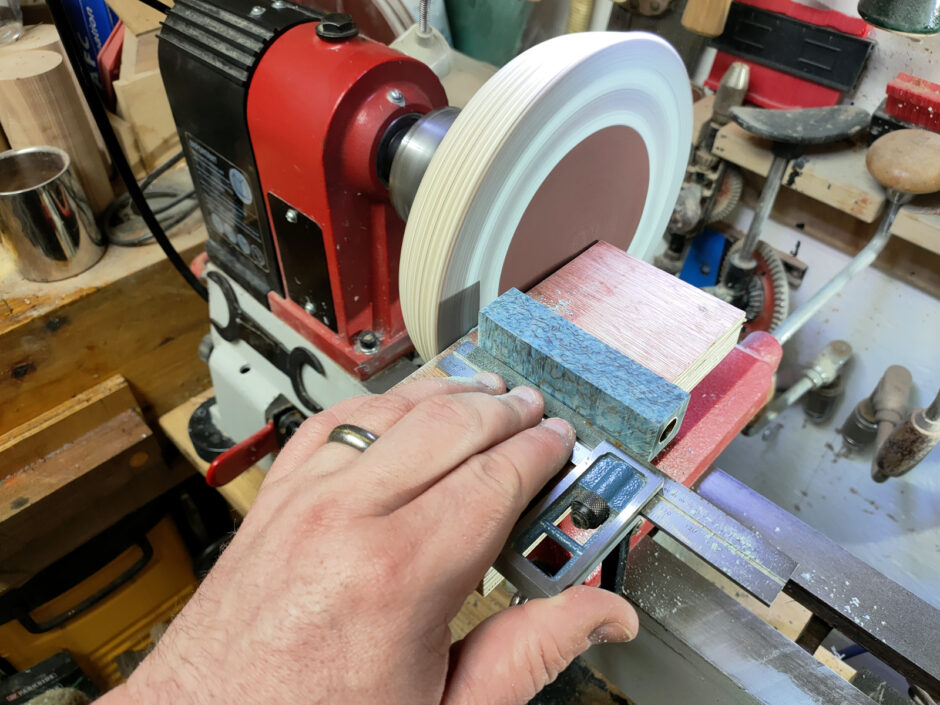
Now this works, but it’s not perfect – it relies on three things here. First, that the tube is drilled perfectly through the blank, and that almost never happens. It was done with a pillar drill and lots of checking with a good square against the drills table, but you can only count on that getting you within a degree. Barrel trimmers use the inside of the barrel for a reference which is a superior way to do it, but needs must. Second, the two edges of the platform have to be parallel here for the square to be referenced off the back side (that’s done for this platform, the front got jointed and then I ran a marking gauge off it to set the back edge and planed to that line), and third, the front edge has to be parallel to the disk, which you can get within a degree of, but you can get cumulative errors in all of this so if you don’t work carefully, you could get an end that wasn’t square to the barrel and that means that you could get a gap between the pen blank and the fittings of the pen that you couldn’t prevent and that’d be really annoying 🙂
Didn’t happen this time, mind, but I’m still buying that barrel trimmer kit.
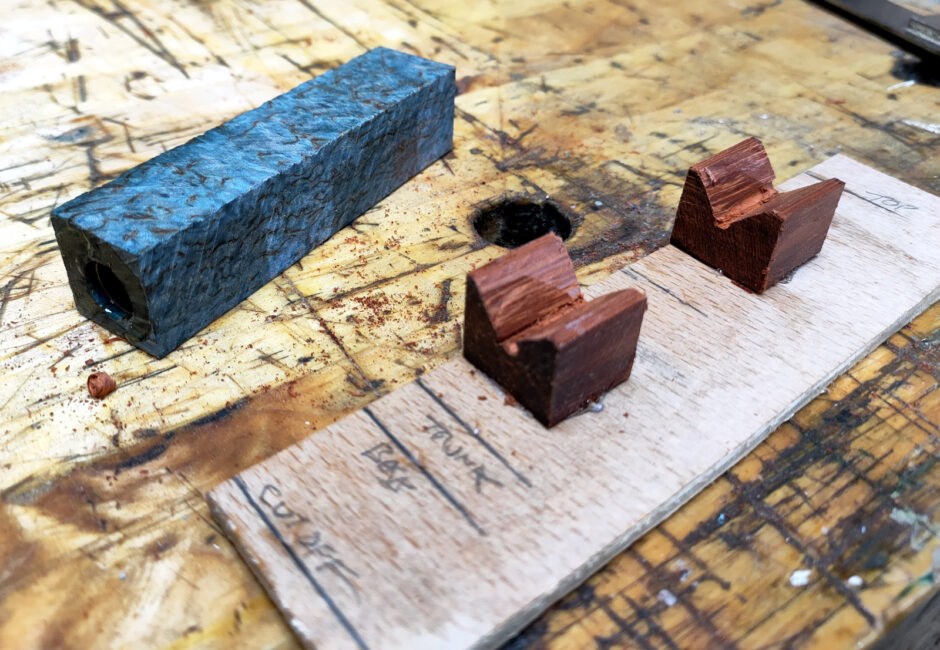
I also don’t like that first few minutes of rounding the blank and taking off those corners – it’s the most interrupted the cut ever gets and it’s the most potential for ripping off a chunk through a shock load on the blank, so I thought I’d use an offcut from the padouk pen blank I used the other day and make some miniature V-blocks from it and superglue them to a bit of plywood (that was a pattern for christmas tree carving, but I transcribed it to plasticard a while ago for storage) and jointed that front edge so that I could use that on the sanding platform…

I mean, it’s not rocket surgery, but it’s better than nothing.
Now I’ve not turned this material before so I started on the keyring, because I can use the skew, the spindle gouge, the spindle roughing gouge and some wire for burn lines and very quickly get a rough feel for how it works.
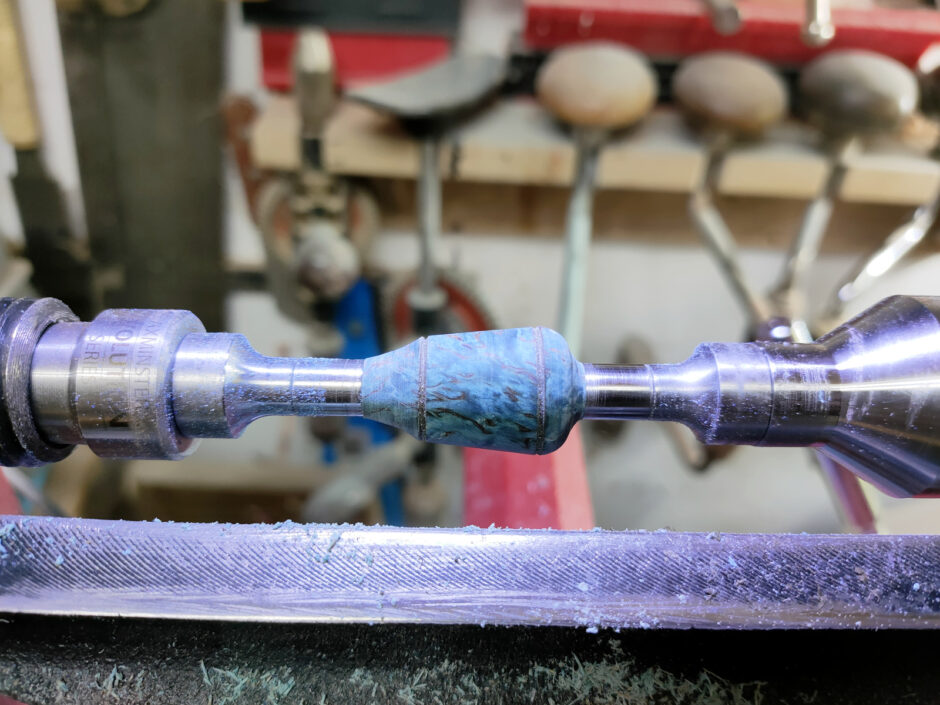
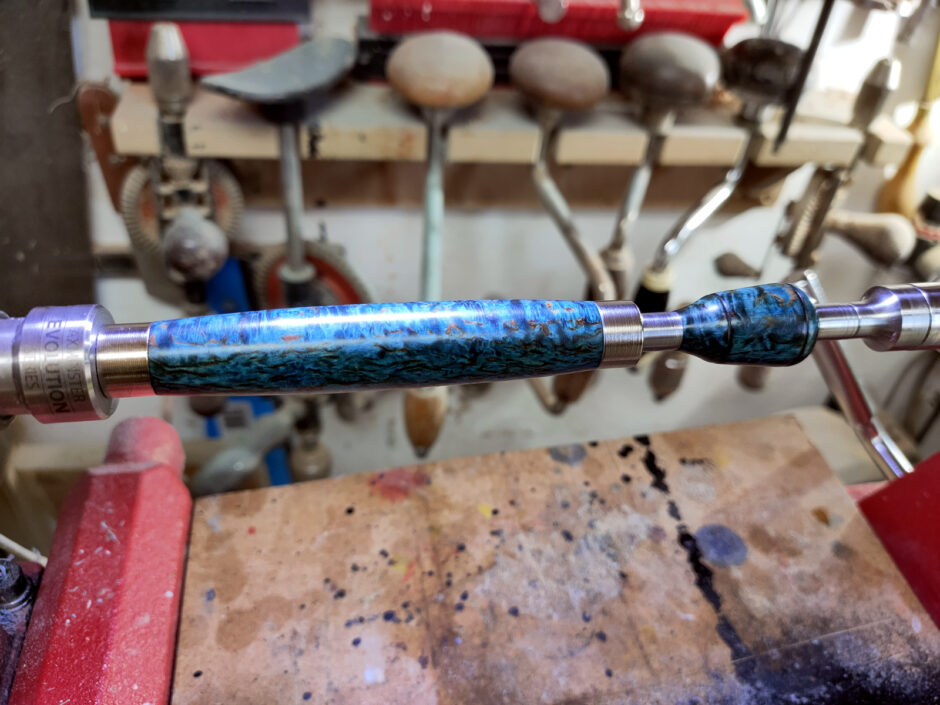
And it works very very nicely indeed. Very forgiving material, cuts clean and easy, scrapes nicely as well. In fact, there’s really only one problem and it’s down to the sabilising acrylic rather than the wood:
It would appear that I have shawarma’d a smurf.
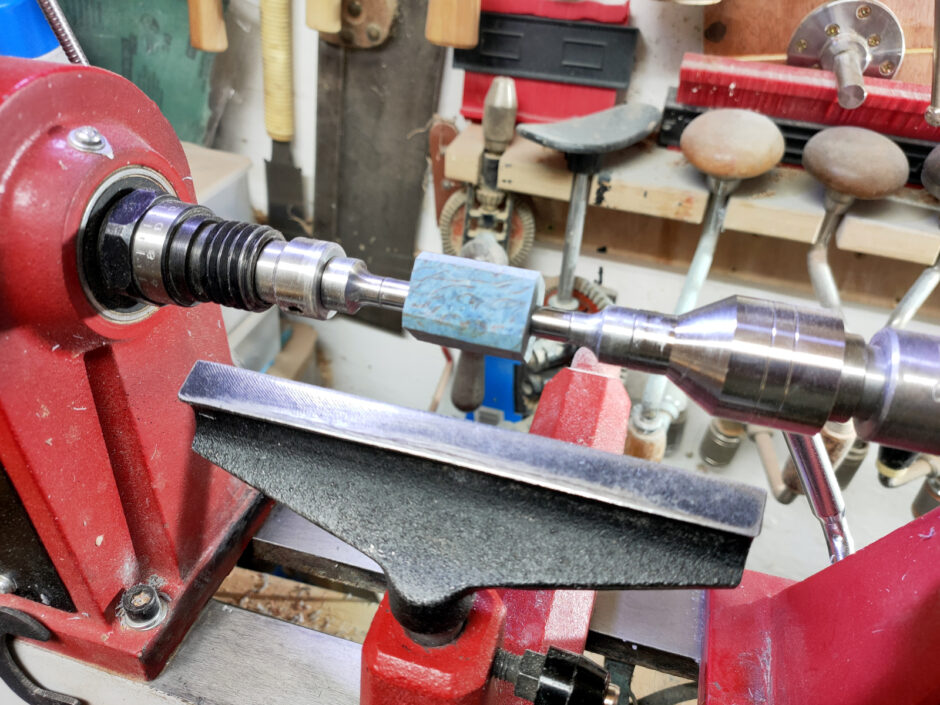
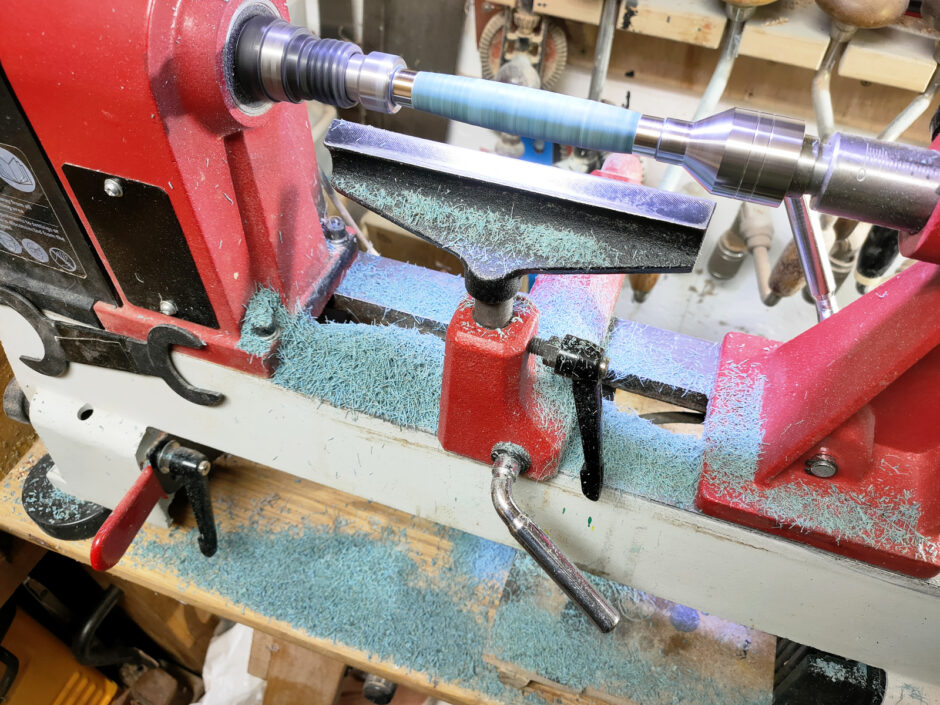
Incidentally, when I say that it’s a forgiving material, all of that pencil body (after the initial roughing to round which was done with the spindle roughing gouge) was done with the skew, and my shed is very tiny so I can cut towards the headstock with the skew without any problem right-handed, but I cannot cut towards the tailstock with the skew while right-handed because I would have to be standing inside my workbench to do that – so my choices are horse the lathe around so it’s at 45 degrees to the wall and I have enough room to move; or cut with the skew left-handed, so I do the latter. On some materials (looking at you, olive ash) that’s a pain in the fundament and I usually just horse the lathe around because I can’t manage it, but on this material it was very straightforward.

And that’s everything cleaned down and all set for finishing. I’m coming off the skew, so I’ll start with 800 grit dry-sanding and then I work up through the micromesh pads to 12000 grit (well, their 12000, whatever that translates to) wet-sanding all the way. I’m using micromesh because of the acrylic – if I used normal sandpaper here, it’d start to melt and smear if the heat built up and heat will build up on blanks like this very very quickly indeed if you’re not careful. 1-2 minutes wetsanding with the lathe running (less time as I go up the grades), then twice that sanding by hand with the lathe stopped along the grain to get rid of radial lines, then dry it off with a clean piece of paper towel with the lathe running and then on to the next grit; and for the last two grits, I clean the blank with isopropanol between pads. Then Yorkshire grit, and then Yorkshire grit microfine. And then two coats of melamine lacquer from a spraycan (the chestnut products one), denibbing with Yorkshire grit microfine after each coat. Then the resin polish (the stuff normally used on cars), and finally a single coat of microcrystalline wax.
And then as I was buffing the wax at high speed, I let the heat build up too much, the melamine lacquer wasn’t fully cured and grabbed the paper out of my hands and basically epoxied it to the blank.
After a bit of cursing, I got the paper off the surface, cursed a bit more, and went back to about 4000 grit on the micromesh pads and did the whole routine over again from there, but with more time on the yorkshire grit this time and with a lot more care on the final buffing pass for the wax 😀
Still though. Pretty.
Next up, assembly. And nearly destroying the thing. See, the photo on the website that I didn’t see was this one:
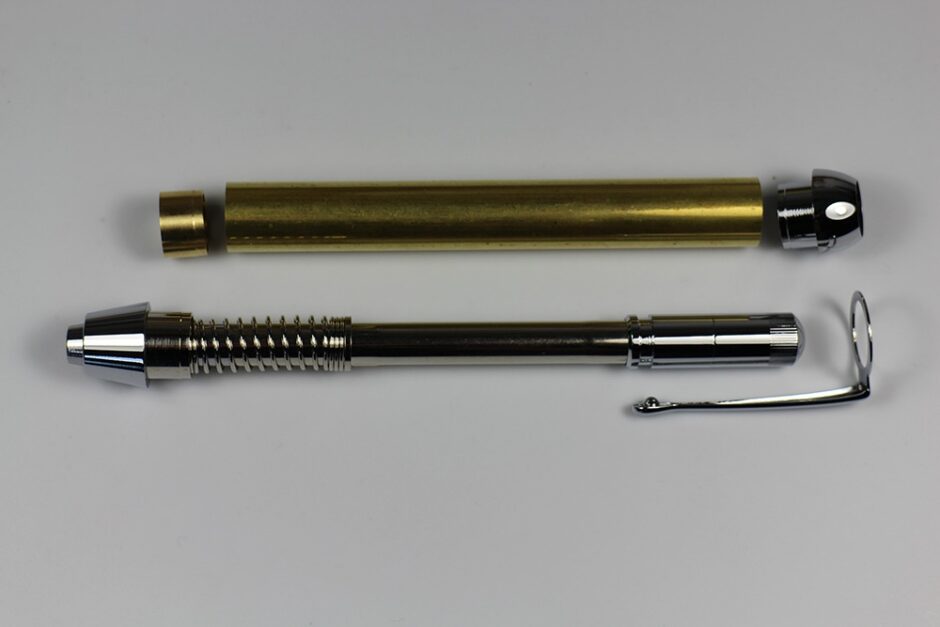
You see how you have five pieces there? Well, for shipping, they partially assemble the innards so you have four pieces, not five – the chrome endcap and clip go in their own bags, as does the inner brass tube, but the other end piece, the brass inset that the main mechanism screws into, that’s screwed onto the mechanism for shipping. What you should do is unscrew that, press it into the nib end of the pencil on its own, then screw in the mechanism. What I did was try to press in the entire mechanism – which did in fact set the nib endpiece in place, but which also pushed the clutch mechanism right up inside the pencil so it wouldn’t work, so I had to unscrew the mechanism, pull it all apart (in that photo above, that single mechanism bit with the spring is actually six parts all fitted together with interference fits), reassemble it, tweak the clutch slightly because I’d compressed it a bit too much, and refit everything. But luckily I hadn’t mangled it too badly and it fixed up nicely.
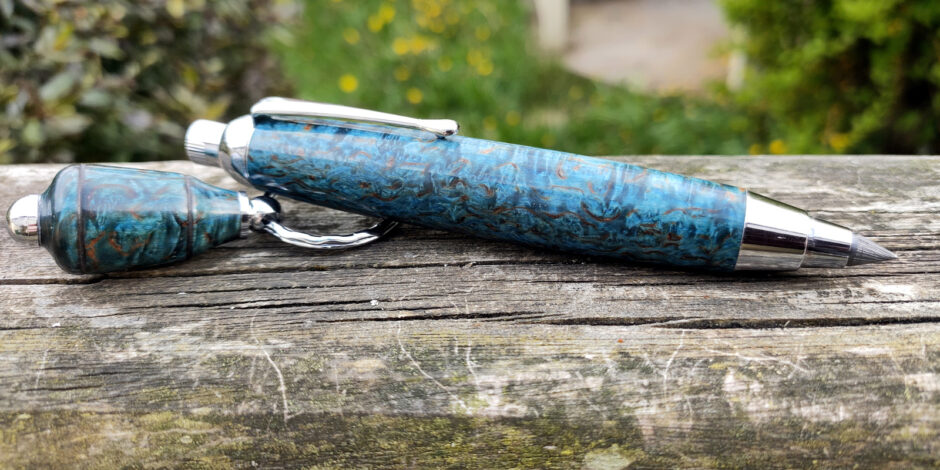
Looks nice in the sunshine, even if we didn’t have much of that today. Oddly looks darker in the lightbox, which should have more lumens. I wonder if the colour profile of the lights is just that much different from sunlight.
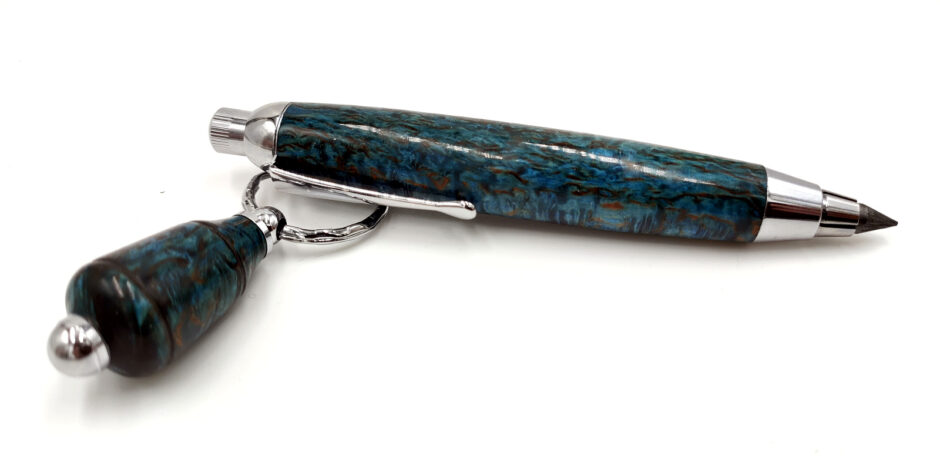
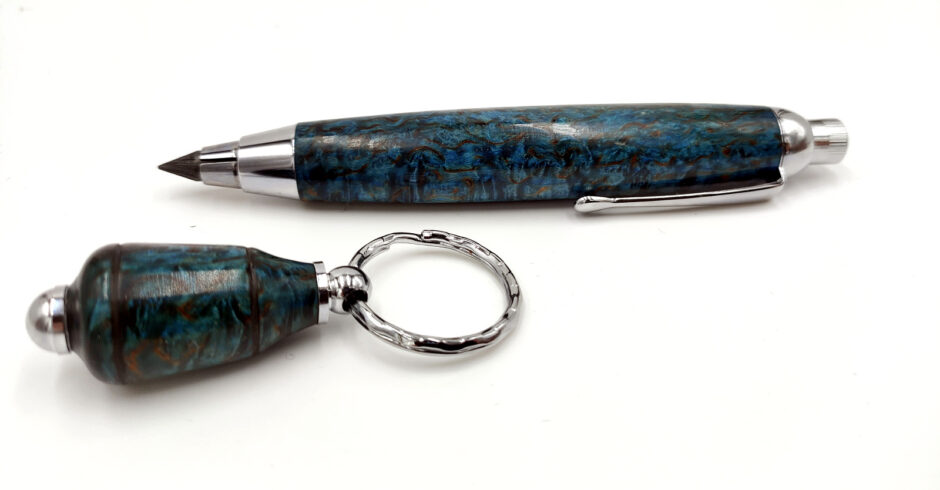
Feels nice in the hand, sketches well. I like it. I’m enjoying using it for sketching out an idea I’ve had for that padouk offcut Feinesholz threw into the box with the pen blanks as a challenge. I didn’t quite get the perfect mirror finish that Feinesholz’s model photo has, but they’re using a different material anyway (that’s my story and I’m sticking to it). And while the imperfections show up under strong point light sources like in the lightbox or up close to a lamp, you do have to be looking for them and even then they’re more minor things to bug me than they are real flaws that affect using it. I’m starting to think I can make these things well enough that that whole idea of making a piece and selling it to offset the cost of the wood is an actual runner. I might try that later…
Tags: acrylic, birch, feinesholz, karelian, karelian birch, masur, melamine lacquer, pencil turning, stabilised wood, yorkshire grit