So, y’know when you have an odd idea and you can’t be sure if it’s good or terrible?
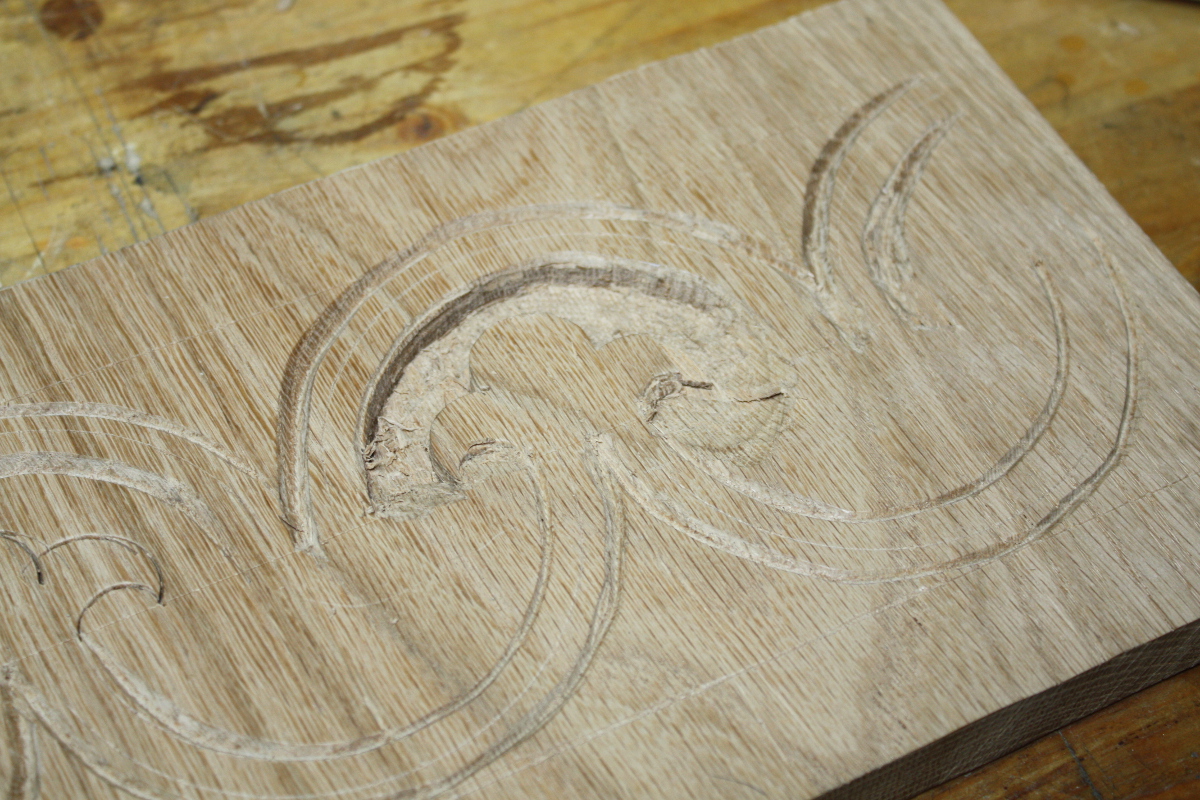
The oak carving is going okay. But depressingly regularly, while cutting away the background, a piece of the foreground chips off. Sometimes I can fix it with CA glue, sometimes I can soften out the edges so it looks like it was supposed to be rounded instead of oops-broke-a-bit, but I kept wondering about how well the box would hold up if it’s this chippy, and also while I like the way it looks, well, most of the appeal of this sort of stuff comes from the medullary rays and the lines of the grain you get when you rive oak, and the flatsawn stuff just isn’t as pretty.
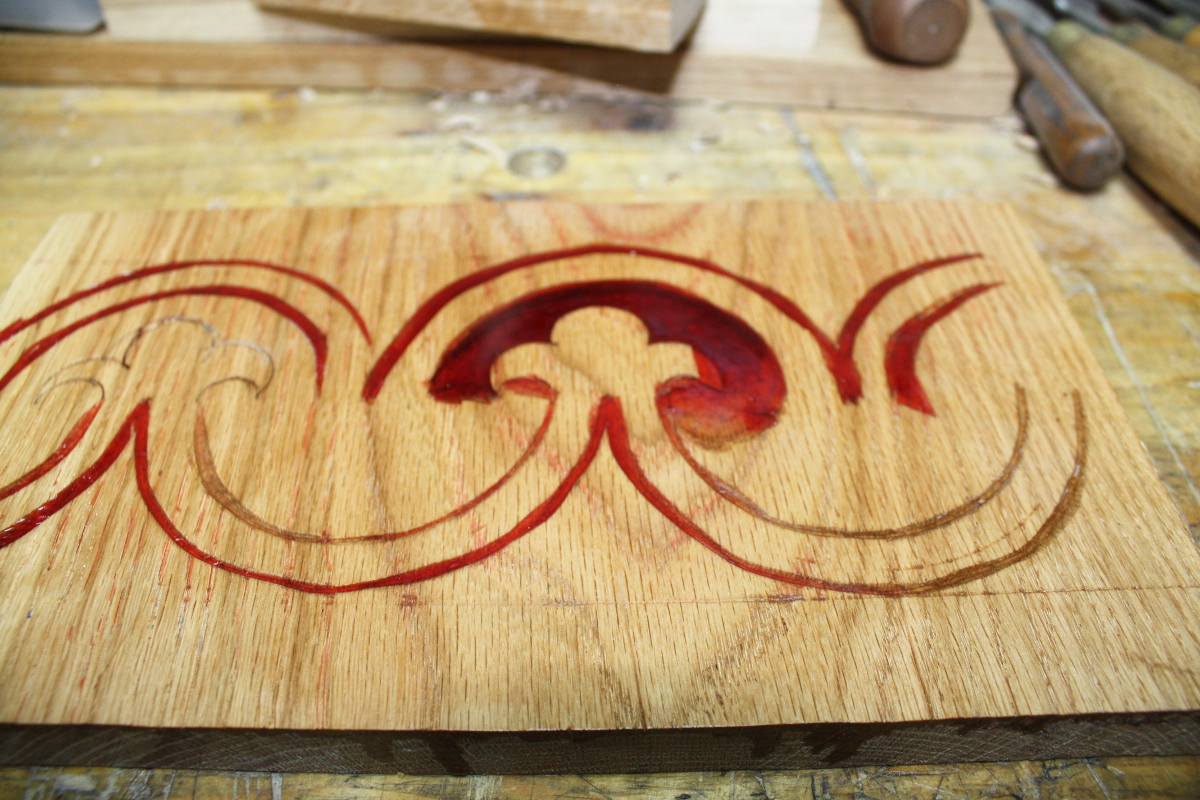
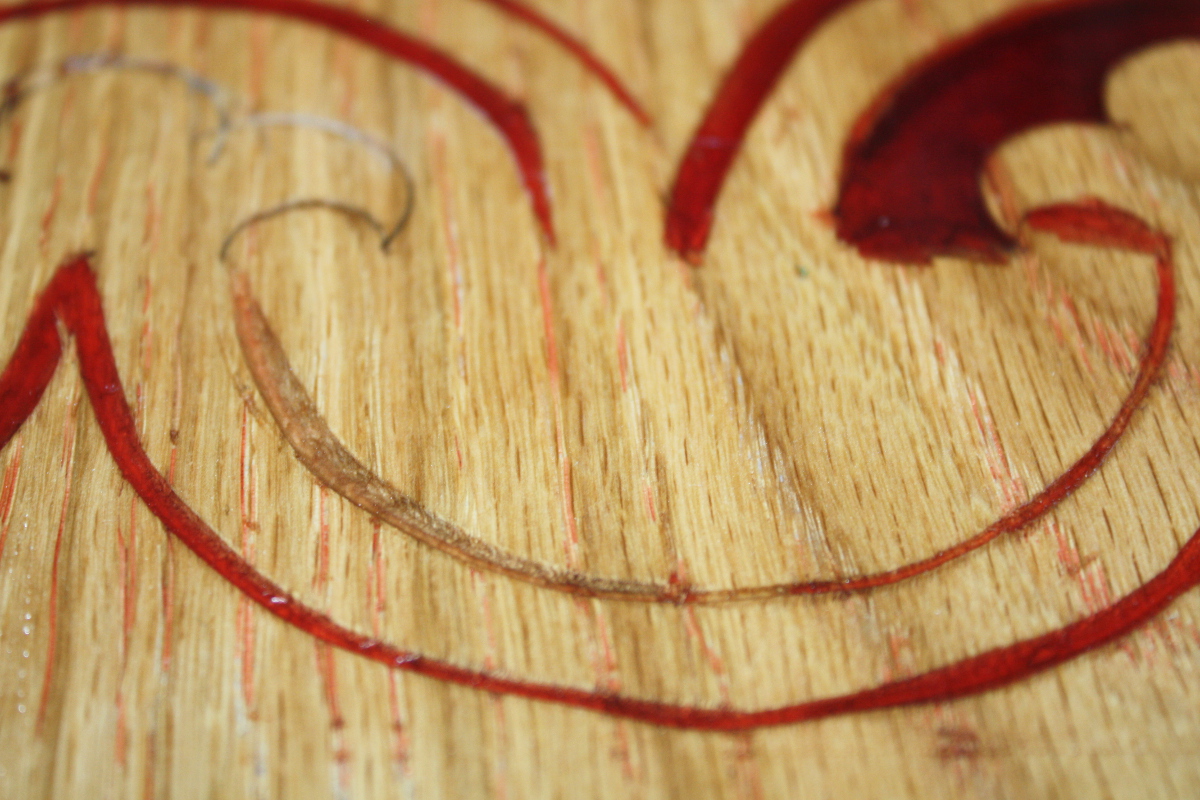
And then I wondered, well, what if you carved a Peter Follansbee pattern, but then filled it with Peter Brown resin?
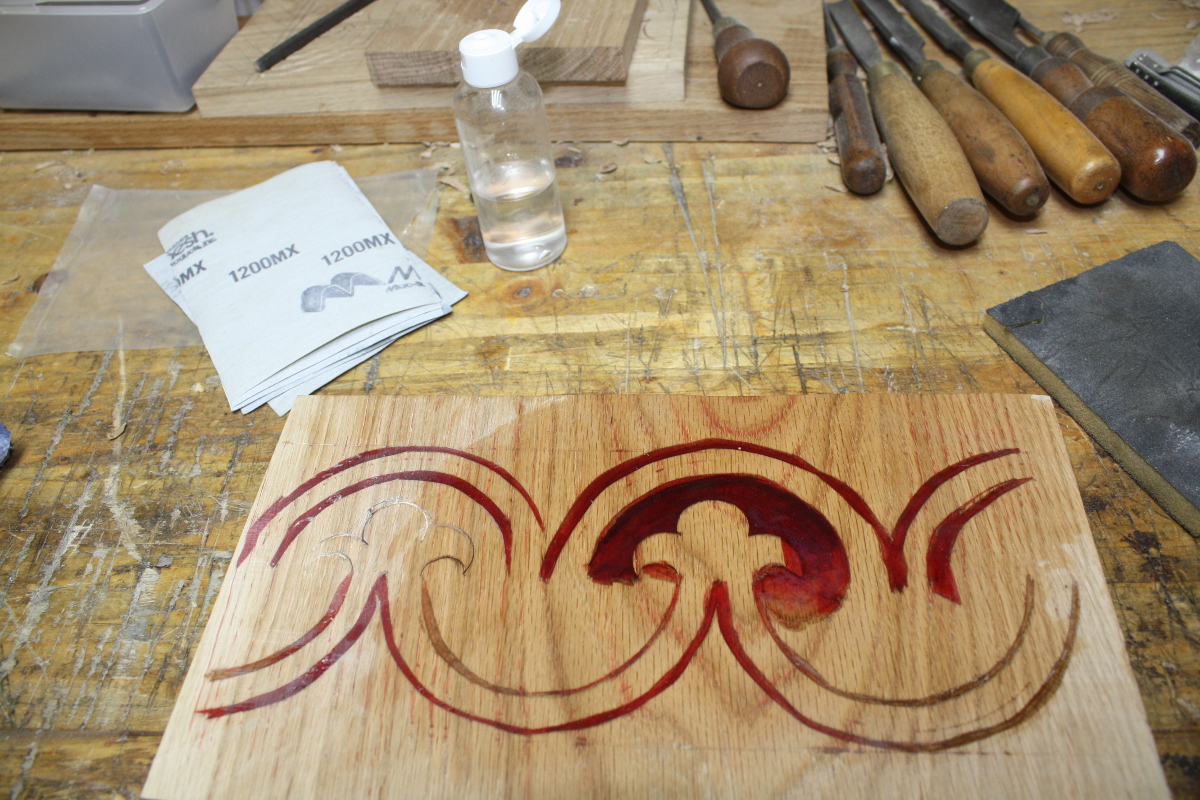
And I couldn’t decide if that was a great idea or a horrific one so I took an offcut, scratched in the pattern and spend a very hurried ten minutes hacking out the basics of the pattern and annoying myself that despite speeding through it, it came out better than some of my more careful attempts.
No, it’s not finished – in
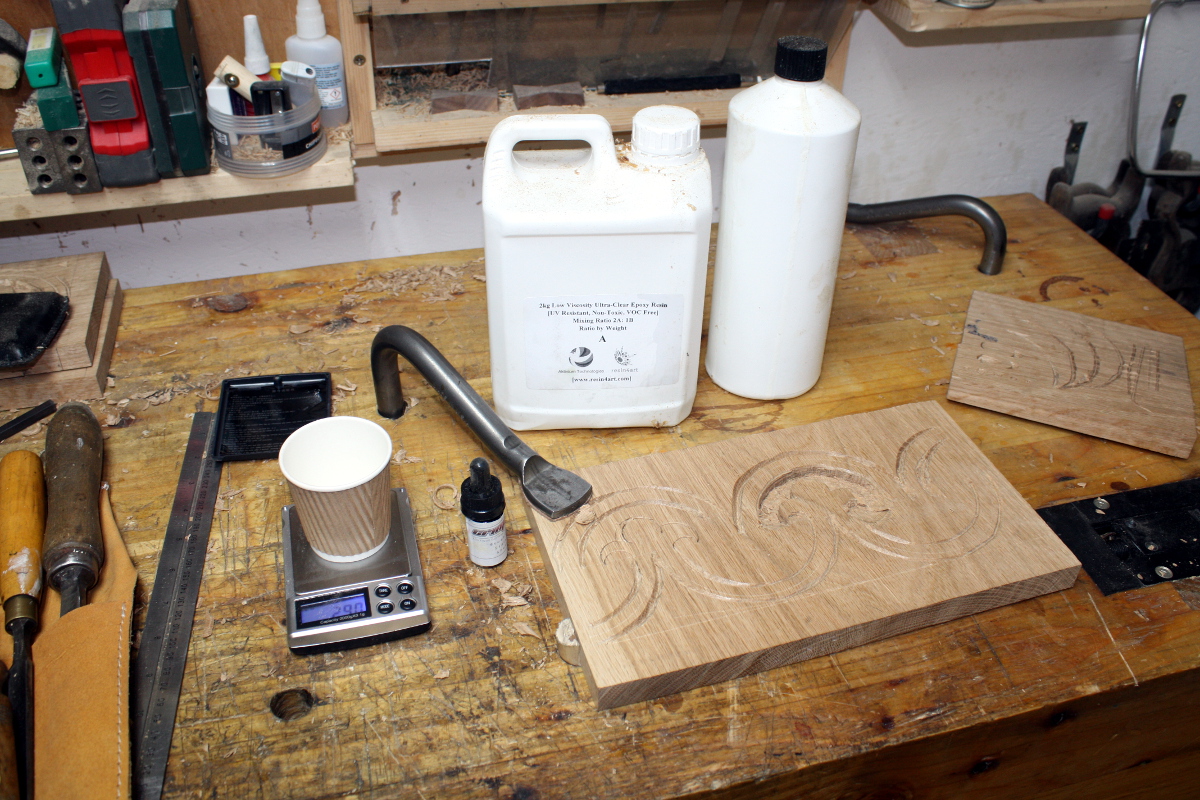
I’m fairly sure digital scales in the 0.1g range were not common in 17th century New England, but neither was epoxy resin or a polio vaccine, so, y’know, I can live with it.
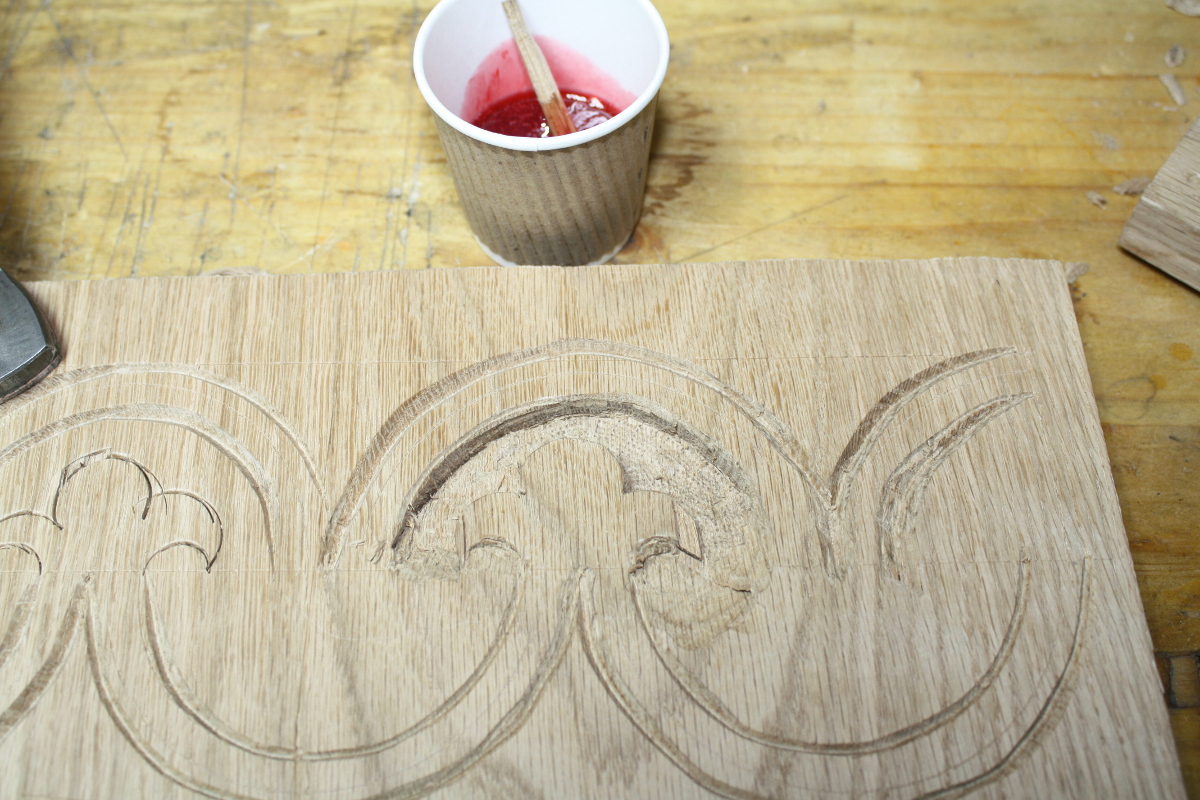
Two parts A to one part B by weight plus two drops of crimson stain and mix for a full minute to make up 60g of resin. And then pour.
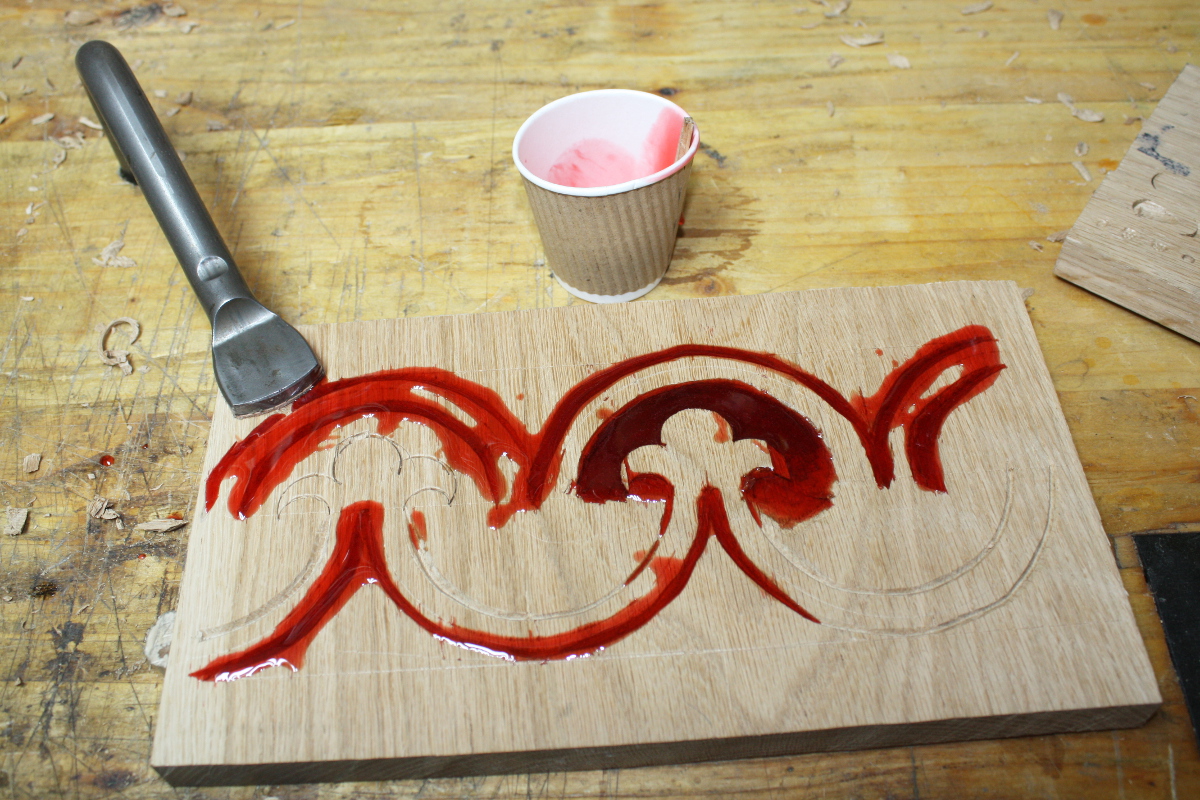
It looks like a seriously impressive accident just happened.
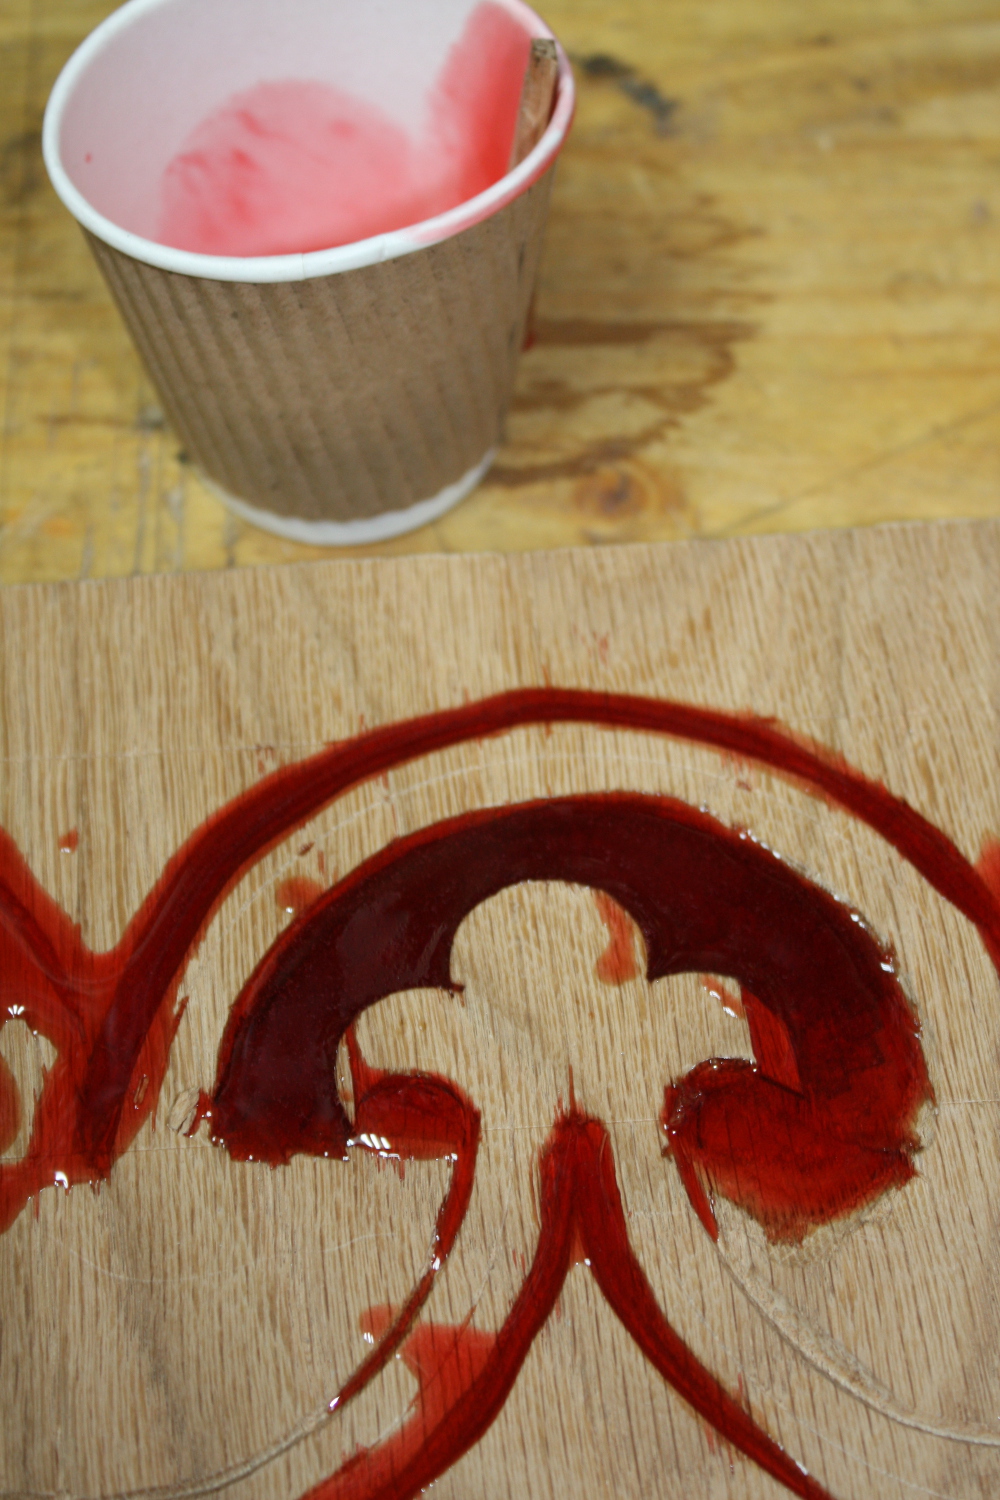
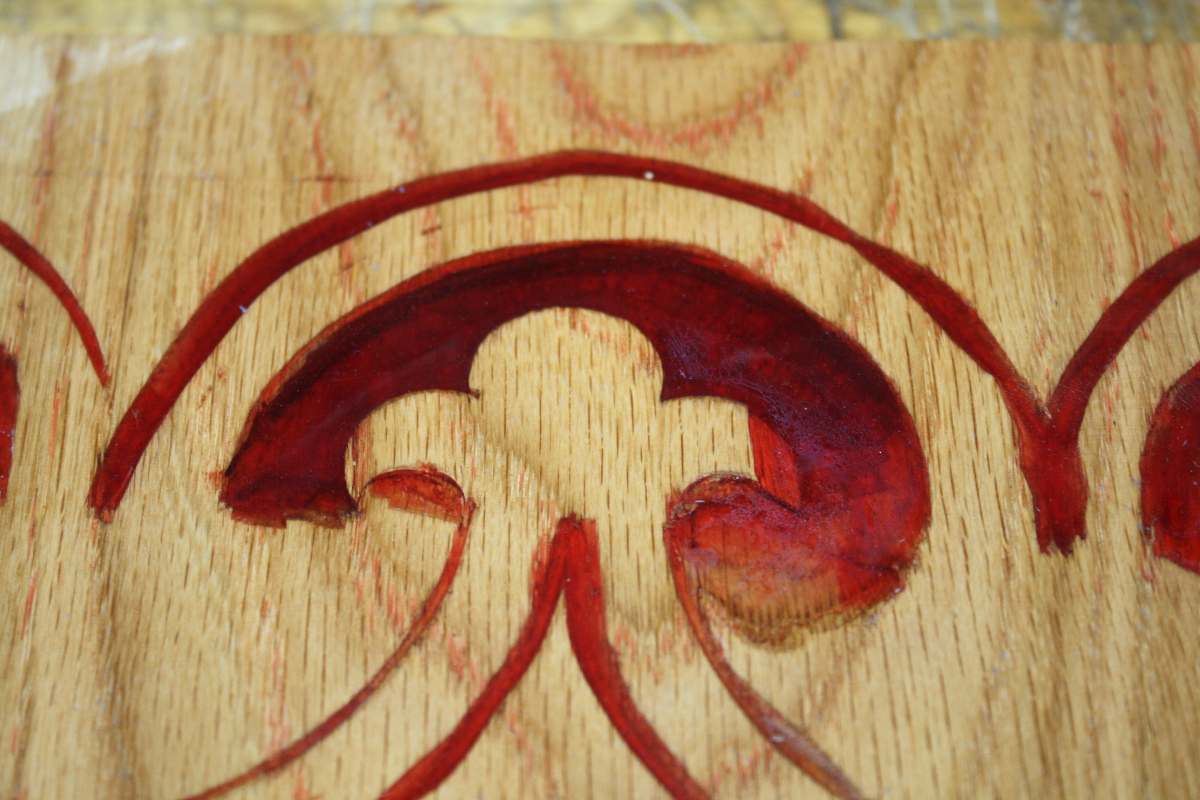
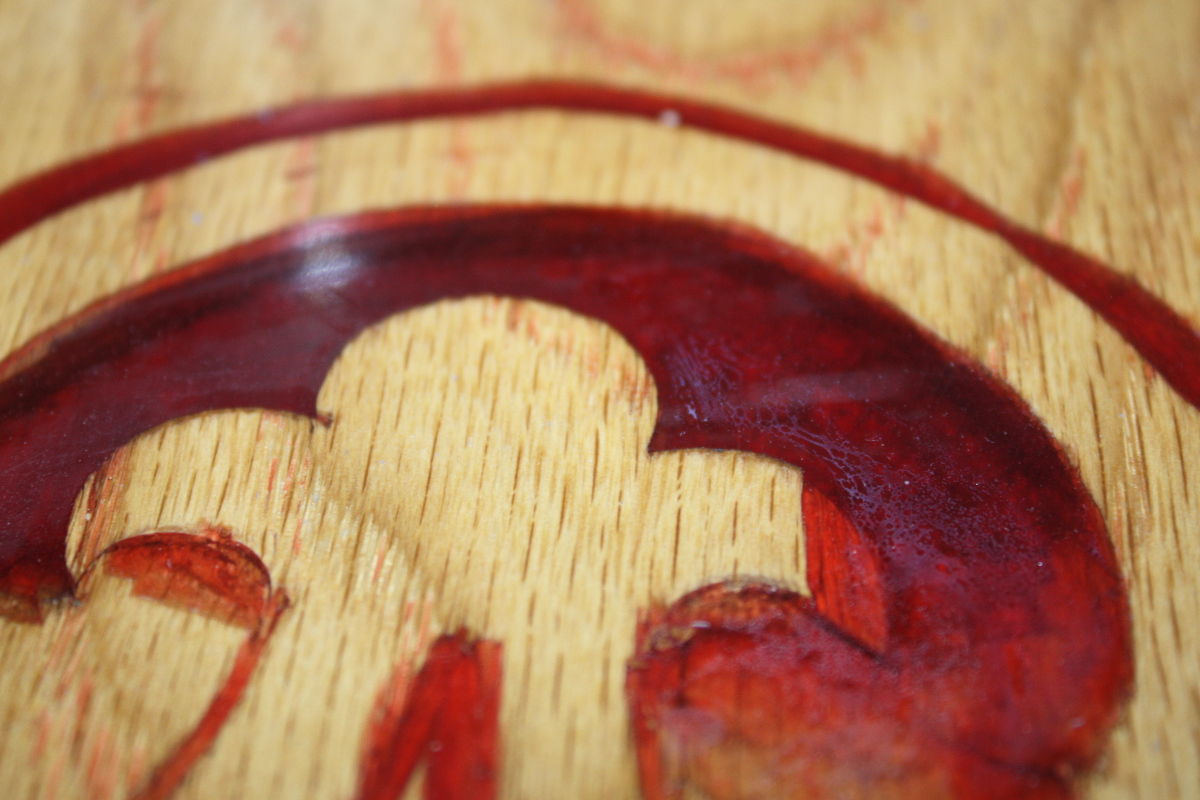
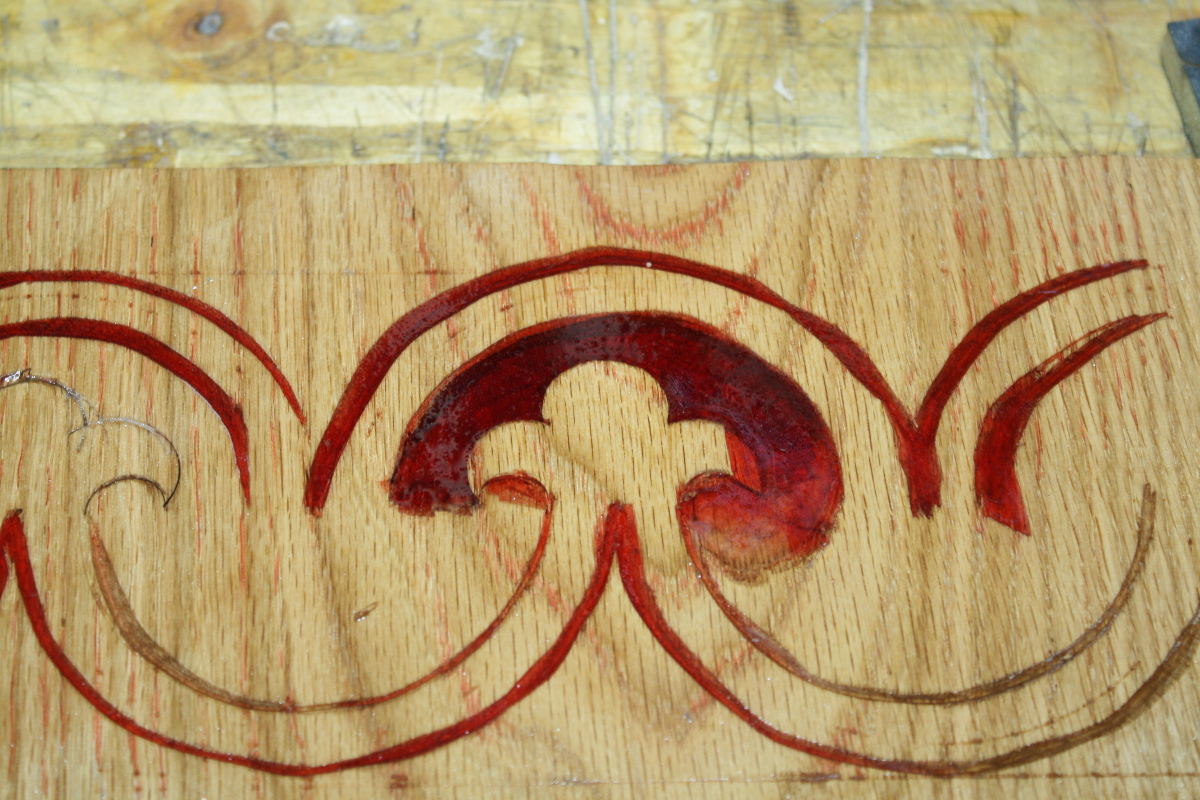
I know it’s spilled over, that’s deliberate. If I don’t put in enough, the oak being porous soaks up enough resin that it dips below the surface and I’ll have to take it down too far afterwards to get a clean surface again. I’ll let this set then pour more resin over the top to get it all above the datum (and I’ll leave it clear so I can see what a clear resin looks like in some of those v-tool cuts as well; that might also be something to try.
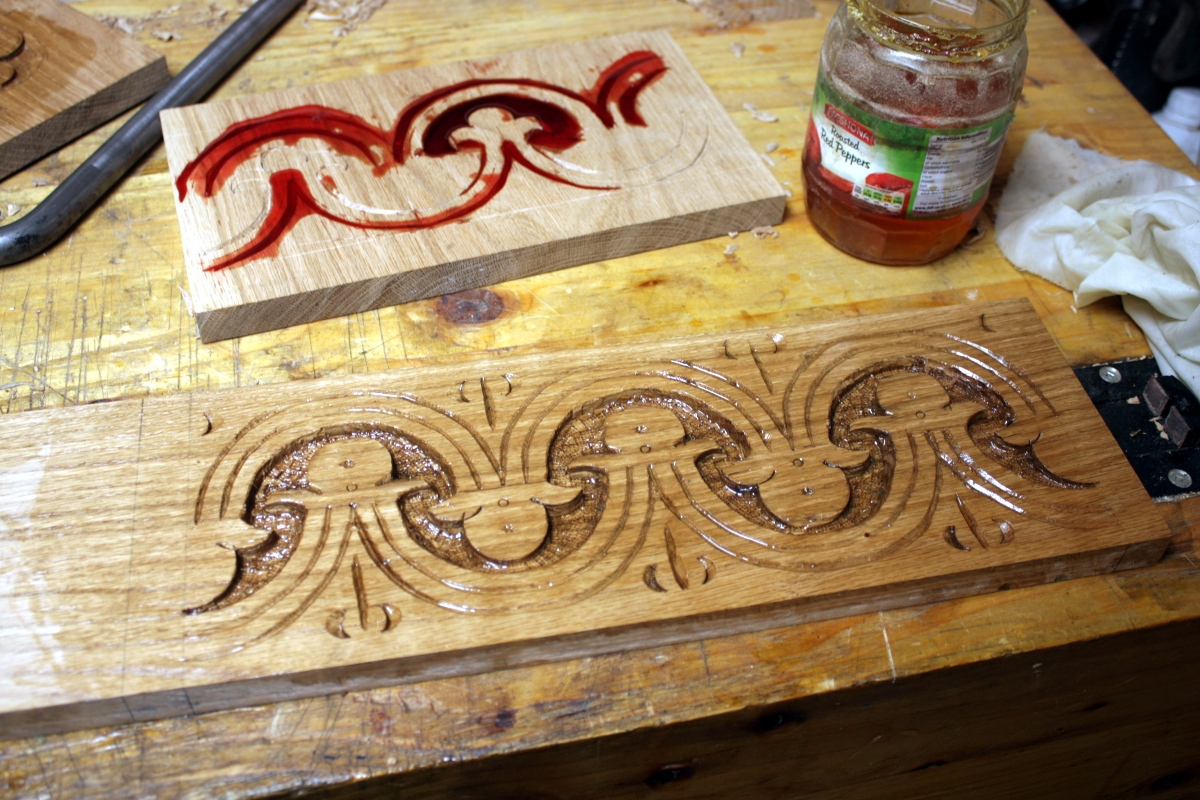
I mean, yes, one’s had more work, but so far this isn’t convincing me it’s a massive improvement, but let’s just see.
So it cures for a few days and then today…
Yikes. Messy. I tried planing down the surface with the #05 but even on a light cut the resin chips and it’s just not viable. So sanding is needed and I only had a half hour so…
Repeat after me, “It’s only a test, it don’t mean a thing”…

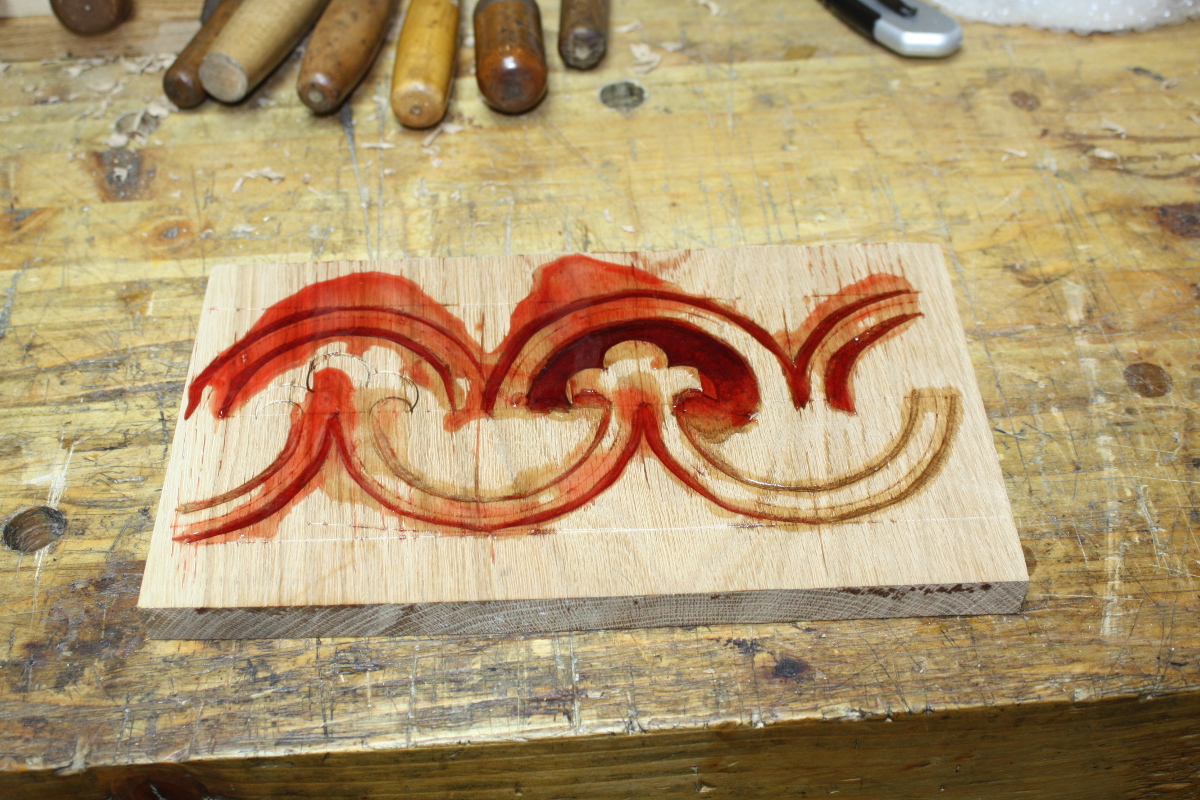
So that took off the excess and got back to an almost-flat surface (one part of the oak drank a lot more resin than even the second pour made up for). And then more sanding is needed to get an idea of what it could be if I did it right.
Wetsanding with micromesh up to 1200 grit (but not for a huge amount of time, only 30-40 seconds per grit) gives this.
For fits and giggles, add the linseed oil that you’d normally finish oak with:
And the transparent resin is interesting as well – you can see the pattern, but not feel it and the surface is smooth as glass.
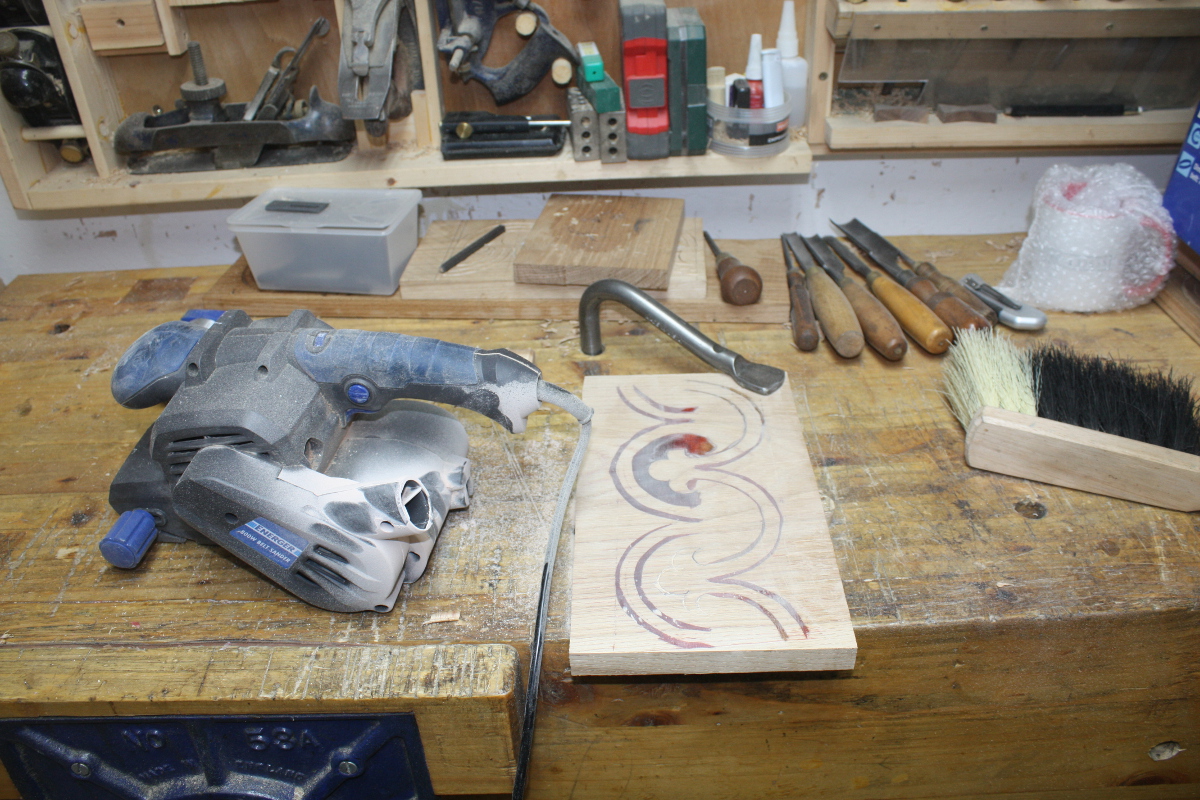
The rushed beltsander is not the best tool here. It grinds the resin dust down into the pores of the oak and it’s nearly impossible to fix that. I need to think about that a bit to figure out what to do to prevent it or if it can be prevented at all. Maybe a #04 with a really really fine cut is an answer, I don’t know for sure. Maybe I should finish carving, seal the pores and then pour the resin.
Or, you know, maybe this is an absolutely terrible idea 😀 It certainly isn’t as good as a Follansbee, so maybe that’s why I’ve not seen this done before. Need to think about it a bit more.
Tags: experiment, follansbee, oak, resin


I’m not a fan of the resin, but I’m not going to judge because I was using a power plane this afternoon to rough dress the split timber for my next box lid.
How are you holding the gouge when the bit chips out? Dead vertical, or leaning outwards a little bit? I find with a bit of a lean so that the axis between the bevel and flat is vertical, I get considerably less chipping on well seasoned oak.
I don’t mind using power tools for the real donkey work (I’ll use my Dw734 to thickness a board I’ve flattened on one side with a #05 or a scrub plane for example); mainly because in the 17th and 18th century these were tasks that took the average woodworker about six seconds to do (just long enough to yell “APPRENTICE! YOU DO IT!” and go for tea) 😀
I draw the line more at things that take some judgement – flattening one side with a plane or doing the final finish planing for example.
I was holding the gouge vertical the times that striking a mark caused a chip; other times, I was cutting out background and as I cut towards the struck line, the stop cut wasn’t enough to stop the chipping for some reason. I seem to be getting a little better, but who knows 😀