So, in order to procrastinate before starting the fancy pens (and also because I was on-call this week so I didn’t have much shed time), I wanted to try out a new pen kit. See, brexit (that gift that keeps on taking away) has started driving up prices for UK based vendors and I don’t really see there being a lot of potential for that to stop anytime soon. There are a lot of good UK pen kit vendors and retailers but if I have to pay an extra 20-30% on top of the price tag for customs, duty, handling fees and so on, well, there are a lot of good French and German and Dutch vendors and retailers as well, so I’ve been looking at a few.
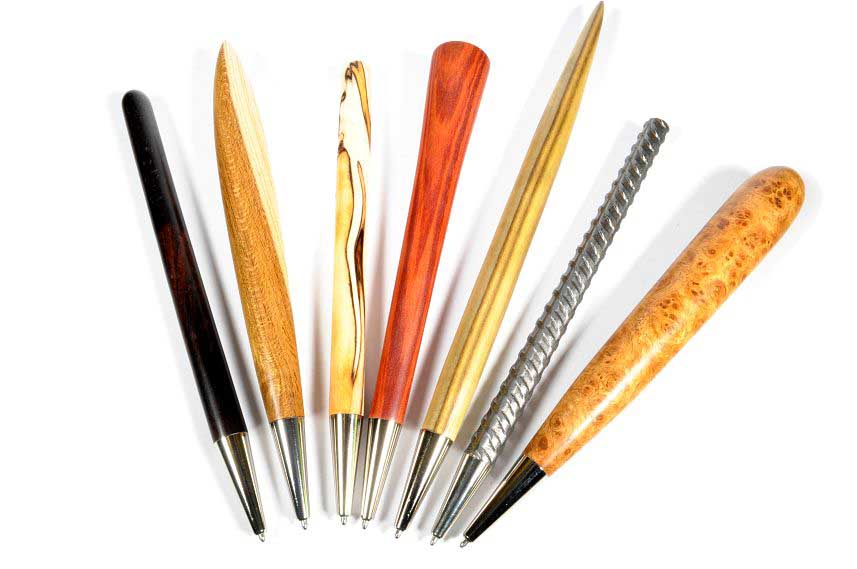
The IAP have a nice list of vendors from all over the place, and I basically started going through each of those on the continent and looking at websites for something to jump out. There’s been one ro two but I thought I’d start small so when I saw the Berlin desk pen kit from Gerhard Liebensteiner I thought that’d do nicely (their Berlin Mini pen looks interesting too, but the desk pen has a lot more potential for odd shapes so I’ll start there).
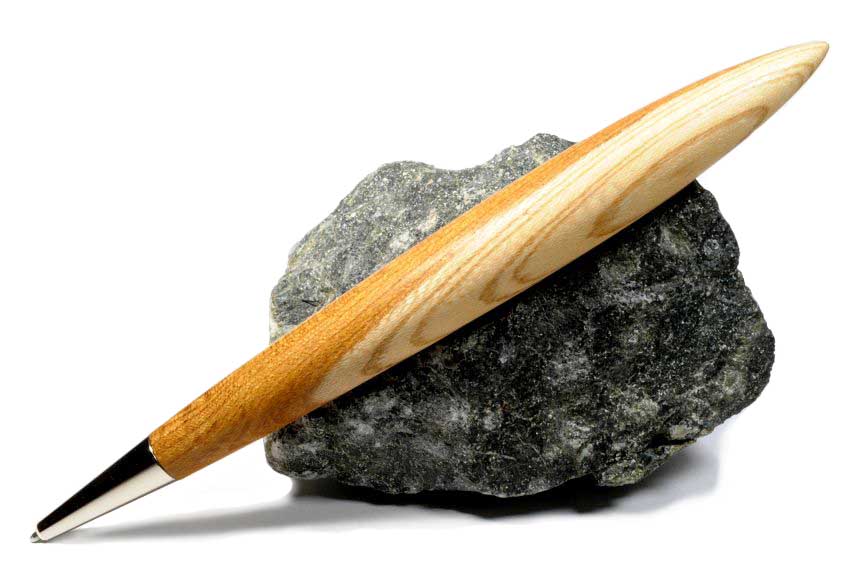
It’s the shape that jumped out and grabbed me here – because it’s a closed-end design, you can turn pretty much any sort of pen shape you’d like, so there’s a lot of potential there.
I liked the taper-away-to-a-point idea, so I thought I’d give that a go to start with. The kit itself is very, very simple:
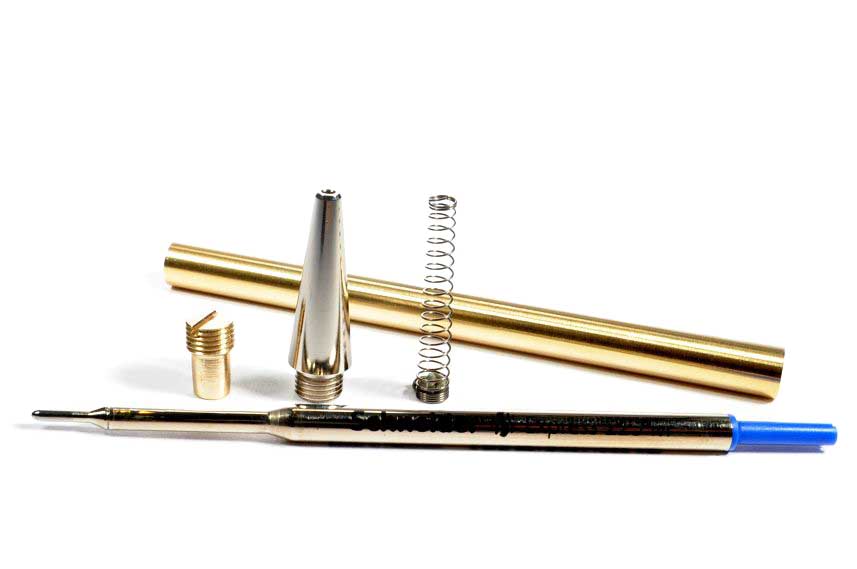
And by using a brass tube that comes with threads already cut on the inside, this might be one of the simplest closed-end pen kits out there. There are only two real drawbacks to the kit – first, it’s a nonretractable desk pen, so you need some sort of holder for it. But then, if you’re going to go make a 30cm long wand of a pen with this kit, it’s not going into your jacket pocket anyway so maybe that’s not such a big drawback. The other one is that there’s a lot of stickout. More on that in a moment.
Liebensteiner do a nice video on making a pen with this kit, though it is in german, but that’s not really that much of a problem:
So I ordered a kit to test it out and the tooling, which came to around €15 (plus another €15 in shipping, thank you brexit) and it took all of four days to arrive. I had an acrylic pen blank to hand so I used that – this is just a test pen, so it’s not going to be anything special really. I don’t have a pen drill for this kit, but it’s just an 8mm drill bit that you need so I just used one of my completely standard HSS bradpoint drill bits and started drilling.
This is the first problem I came across though – you’re drilling a much longer hols for this pen than normal. Almost 100mm deep and it’s a blind hole at that. So you have to have good alignment and centering or you’ll pay for it later. With the hole drilled, I epoxied in the brass tube after loctite’ing the adjustable plug at the other end of the tube to the right setting for the nib to be exposed by the recommended 2.5.-3.0mm amount.
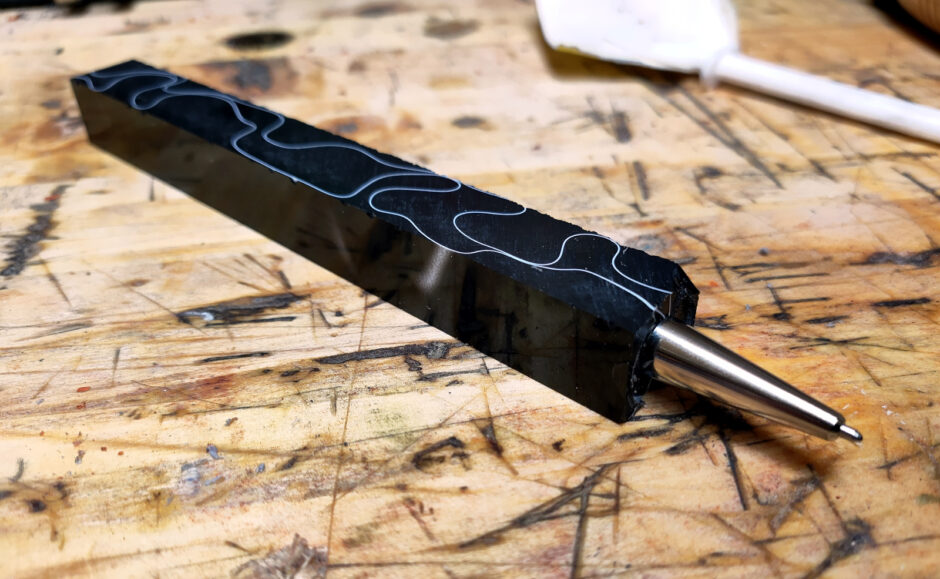
I mean, technically that’s a pen right there 😀
To mount it on the lathe, your tooling is a small arbor which is threaded on one end; a bushing of the appropriate outside diameter threads onto this thread and you then screw that into the end of the brass tube where the nose cone normally goes and hold the arbor in the chuck. If you have a collet chuck for the lathe, this would be its time to shine. I don’t yet, so out came the stepped jaws which work well for gripping small diameters on my chuck.
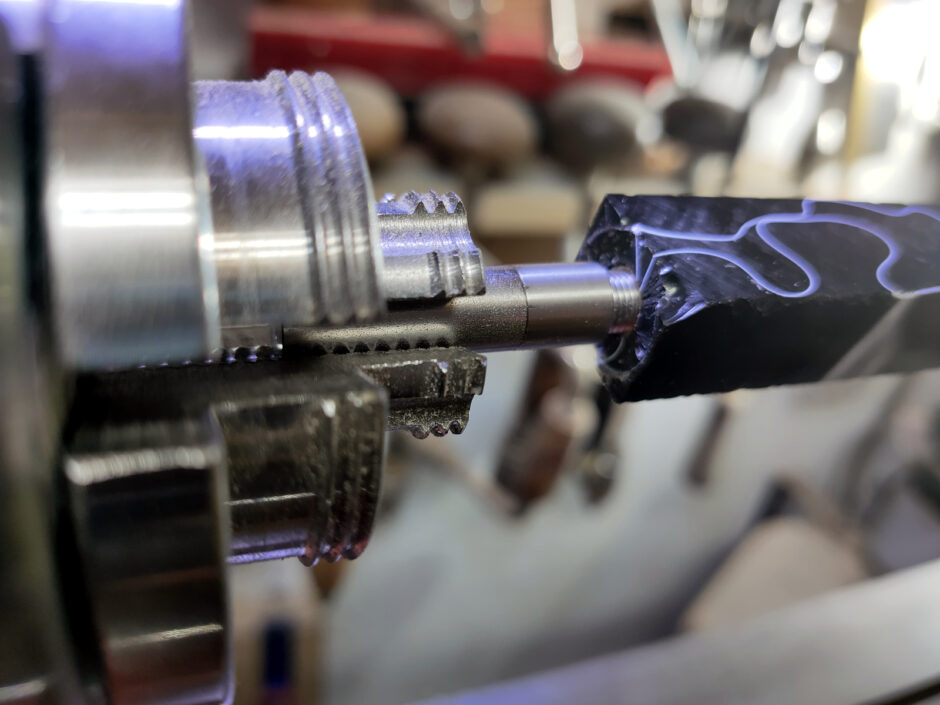
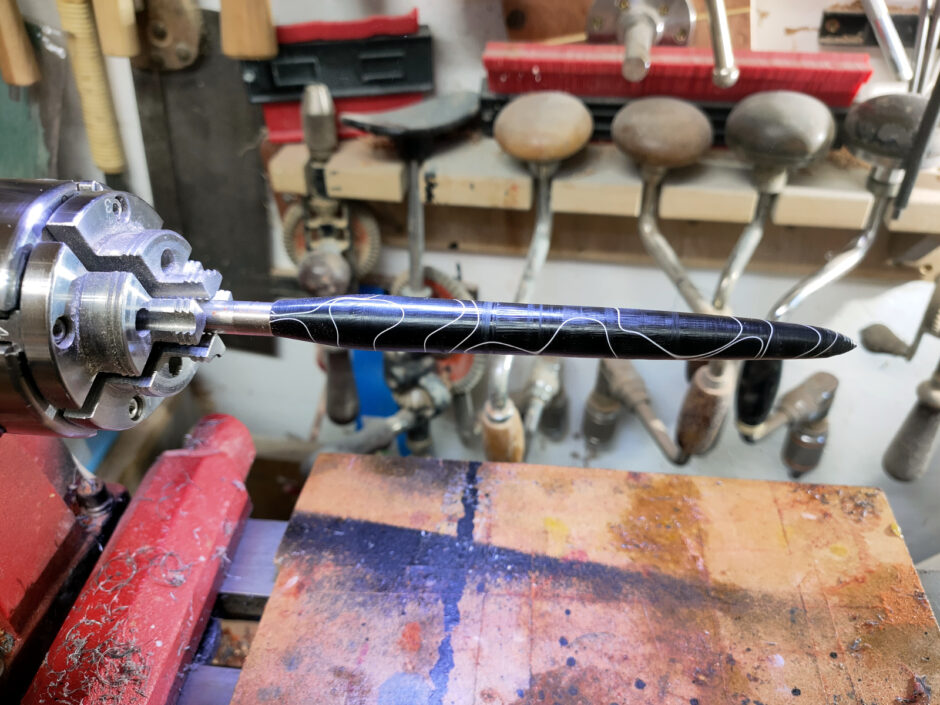
You can see the arbor and spacer/bushing there. It’s not fully threaded home here, just for the photo.
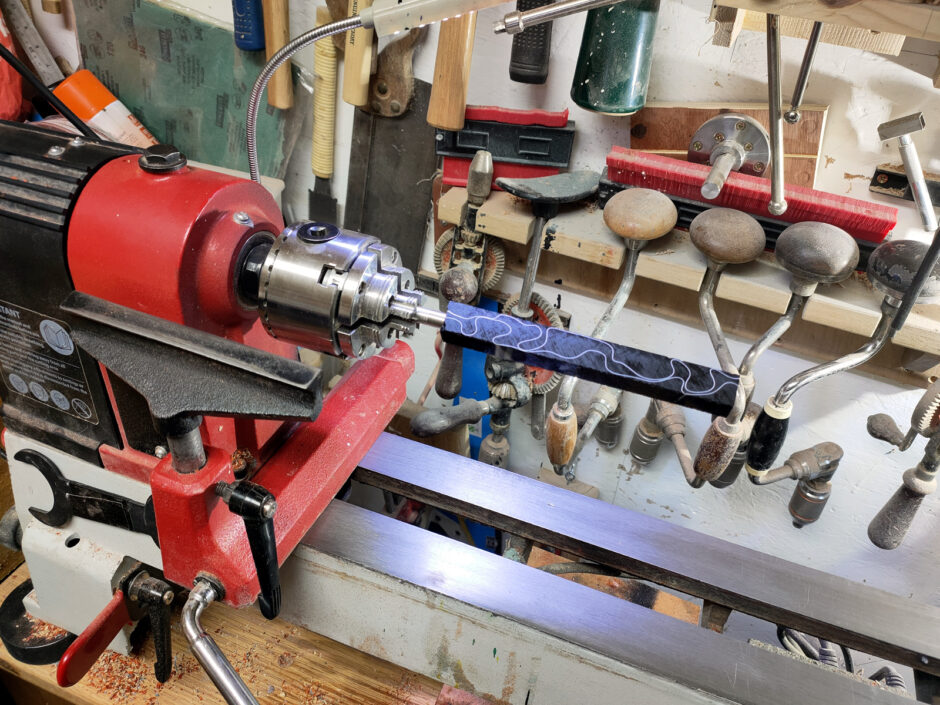
And there we’re fully threaded home and seated, and you can see what I meant about the stickout. Granted, here I’m making a much longer pen than the tube, but that’d be par for the course with this pen. I think this might be the only reason this kit isn’t better than the normal kits as a beginner’s kit – if it wasn’t for this, it’d be easier, more fun and less expensive than the slimline pen kits they keep putting into the beginners pen turning kits. So, tail support right up until the end with this one.
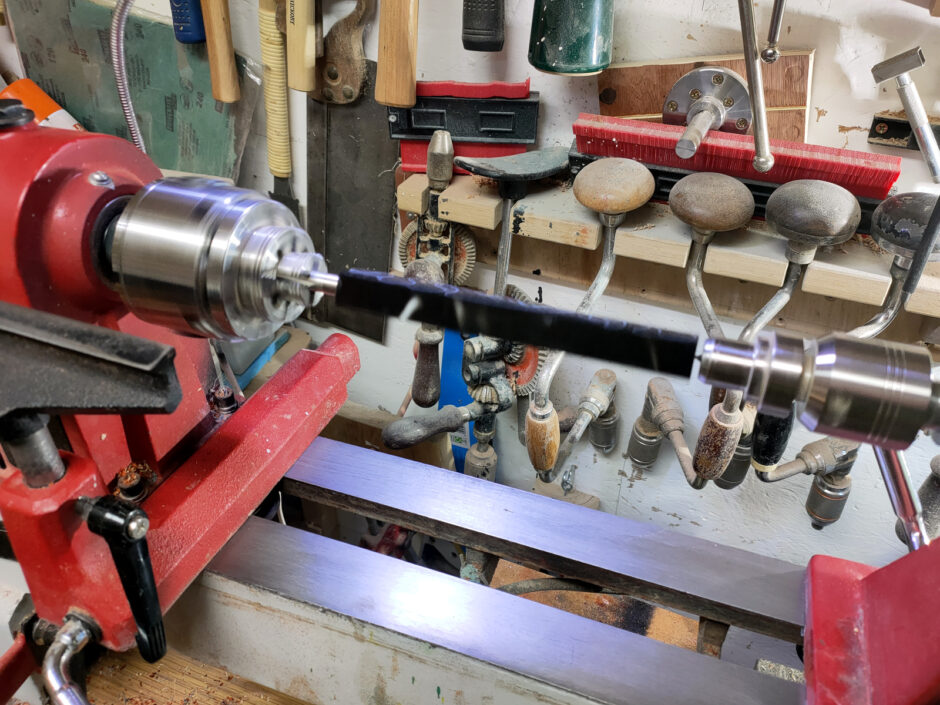
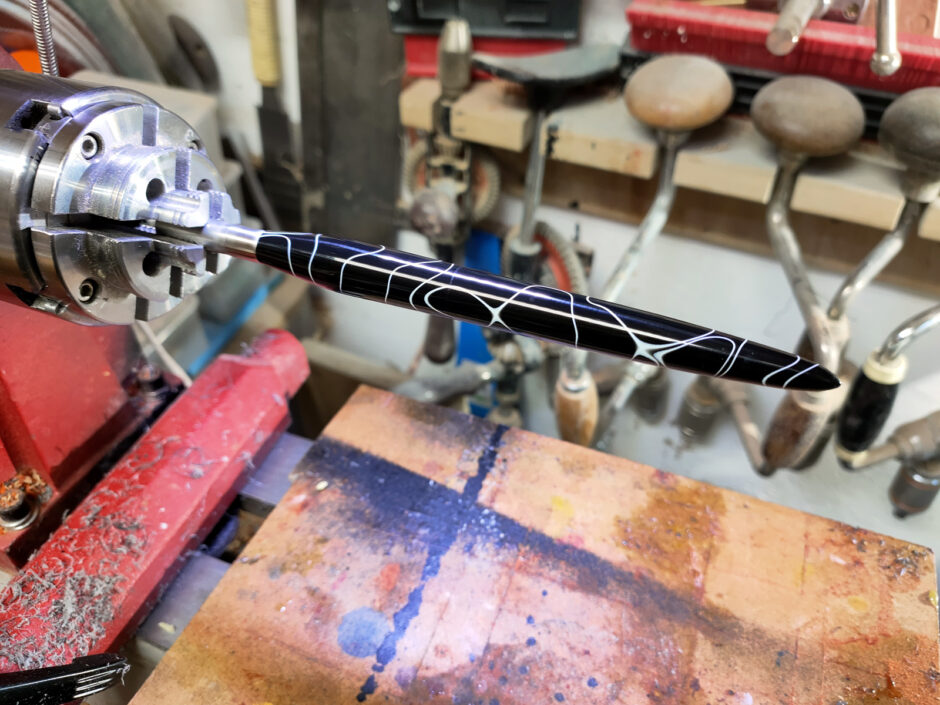
Can’t say I’m a fan of this material either. Even on the skew it complained a lot about being cut, in a very high-pitched voice. For the end I wound up cutting it with the skew while supporting it from the far side with my fingers which I’ve seen production woodturners do, but it makes me nervous. A spinning thing and a sharp thing and my fingers. Not a mix I want to try. But, got it done.
And on to sanding, from 400 grit up to 800 dry, then wet micromesh pads to 12000, then Yorkshire grit and Yorkshire grit microfine and resin polish and then a final coat of Hampshire sheen wax.
Not too shabby. Then just unscrew the arbor (I found it easier here to open the chuck and grip the arbor with mole grips because the turning will really jam the pen onto the arbor and I think the forces might get the arbor’s steel thread nicely wedged into the tube’s brass threads and a little effort was needed to break that seal. But no permanent damage done. Just remove the arbor, insert the pen refill and spring and then screw the nosecone down over the lot to secure it, and done.
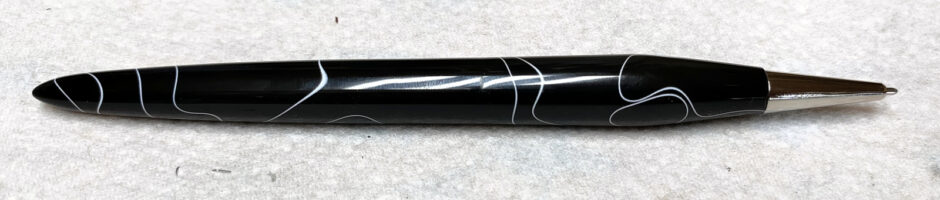
I think that’s a success. Will have to add Liebensteiner to the list of pen kit retailers. They also do a few other kits, but I might choose another vendor for the next test pen, just to evaluate retailers as well as kits.
Tags: acrylic, berlin desk pen, brexit, hampshire sheen, pen turning, skew, yorkshire grit