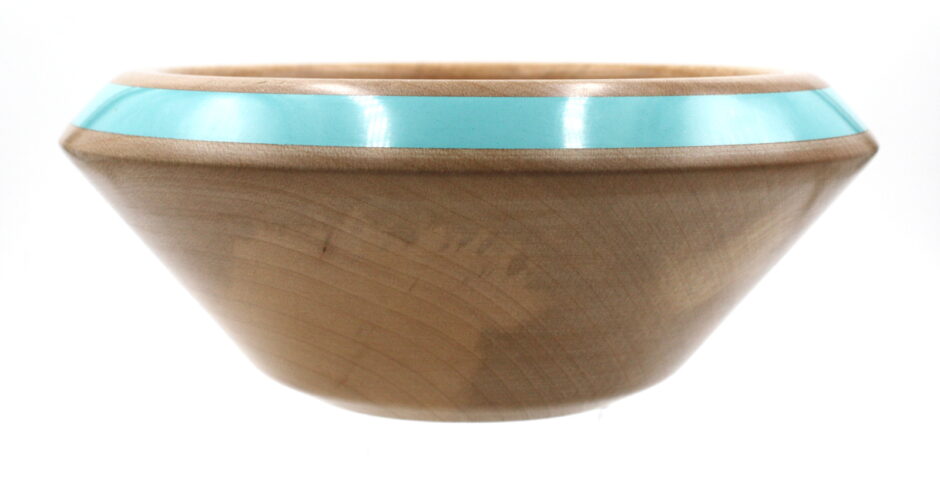
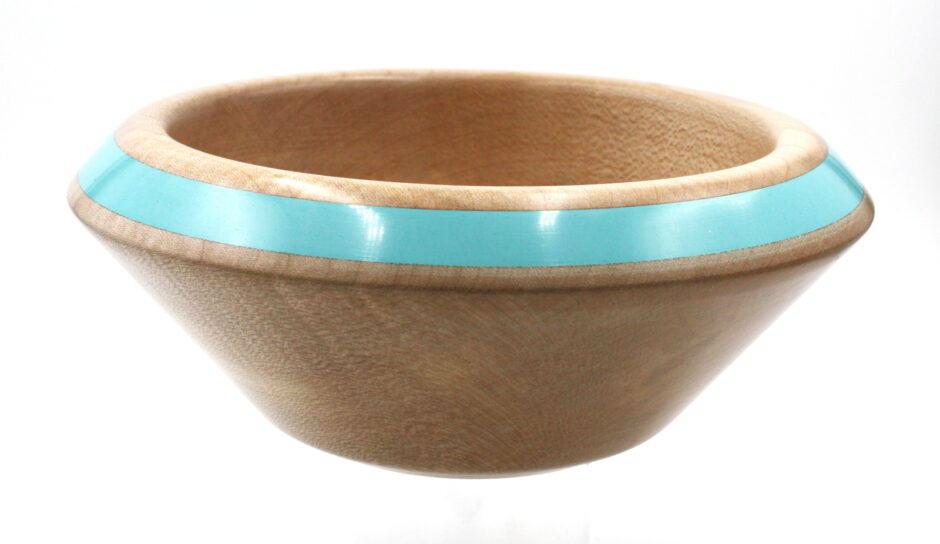
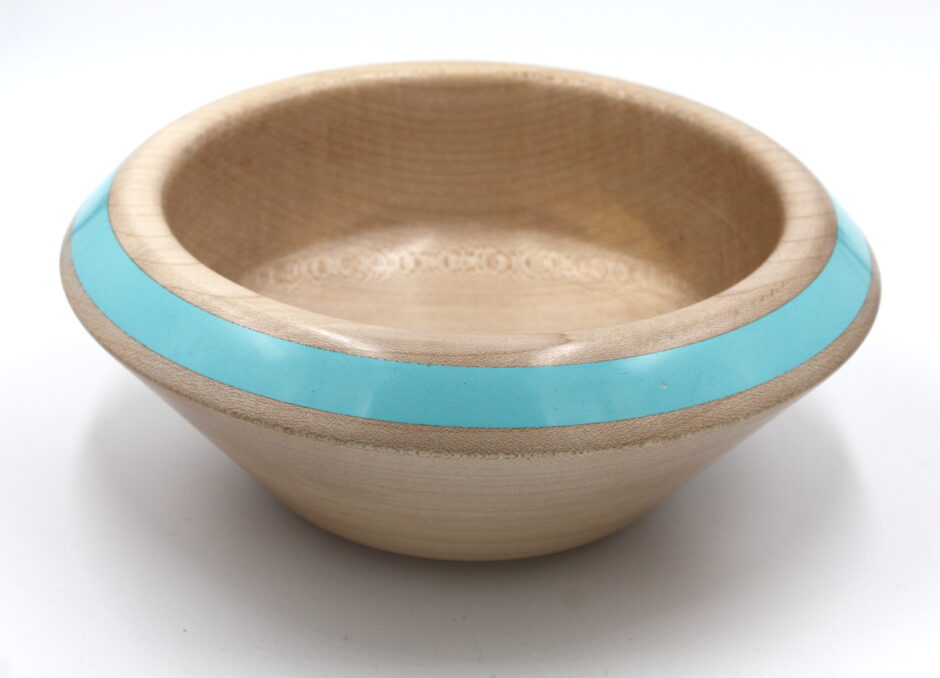
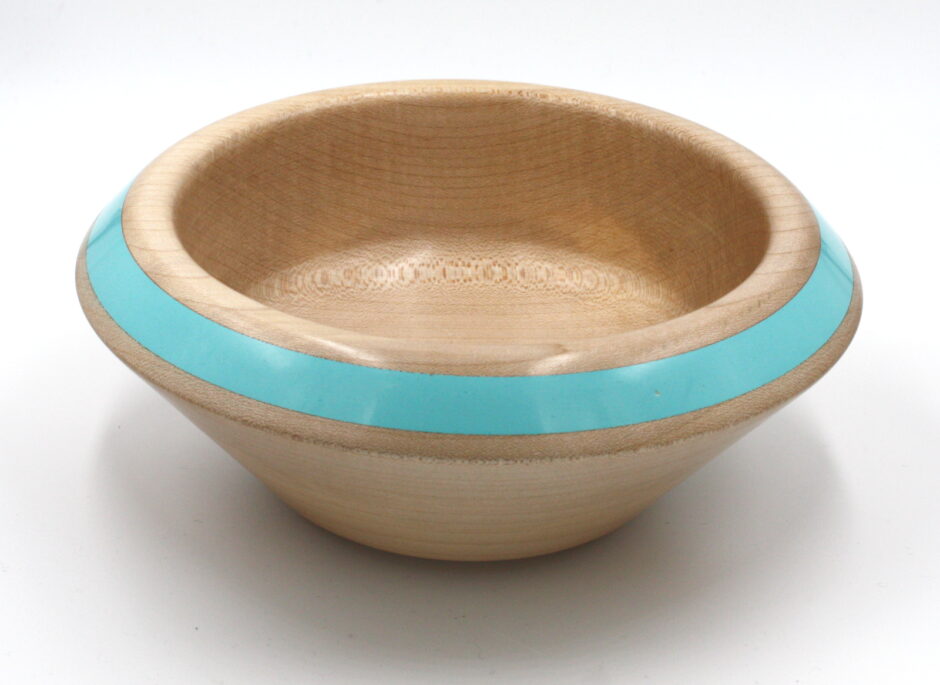
Second bowl finished this week (and by that I mean it was hanging around for weeks and I finally got to it) was a nice sycamore bowl. I saw a photo of a nice bowl a while back with irridescent metallic paints in the rim:
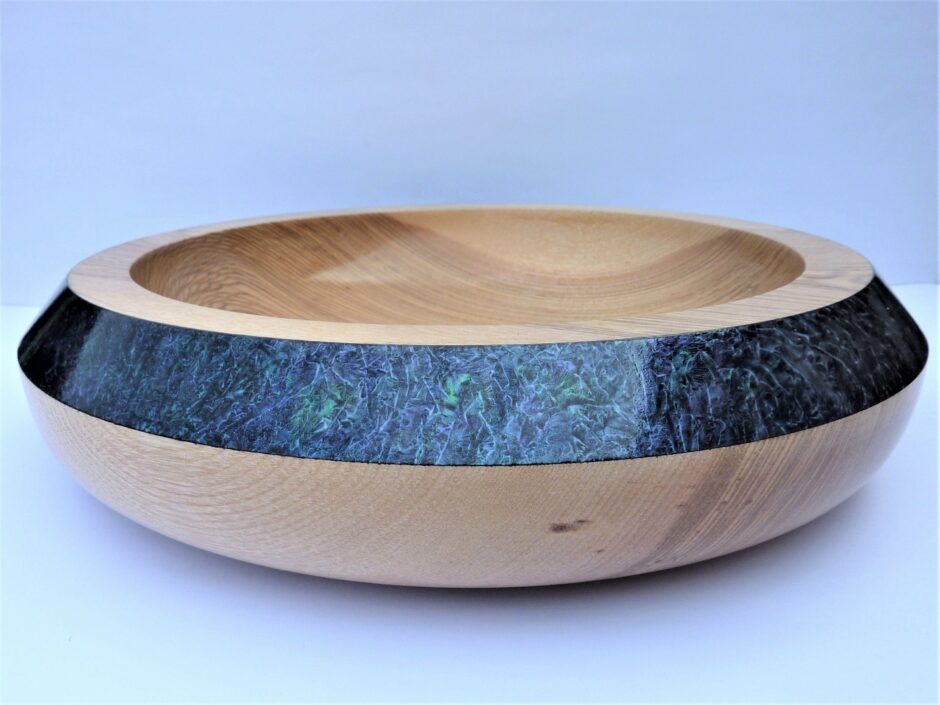
I like the angled rim shape there and wanted to replicate it, but I don’t have the irridescent paints so I wanted to go for a simple inlay instead. Resin would be awkward to pour into an inlay on such a rim because of the whole “liquids flow downhill” thing, but milliput might work so I thought I’d try that.
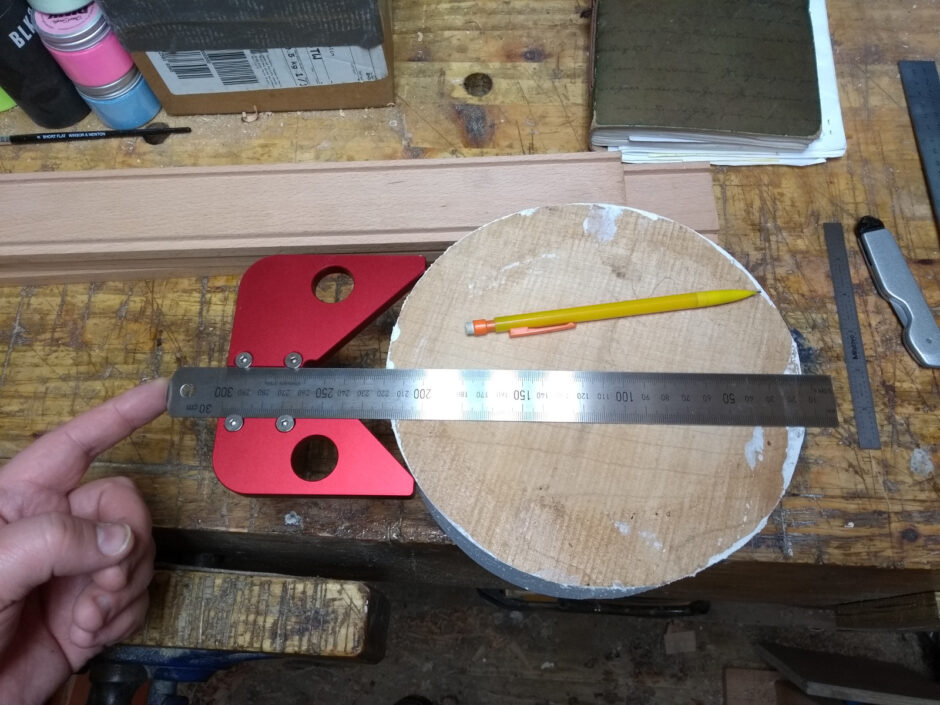
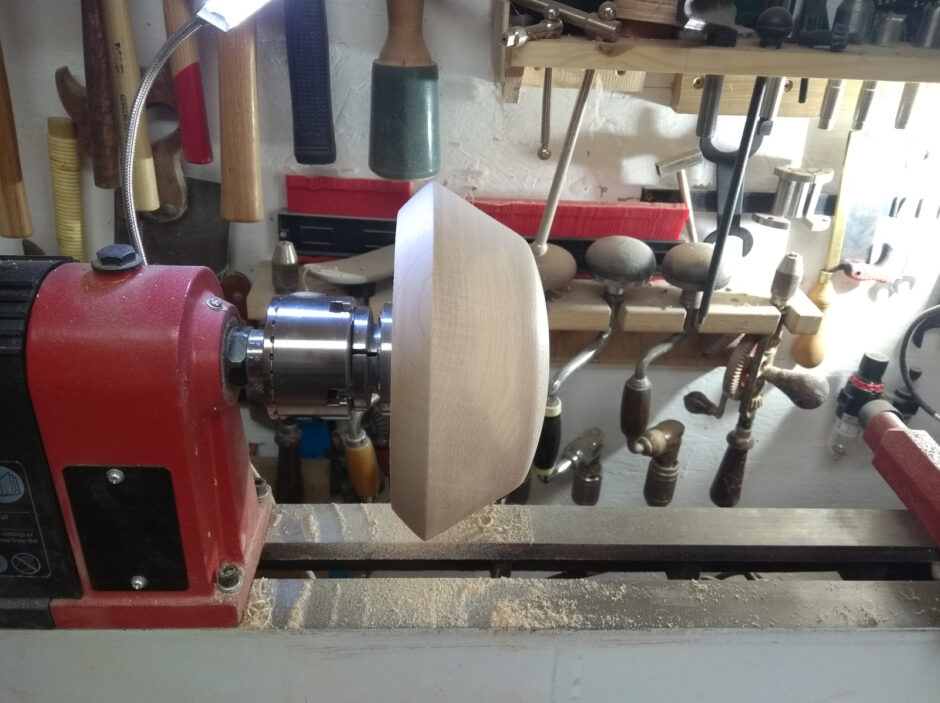
First use of the new centerfinder toy.
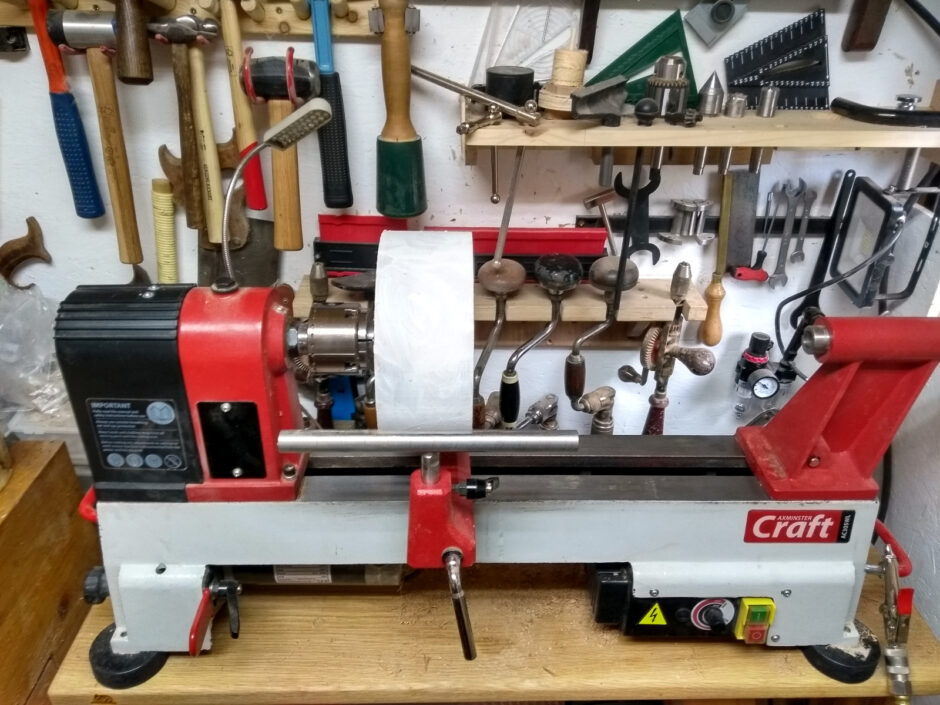
Mounted with a faceplate ring which I’m starting to really like over other mounting methods because I can take the blank off the lathe and forget it for three weeks while being lazy and then remount it and it’ll run true.
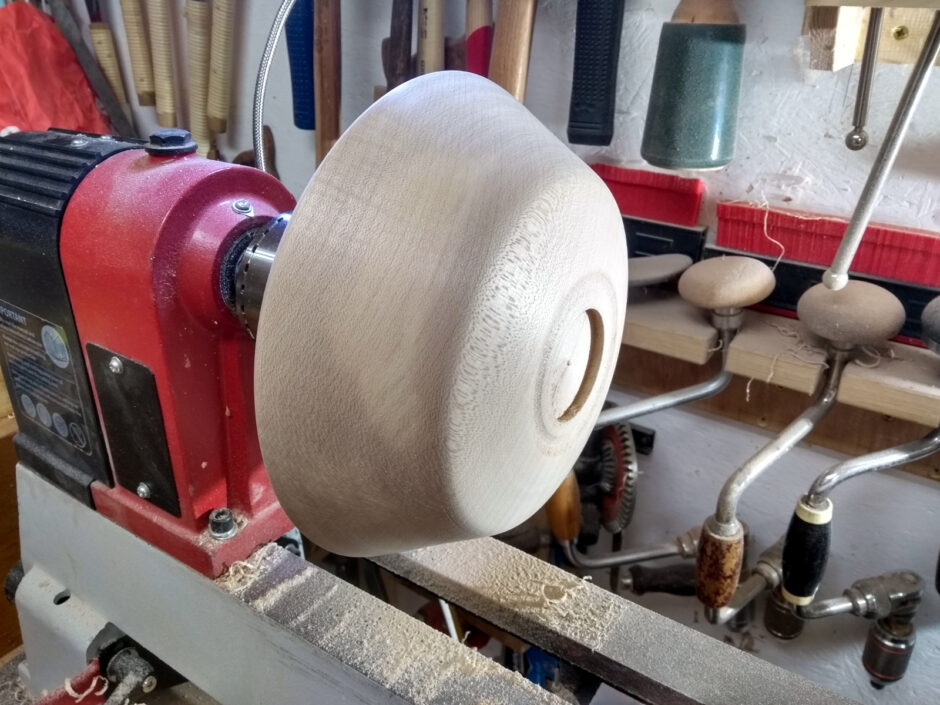
It’s got some nice grain patterns there, though that really isn’t the profile below the rim that I was aiming for, but well, every day’s a school day.
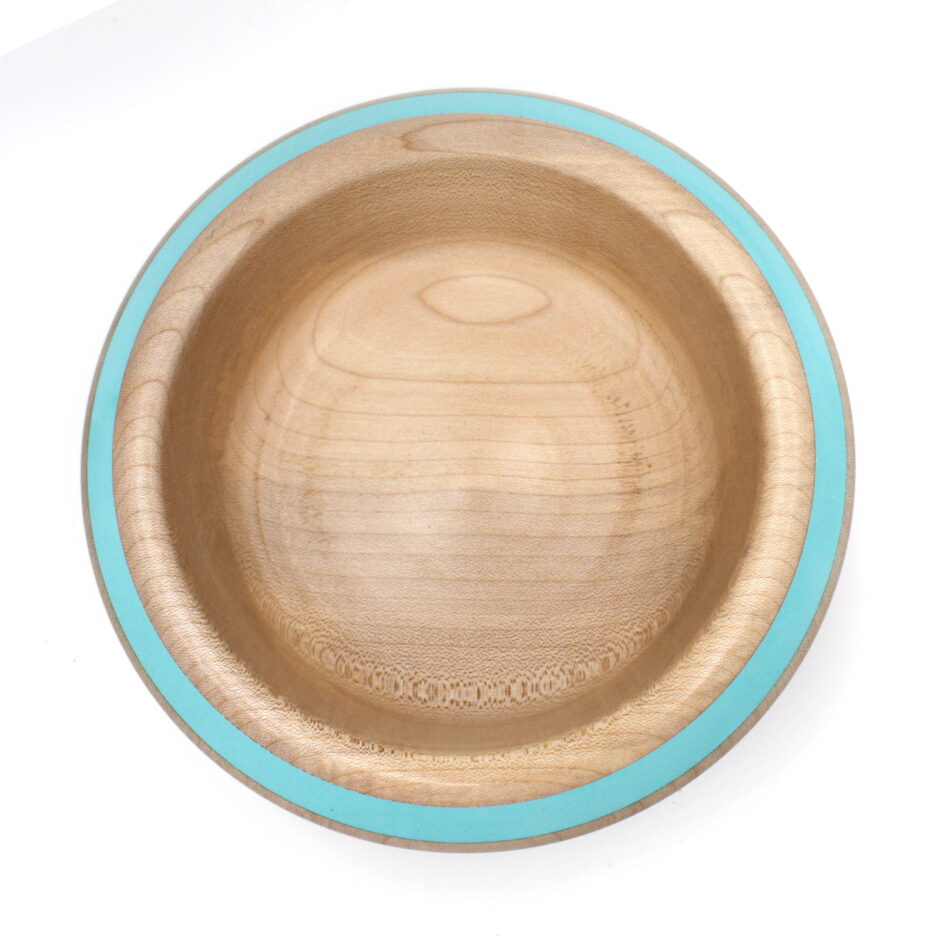
Quite happy with the rim though. Then I cut out a recess with a parting tool in the rim and filled the recess with milliput, left it cure for a day or three and then recut the rim to get a nice finish, turned the bowl around on the lathe and hollowed it out (and got to use some of the bowl gouges I got as a birthday gift from the parents for this one, especially a new half-inch bowl gouge with a factory grind rather than an Irish grind and that one makes the turn at the bottom of the bowl a lot easier to do). I managed not to take photos of any of this, until I got to sanding…

But I did get some video of the sanding, mainly to show how bloody loud it is when the dust extractor is running three feet behind you…
Straightforward finish – all of the 80 grit sandpaper, then up the grits to 320, then cellulose sanding sealer (thinned to 50% with cellulose thinners) and then yorkshire grit (regular and microfine) and then hampshire sheen wax.
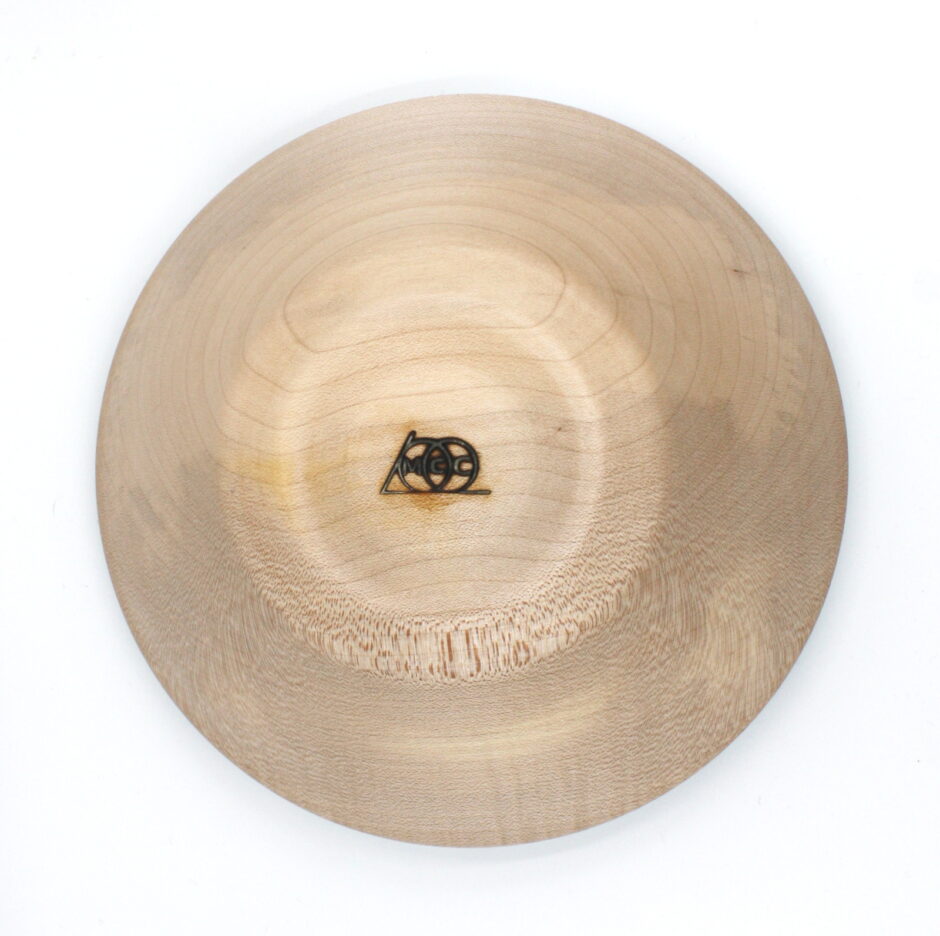
Then I flipped it again, putting the cole jaws on the chuck to hold the bowl rim, turned the recess out to clean up the foot, tidied up the base and branded it, sanded it and just gave it a coat of hampshire sheen wax, then stopped the lathe, took off the facemask and pulled out the isotunes I was wearing as ear defenders, and heard a hissing noise. I thought it was the air compressor at first, but no, it was the MAP gas canister from the blowtorch; after heating the branding iron with the blowtorch and branding the bowl, I’d set the branding iron and the torch head on a scrap of wood outside to cool as normal, and put the tank away in its storage box, but hadn’t noticed it was leaking because of the ear defenders. Reattaching the torch head and removing it more carefully got the valve to reseat correctly, but I’m rather glad I was turning with the door open now.
Still, came out nice.
Tags: hampshire sheen, milliput, sycamore, yorkshire grit


Mark,
Nice bowl as all have been.
BTW, I’ve often said it is better to be lucky than good. It can be the little things that bite us on the ass.
ken