As I mentioned last time, it’s a nice problem to have, but it’s still nicer when you solve it 😀
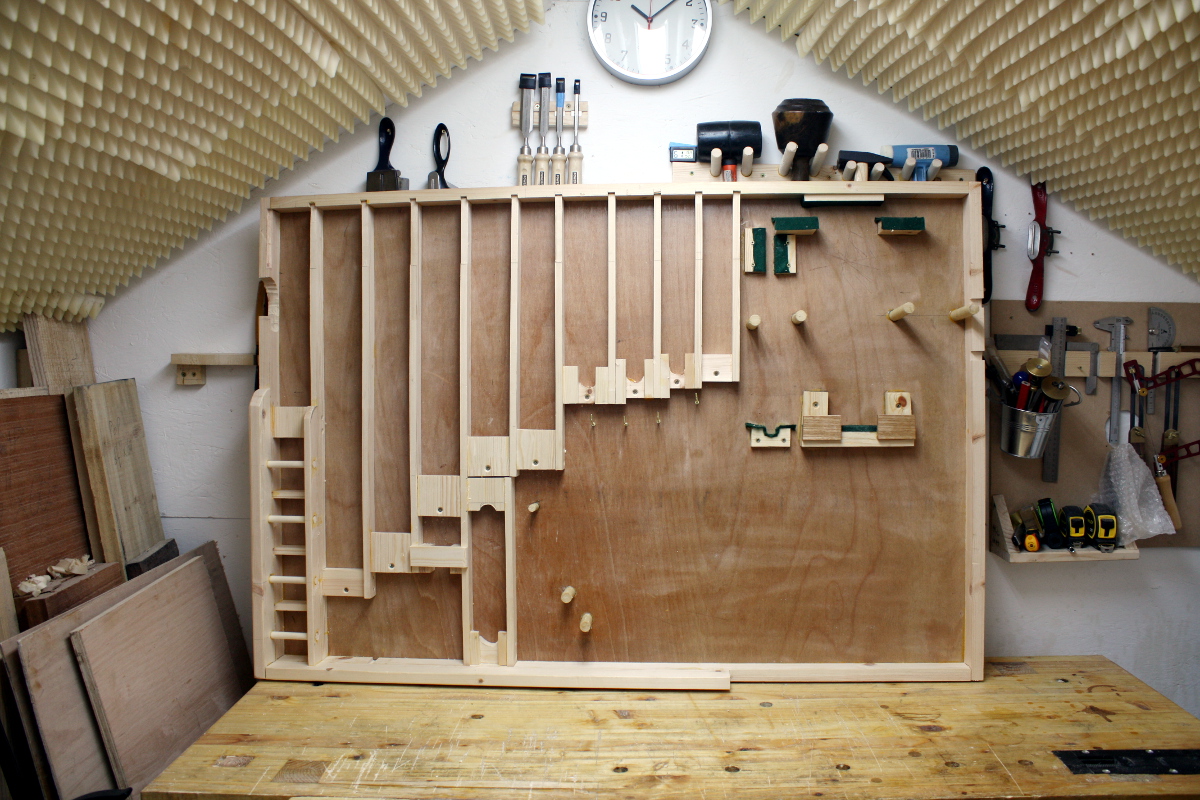
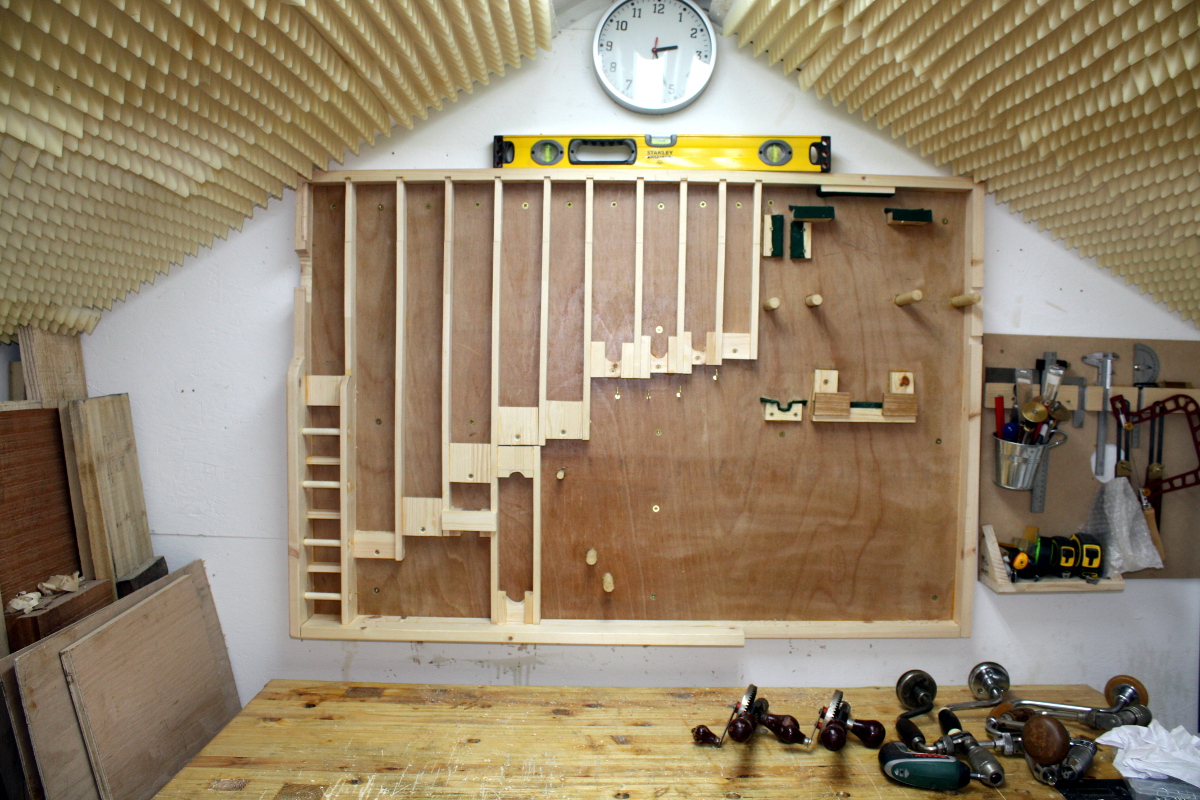
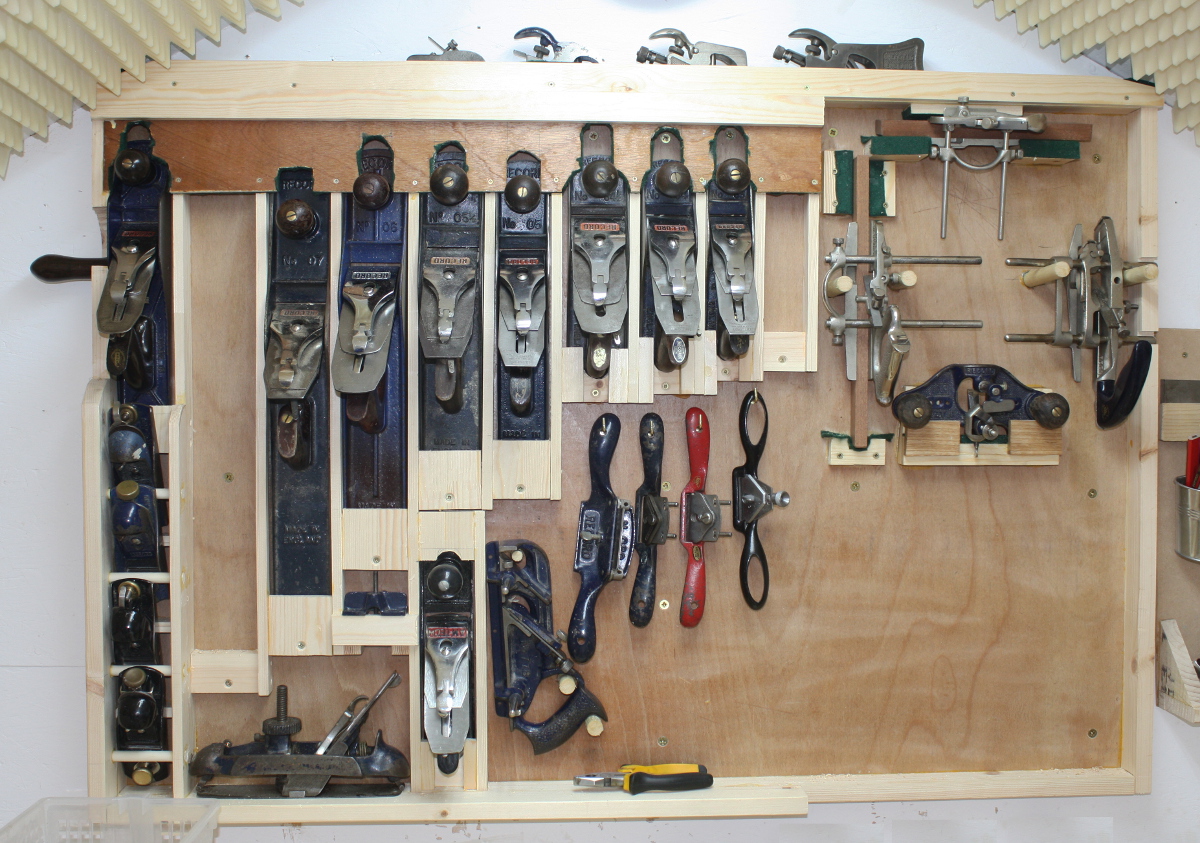
So it’s mostly a conventional plane rack, with a few quirky bits for the non-bench planes. Here’s the map:
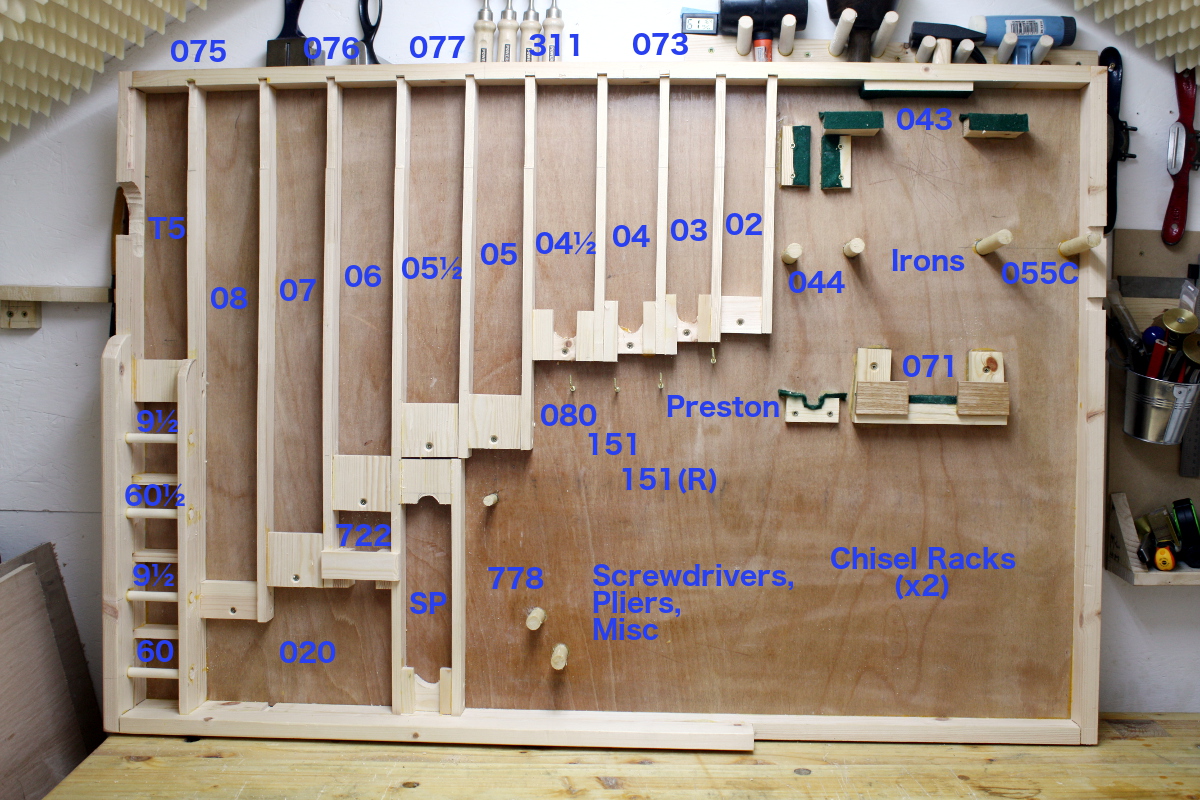
Bench planes make up most of the area, with the T5 over on the far left because of its handle, the blocks below that because that was all the room there was, the compass plane sitting on a shelf, and the various plough planes and rebate planes and router planes in various holders, and the spokeshaves on hooks.
Nicked the general idea for this from here. Though mine’s less fancy 😀
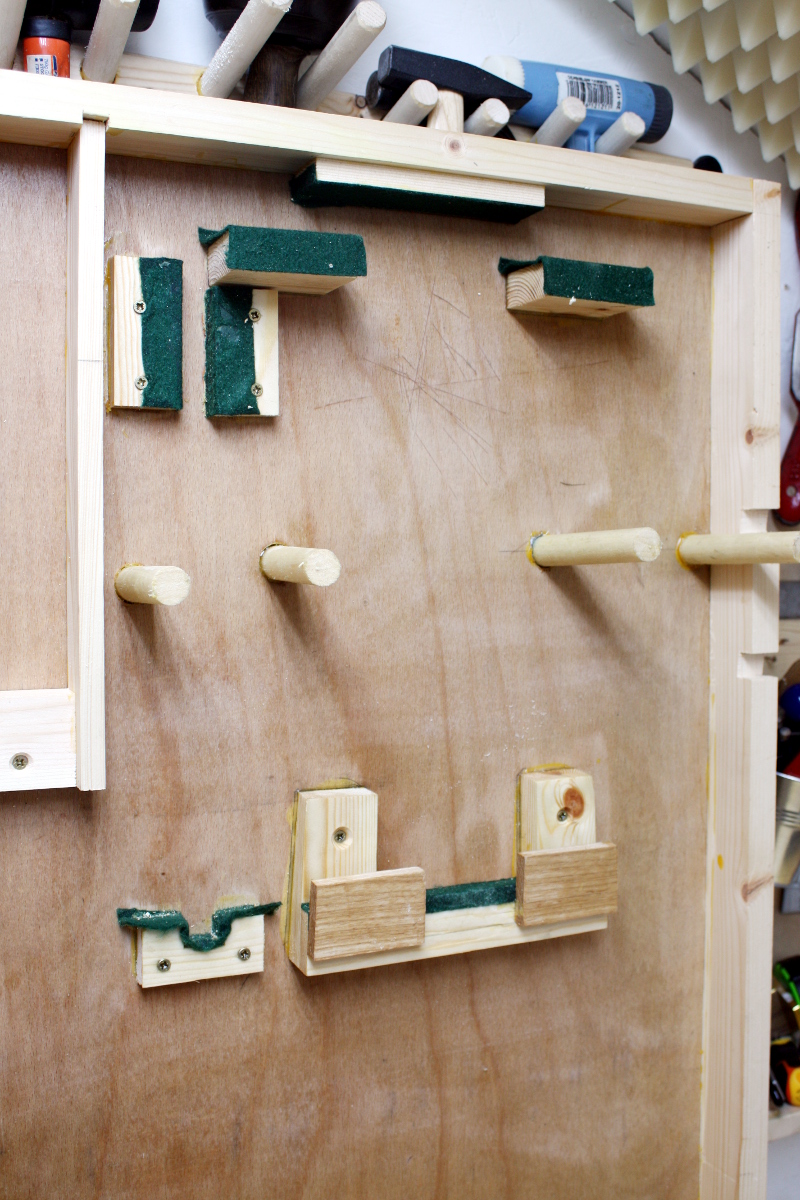
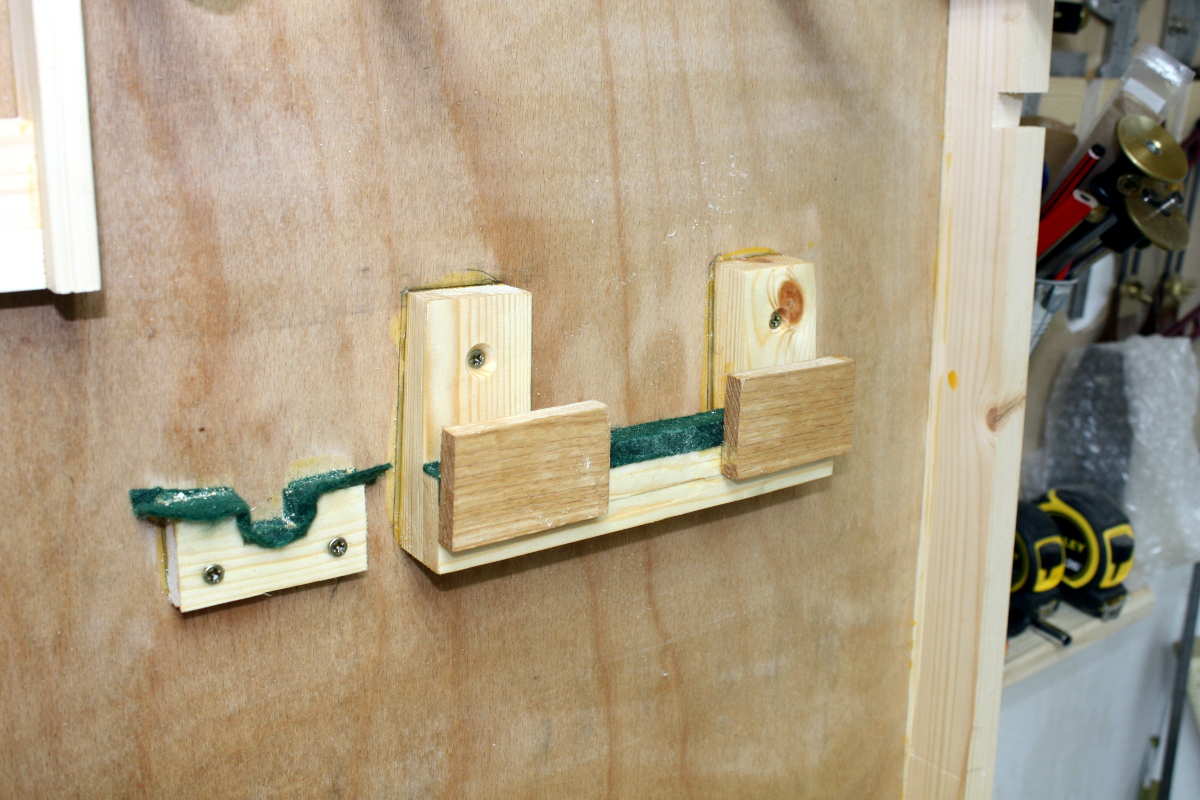
The #044, #043 and #055C plane housings are just pegs and small boards or cutouts in the frame to keep everything aligned. Gravity does the rest, along with the extra friction from the felt. The #043 mount might need some more work but it seems okay for now.
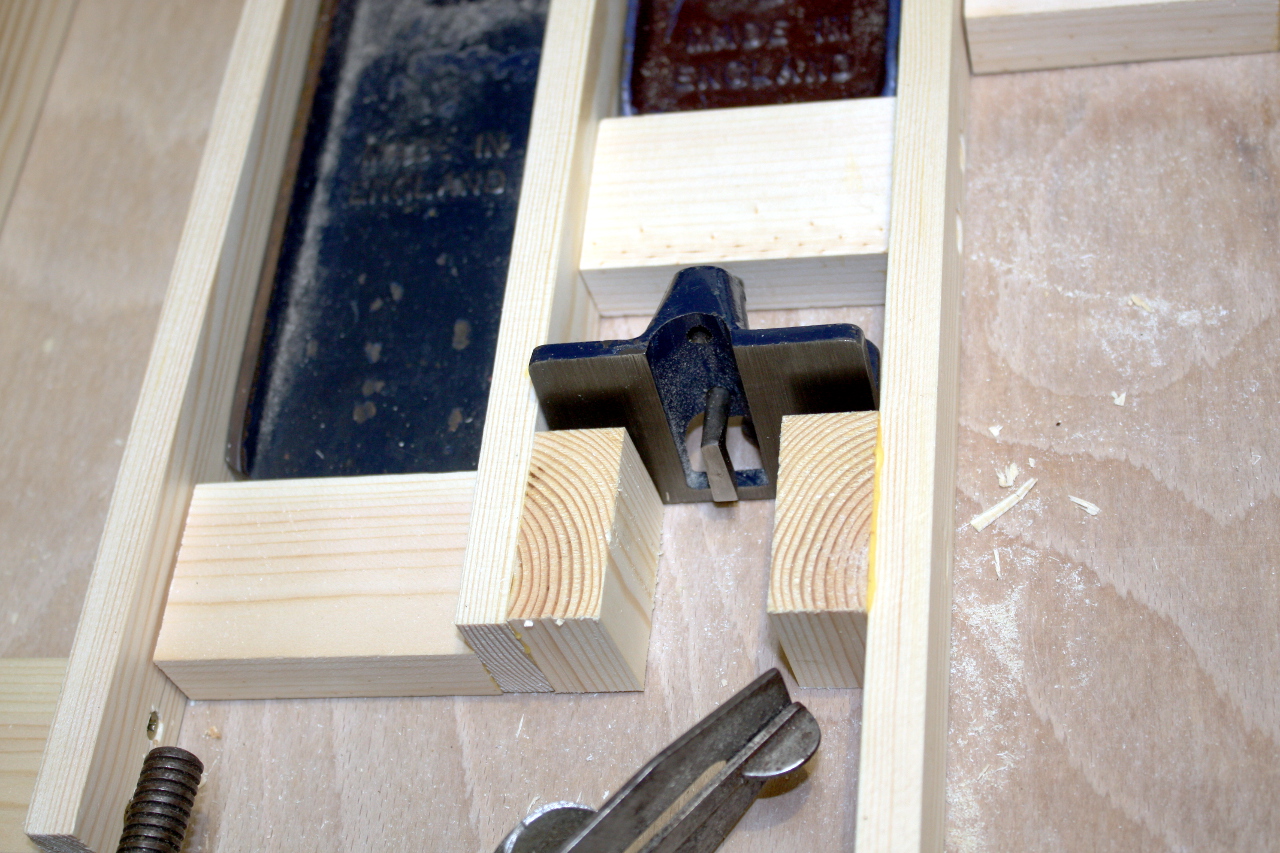
The #722 mount looks like this but there’s a small cap across the top to bridge the gap now. Works very well if I do say so myself.

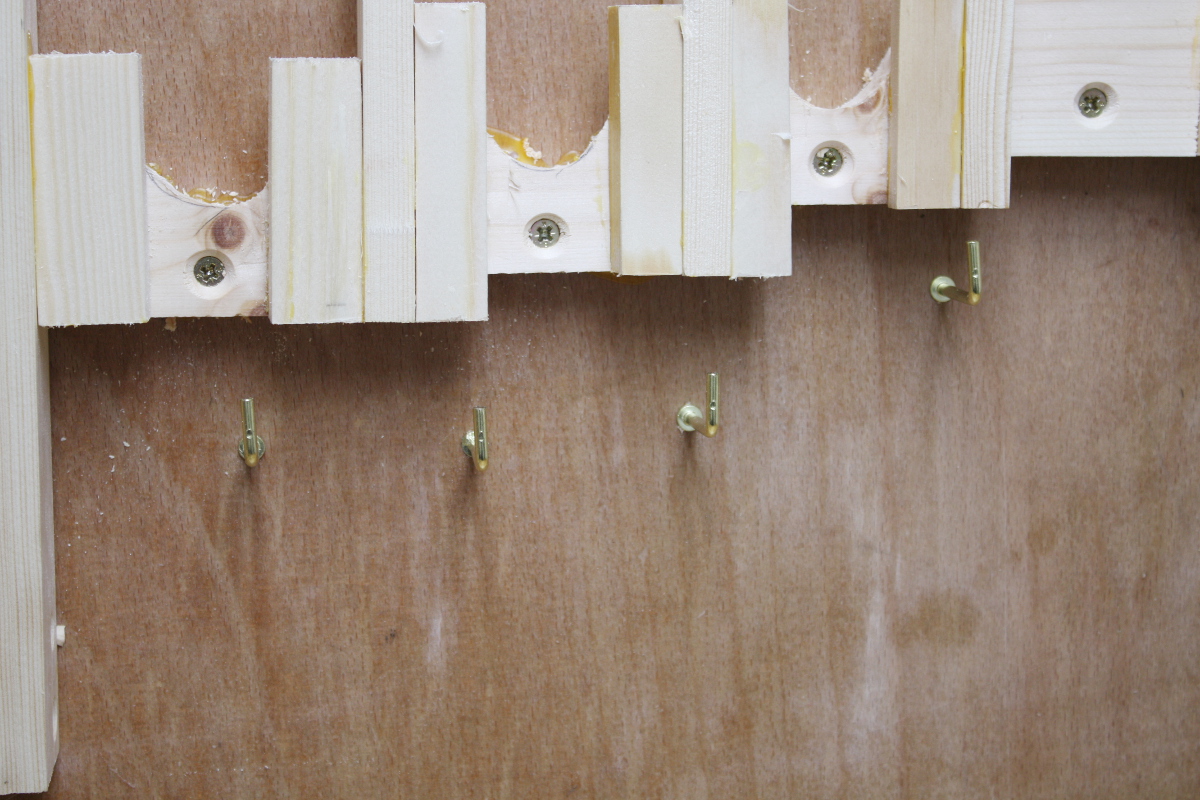
And the block planes get small cubbies, but with a bar in front of each one to ensure the plane is at a steep angle; that way I can stack four in that space without coming away from the wall too much.
The spokeshaves and the #080 were a bit easier to build 😀
I still have to build the chisel racks (I have a nice idea for those) and there’s a small area for screwdrivers and such as well, and I want to have a space for the spare irons and the blade sets from the combination planes up in that top right corner; that has to be built yet as well but it won’t be anything fancy.
All that’s not complete either, there’s the toe cap for the bench planes and a header to add, but I wanted to mount it on the wall first:
24 5mm screws, because only five of those are in studs. And it is a lot of cast iron. But it seems okay so far…
Anyway, with it on the wall, I could add the toe cap:
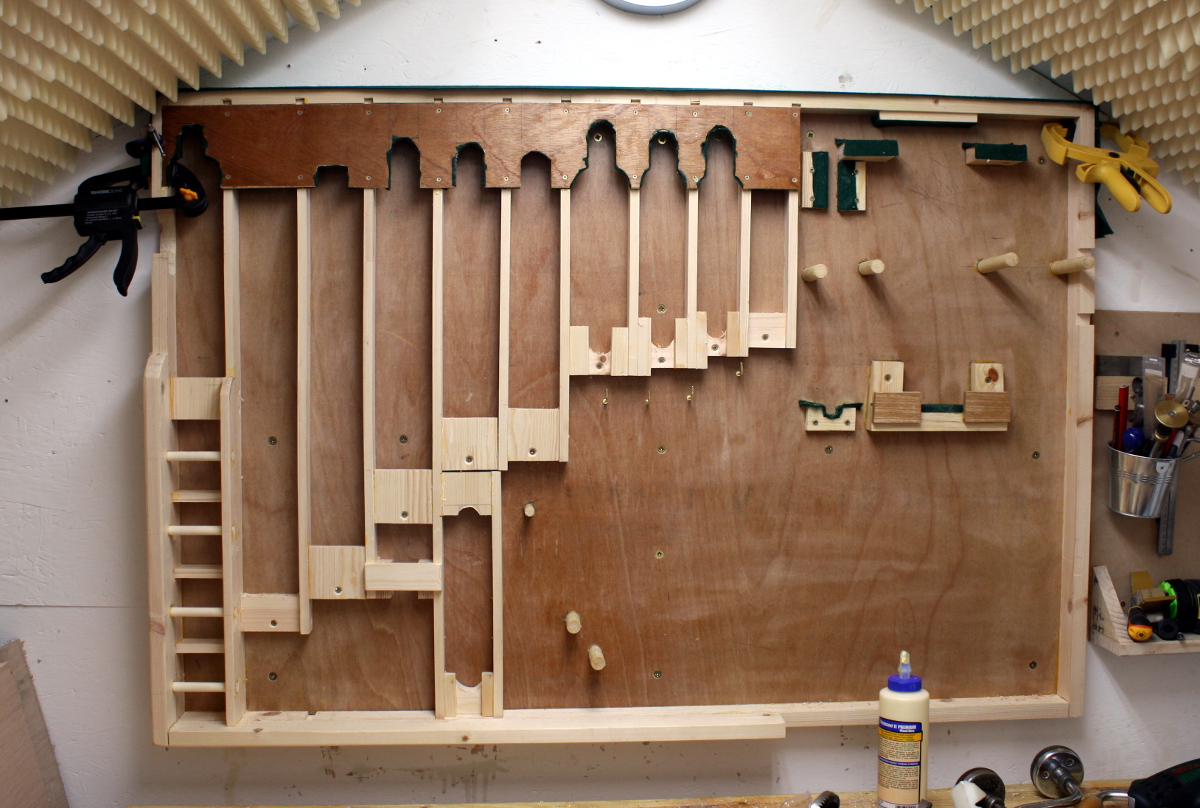
More glue and screw construction here, this isn’t going to win awards, it’s shed furniture. A bit of felt along the top as well, because I’ll attach a header in front of that to make a shelf:
And done. Had to fettle the ends of the shelf a bit with the spokeshave, but it fits, and more glue and screws later, here we are. Everything fits. I still have space for a #08, which I’ll get as soon as one in decent condition shows up on ebay for less than the price of its weight in platinum, and for a #02, which won’t ever show up for as low a price as its weight in platinum, but that’s collectors items for you. I’m holding its space for when I find one going for €5 in a car boot sale 😀
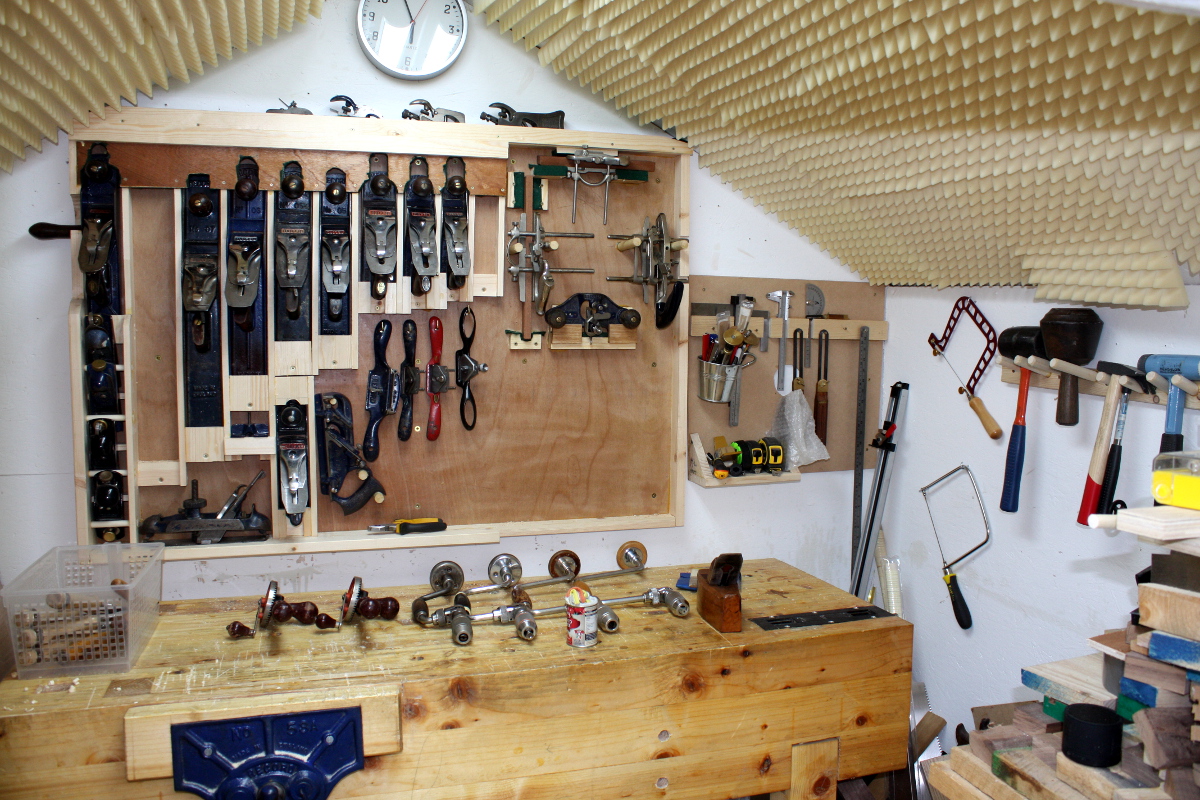
Things are starting to get a bit tidier at last. I still have to sort out the drills and the saws though. I’ll probably move the fret and coping saw from where they are now over to the left side, put the drills where they are now and put the saws beneath them and the hammers. Or I’ll put the drills on the front wall of the shed, behind me as I face the bench. Not sure yet. And of course, now that everything has a place, I’ll buy something else that’ll need more room than I have, like two more braces.
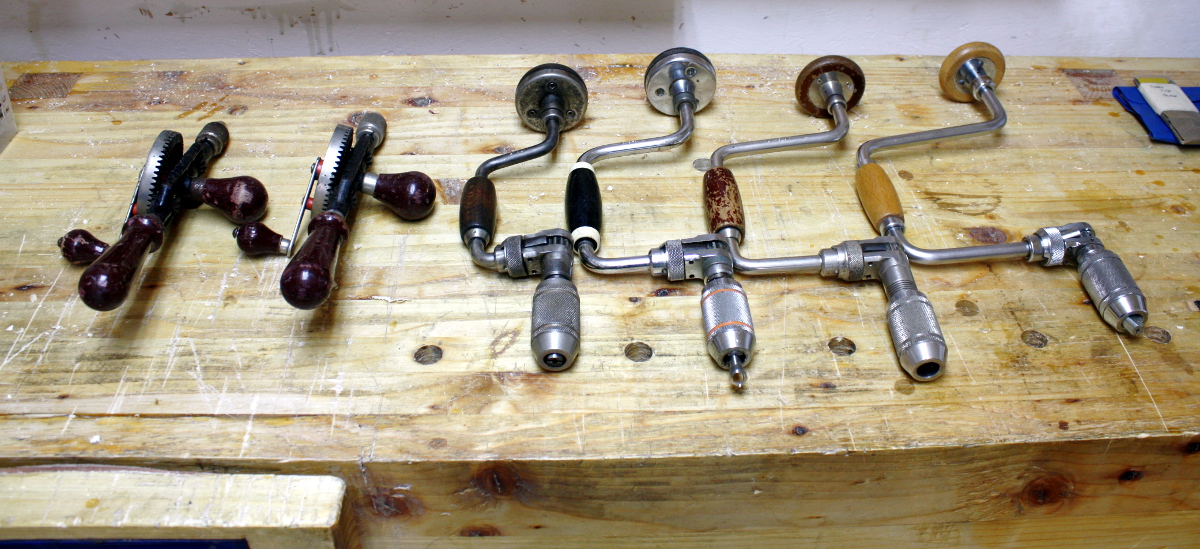
Not to mention the breast drill that’s still in the post…
But next job is definitely going to have to be that chisel rack. The chisels have gone back into a tool roll, and using those things is a pain in the fundament…
Tags: hand tools, plane rack, plane till, planes, shed, Woodworking, Workshop


[…] (don’t ask), and the workbench, there’s not a lot of room so I’ve had to do some organisation for tool storage inside or I wouldn’t be able to do […]