YAWN – Yet Another Workbench Newbie
So after enough time to use up all the swear words on a Workmate, I figured enough was enough and it was time to buy a workbench.
Then I saw the prices for hand tool friendly workbenches and vigorously revisited that notion, and came across Paul Sellers’ videos and the Stumpy Nubs 2×6 Roubo build and all the other builds out there, and like every newbie ever, decided to do something slightly more complicated than was strictly necessary (because hey, it’s fun).
This was the initial design:
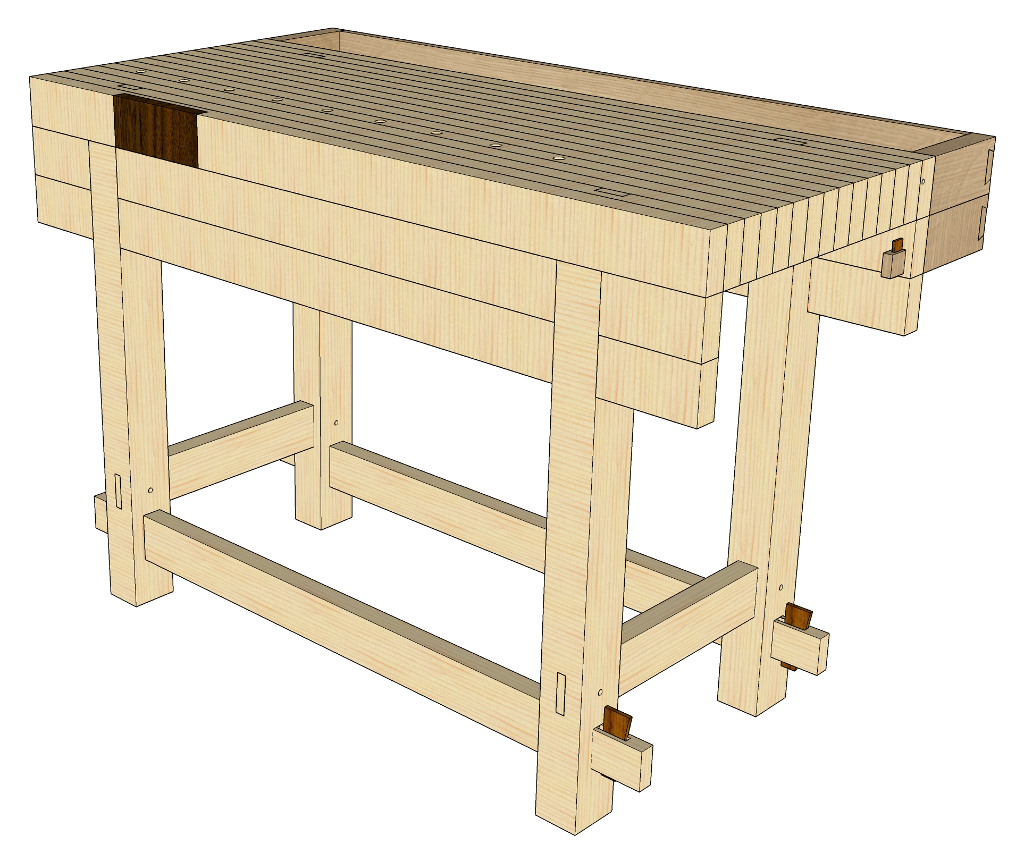
Originally, I wanted a bench that could – with a chunk of effort – be knocked down for moving because we’d have to move house at some point in the next few years and leaving it behind seemed silly. But the more I looked at the joinery and the compromises and the complexity, the less I liked that idea, so the final design loses the wedges for drawbores. The tool tray still attaches on to the back as a separate piece because that way I can have the main body of the bench built and use it to build the tool tray. The long complicated sliding dovetail arrangement for the legs got seriously revised (thanks to the folk on UK Workshop), the legs still slot into the apron but in a much simpler way – no dovetailing, a much shorter length of joint, and the joint itself is an unglued friction fit rather than being all glued up, so that any expansion in the aprons doesn’t try to push the top off the legs.
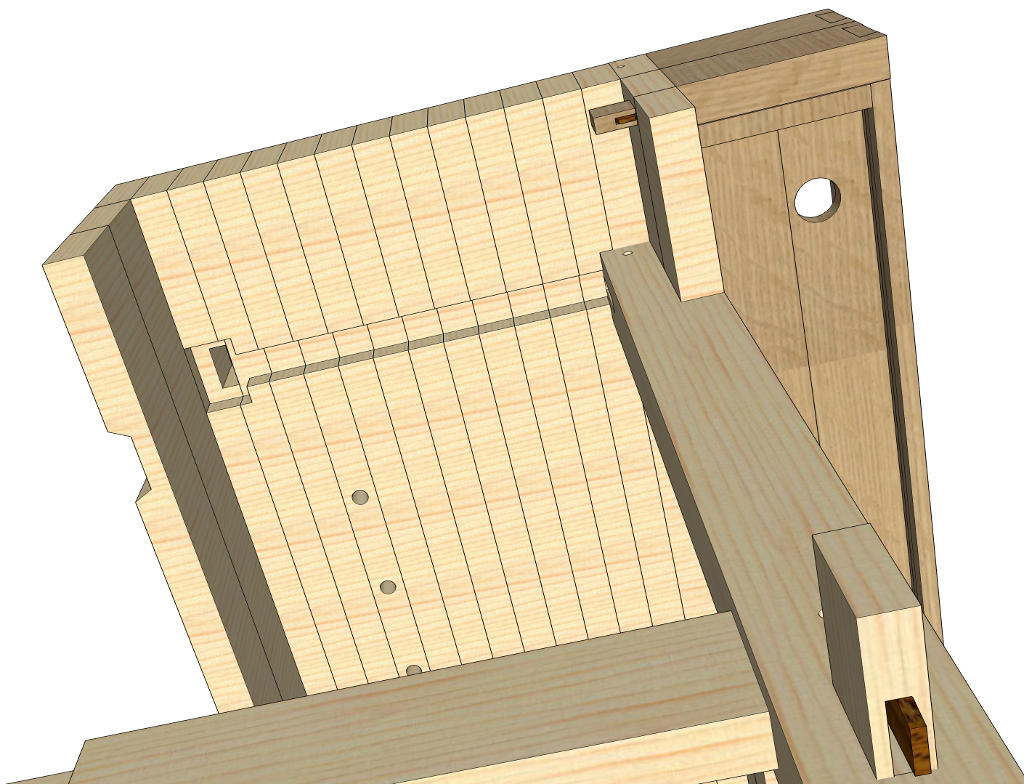
There’s a dado cut in the underside of the bench between legs that the top stretcher will fit into, but again it won’t be glued, it’ll be a friction fit; the idea is to take some of the stress off the leg’s tenons when planing on the bench and absorb that sideways force in the stretchers, but without actually having the top rest on top of the stretchers (my thinking being that the tenons will be drawbored so if the stretchers were just glued into that dado, they’d put stress on the drawbore pin when they expand).
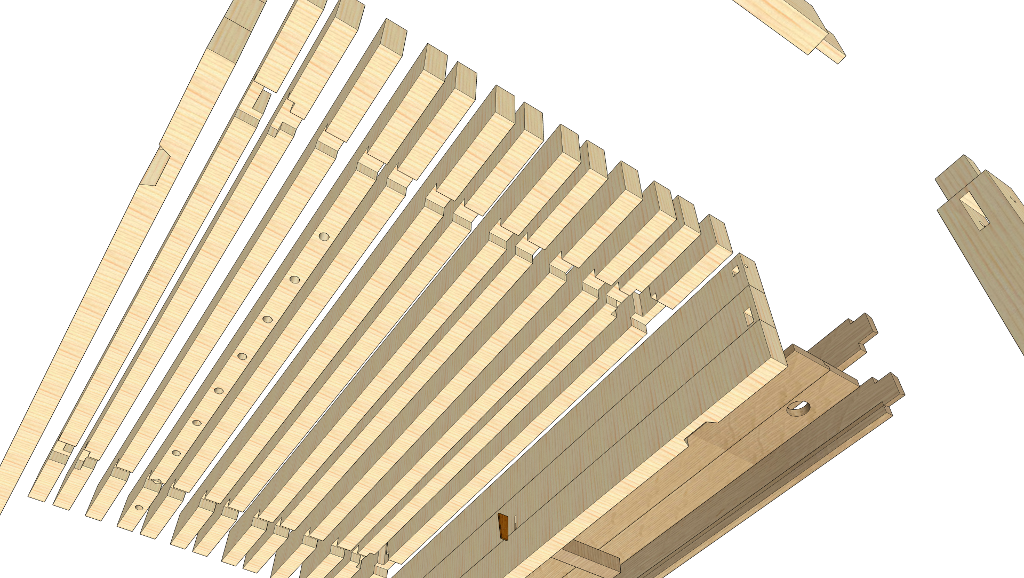
I’m hoping to use the method in the Stumpy Nubs build for the leg tenons and cut them with a saw before gluing the whole laminated top together. The core would get glued up as one chunk; then the leg tenons get cut in the outer boards and everything’s fitted and assembled, and then the aprons go on after that. At least, that’s the plan…
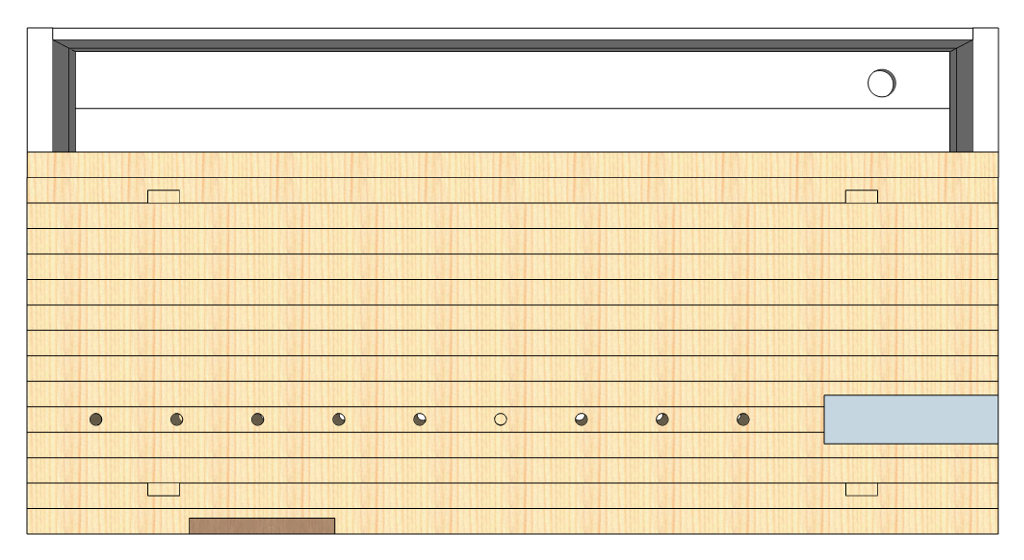
There’ll be a row of bench dog holes and a space for a veritas inset tail vice that can be added later on; I’ll have some more holes for holdfasts as well. There will be a planing stop just to the left of the left leg, and a record 53A is sitting here waiting to get attached to the right of that leg. I’m thinking of an inset hardwood face in the outside of the bench for the vice (the inner jaw will be set behind the apron and the outer jaw gets a hardwood face and suede). The tool tray boards are loose so you can remove them and use clamps on the far side of the bench as well. If it turns out to be useful I’ll put some dogs in the hardwood face of the record vice and corresponding dog holes in the benchtop in a line towards the back of the bench, but I’ll think about that after I get to actually work on the bench for a while.
The whole thing is rather small by most people’s standards I guess – about 60″ by about 32″ (24″ of bench plus 8″ of tool tray) by 40″ tall (the bench height I usually prefer to work at when standing) – but it has to fit into an 8’x6′ shed with enough room to reach underneath to the screw on the record 169 plane stop holder on one end and for the handle of the inset tail vice on the other. And I drew up the plans with the intent that they could and would be tweaked and fudged during the build as required because stuff never goes according to plan. It seemed reasonable enough (stop laughing) and I figured I could build it in a week using only hand tools (seriously, stop laughing, you need to breathe).
Then I started hitting the fun speed bumps. Timber yards in Ireland, for example, are… not hen’s teeth but aren’t far off for newbie amateurs. Okay, but Paul Sellers’ bench is made with B&Q timber and the Stumpy Nubs one is the same. Irish B&Q and Woodies prices are… somewhat higher than is pleasant though. Okay, onto the builders merchant website and ordered some rough white deal timber (not sure if that’s just Irish terminology – for those from abroad reading this, it’s the really god-awful pine-ish stuff they eventually turn into the planed god-awful stuff in B&Q or the other US big box stores). I figured I could save some money getting it rough-sawn and that the handplaning would knock all the it’s-so-special glow off the idea of hand tools and convince me to just use power tools for everything forever. Of course I don’t have a truck or a trailer, so I have to pay for delivery (you can’t fit 4.8m lengths of anything other than rope into a Citroen C4) and that’s all the cost savings out the window before I’ve even clicked on “Pay now”. But sod it, needs must. It would have nice if the delivery man hadn’t dumped it all into my neighbour’s parking spot mind you…
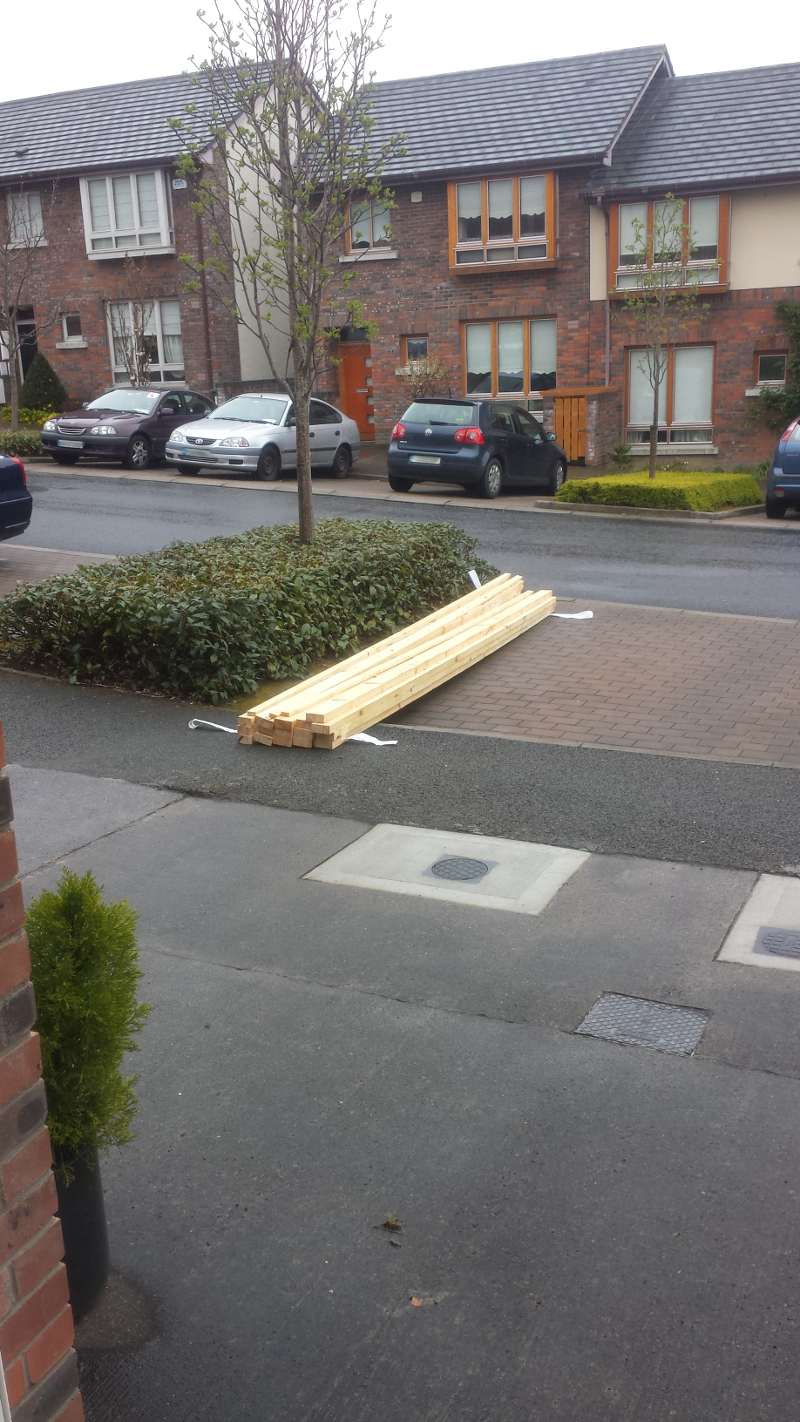
And okay, most of the work’s going to be done with hand tools, but for the initial rough cuts to get the timber down to a stage where I could store it in my shed while waiting for it to warp, cup and twist, I just ran it through the mitre saw.
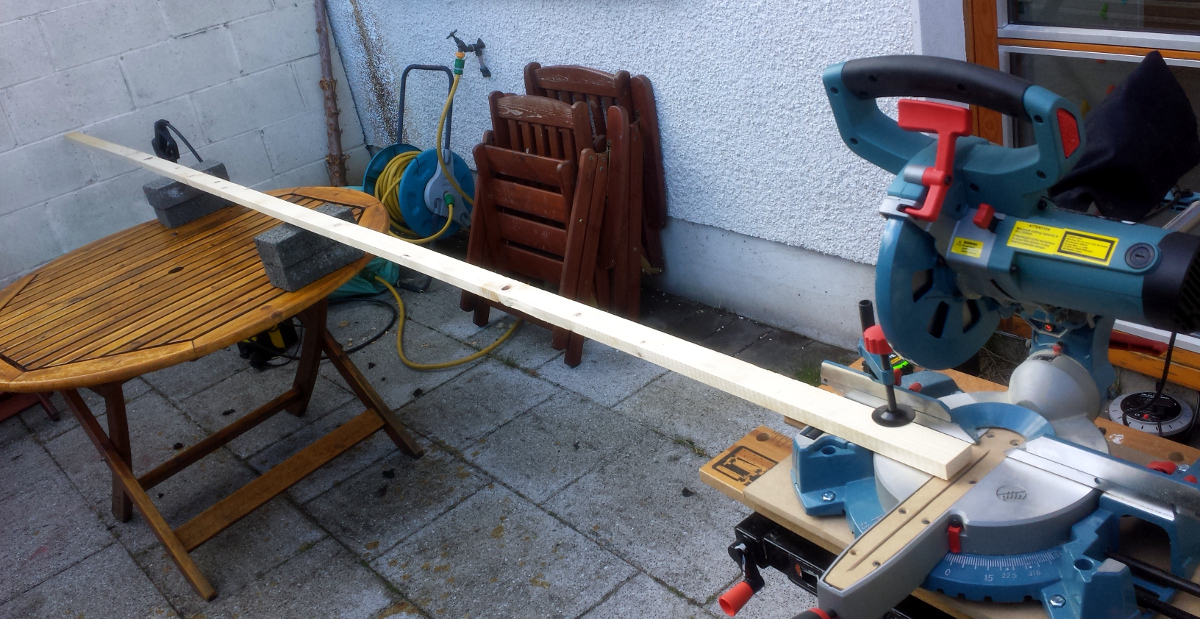
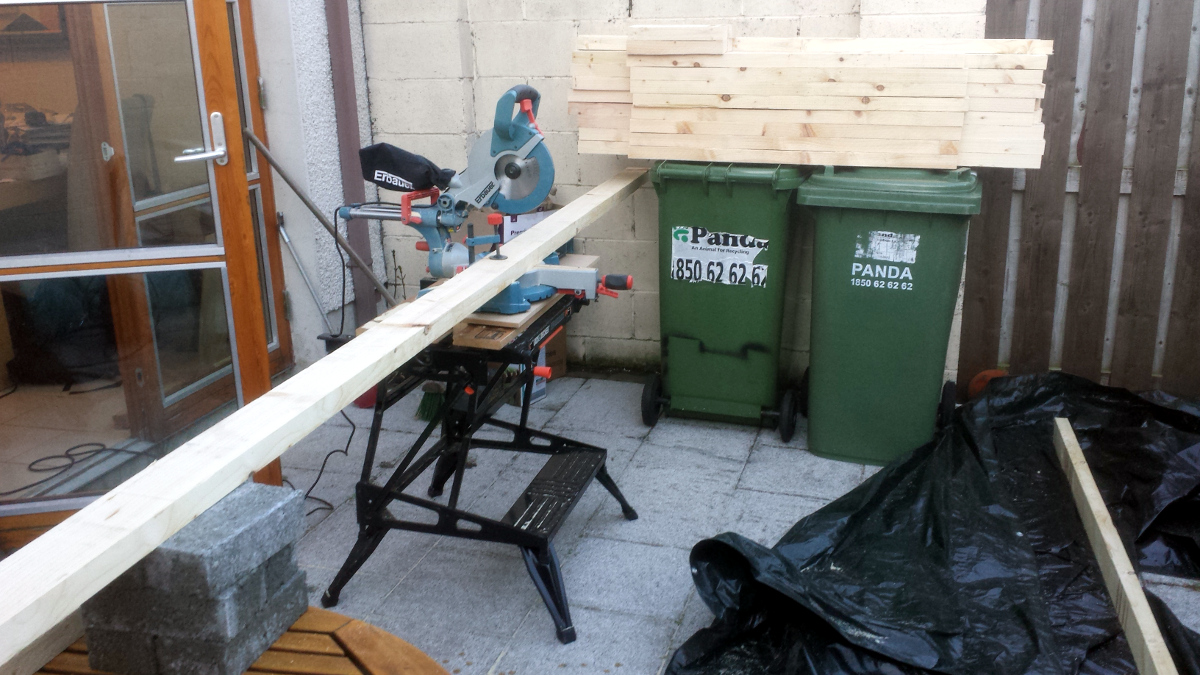
I need a larger back yard. But, it got it done. Stacked and stickered the wood in the shed to let it acclimatise for a week or three.
